
Learn How to Make Your First Quilt
The Complete Guide to Making Your first Quilt
Use the FREE Daydreamer Baby Quilt Pattern from Jittery Wings Quilt Co. to Make Your First Quilt from Start to Finish. This guide includes only what a new quilter needs to know to get started! There is so much to learn, but we can save all those distracting details for later! Instead, let’s get started on your first quilt now!
#makenewquilters
Just wanT ThE FREE PaTTErn?
Are you an experienced quilter who simply wants the free pattern? Cool! I am finalizing the section on binding for my new quilters, but you can download the pattern here and get started today!
#makenewquilters
Includes the Free Daydreamer Quilt Pattern
If you are like me, when you are ready to start a project, you want to get right to the meat of what must be done, and you don’t want to waste time learning more than you need to. Over time, it is great to pick up new knowledge, but to get started, just tell me exactly what I need to know to accomplish the goal.
This Complete Guide to Making Your First Quilt using the easy and free Daydream Baby Quilt Pattern is designed to give you exactly what you need, start to finish, to make your first quilt. It includes detailed written directions for those of you who are readers and technical illustrations for those who like to skim. That said, I do recommend reading the full pattern before you begin. Often it is helpful to know where you are going before you start. This will also help you understand why each step is critical.
HOw TO MAKE A QUILT
THE COMPLETE GUIDE TO MAKING YOUR FIrST QUILT
THE BASIC STEPS TO MAKING A QUILT
Here are the basic steps for making a quilt are the same. Below are the details for each step:
A quilt has three layers. A bottom layer of fabric, a middle layer of soft, fluffy batting, and a top layer of fabric that is usually pieced together. Thread is used to stitch all three layers together and then the edges are bound to finish off the quilt.
Gather your tools. You need snips, a seam ripper, a sewing machine, needles, a cutting mat, a rotary cutter, binder clips, and your materials.
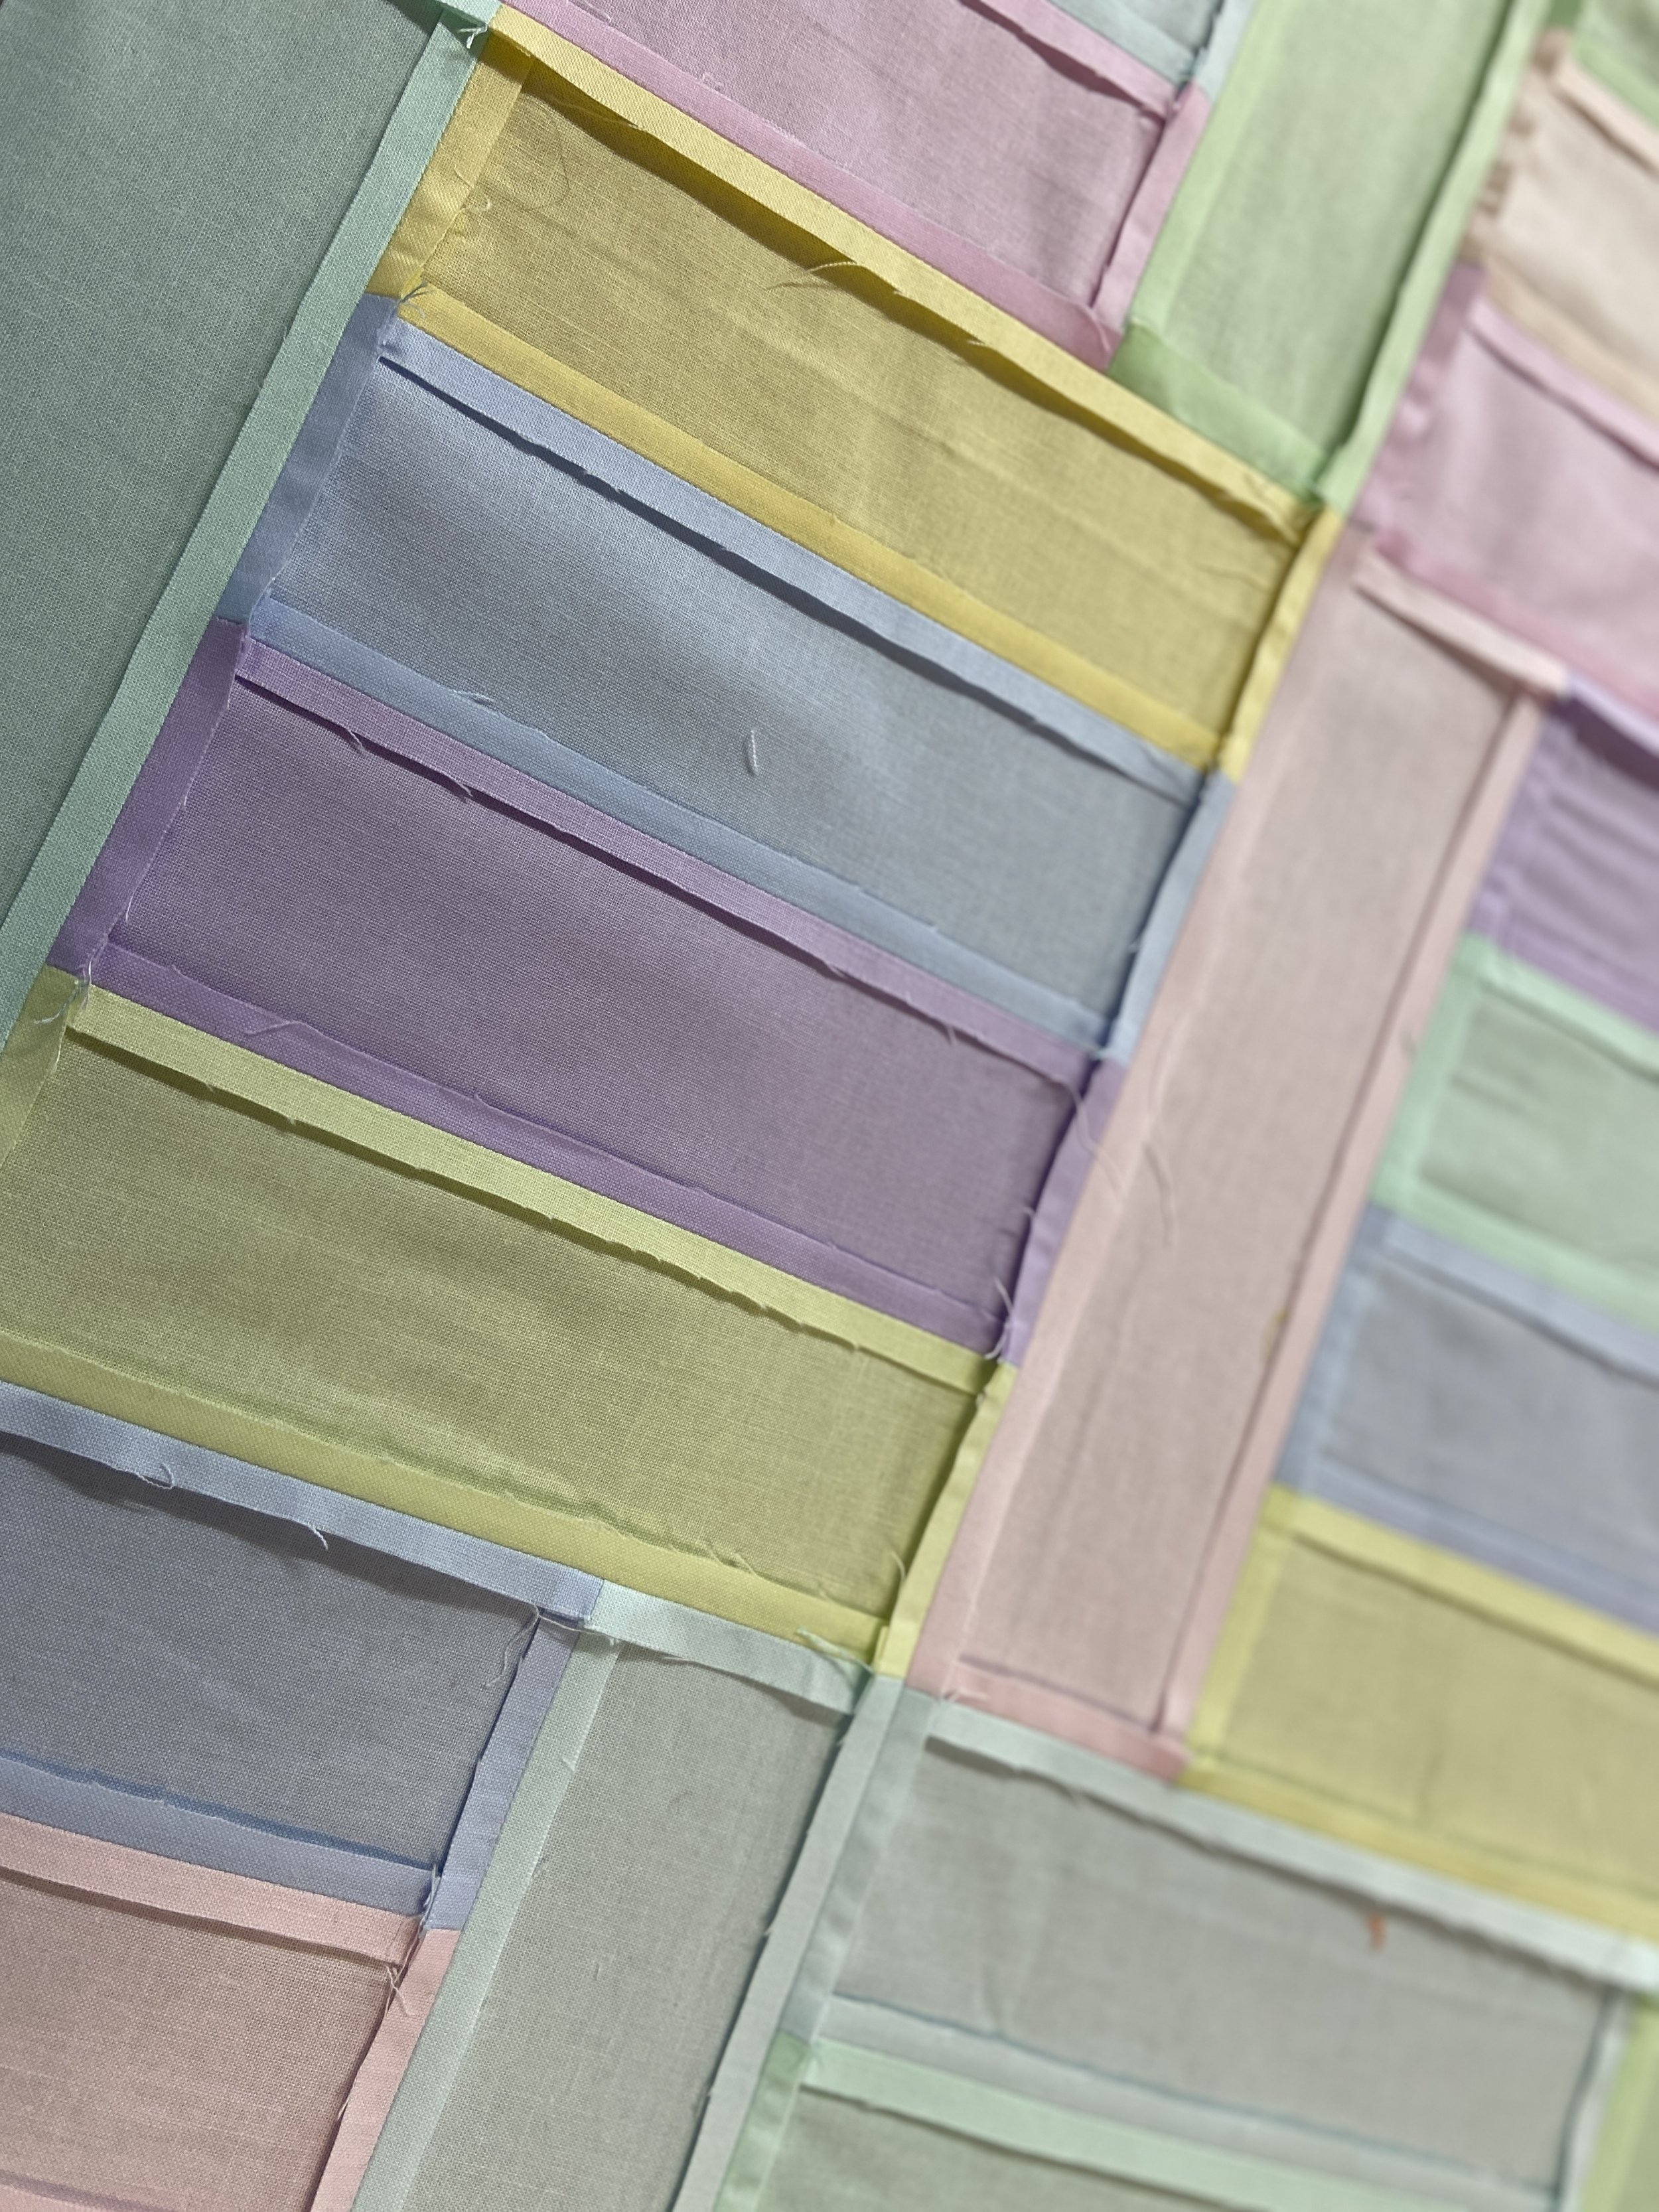
Choose a high-quality cotton fabric and cotton thread for your quilt.
Cut your fabric pieces for the top of the quilt and follow your pattern to sew it together.
Press your seams after you sew each of them.
When the top is together, clean up the threads on the back and press it flat.
Sew your backing together so it is large enough for the entire quilt. Press it flat.
Use your favorite method to baste your quilt. Regardless of the method, turn the backing right side down. Place your batting on top of it and smooth it out. Place your pieced top over the batting with the wrong side to the batting and smooth out. Either use spray baste or pins to secure the three layers together.
Quilt by hand or on the sewing machine to stitch all the layers together.
Bind the quilt around the edges to finish it off.
Label your quilt.
ThE AnAtomy of a Quilt
First friends, a quilt is not a blanket, and a blanket is not a quilt. By definition, a blanket has only one layer. It can me made from a number of different fabrics like fleece, flannel, wool, or cotton. A Blanket can be knitted, woven, or crocheted. Often a blanket has a hem around the edge where the fabric is turned in twice and stitched down.
A quilt has three layers. First, it has a top layer that is either a whole piece of fabric or multiple fabrics cut into smaller shapes and then stitched together. There is also a bottom layer of fabric. Usually, a whole piece of fabric or large pieces of the same fabric pieced together to make the back of the quilt large enough. The top pieced and the backing fabric “sandwich” a piece of batting. Batting can be made of cotton, polyester, wool, or even bamboo. Some quilt battings are blends of more than one type of fiber. After the batting is sandwiched between the top and the backing, the three layers are stitched (or quilted) together by running the thread back and forth between all three layers. Finally, a quilt has a binding, or a strip of fabric that is sewn over the raw edges to hide them and make the quilter stronger.

Pieced Quilt Top: The quilt top is what you are piecing when you follow a quilt pattern. It is referred to as the top because for something to be a quilt and not a blanket, it must have a fluffy inside and a back that sandwiches it all together.
Batting: Batting is the “fluff” that goes between the top of the quilt that you pieced and a large piece of fabric that is used as the backing.
Backing: The backing is the large single piece of fabric, or it may also be pierced, that sandwiches the batting to the wrong side of the quilt top.
Quilt Sandwich: The quilt sandwich refers to the quilt once you have put the top, batting, and backing together, but before it has been quilted. Once it is quilted, it is a quilt.
Binding: The binding is the strip of fabric that is attached to the raw edge of the sandwich/quilt after it has been quilted. It is folded over and stitched again to hide the raw edges and finish off the quilt.

THE ANATOMY OF A SEWING MACHINE
I have a comprehensive video that explains all the parts of the sewing machine and how to clean it. You can watch that video here. Our sewing machines become our best friend and greatest tool when learning to quilt. Here are some of the key terms you will learn from the video. These terms are the ones you will need to get you started making your first baby quilt.
Presser Foot or "Foot": The attachment on your machine that cradles the needle and helps pull your fabric under it. It holds the fabric flat as you "feed" it through the machine. It rises and falls with the movement of your fabric in time with the feed dogs.
Feed Dogs: They look like two or three short, thin metal bars, crosscut with zig-zag-looking teeth. They move front to back inside long, thin slots at the needle plate. They "feed" your fabric through the machine, in timed steps depending on your speed and stitch length.
Walking Foot: Used for quilt sandwiches or thicker fabrics, the walking foot moves in time with the feed dogs to the bottom of the fabric does get pulled ahead of the top fabric.
Machine Needle: The needle that goes into your machine that your thread will run through to make each stitch.
Bobbin: The spool that holds the bottom thread for your stitches.
Bobbin Case: Holds the Bobbin.
THE BASIC TOOLS NECESSARY TO MAKE A QUILT
Before you can make a quilt, you will need the right tools. There are varieties and brands and qualities out there. People will tell you a specific tool is necessary because they want you to purchase it. There are no shopping links to tools in this guide because my goal is for you to know exactly what you need – not to sell you something. There are of course tools that will make your life “easier,” but the tool may not be necessary for making the quilt. I will include my experience on which tools fall into either category.
My basic method for choosing tools is to find the one that works best for me regardless of the cost. There are tools I have spent more money on than others, and I would again because I believe it is the best suited for the job. If I recommend the cheapest option, it is only because it works. I have a full video on my tool must-haves vs. luxury tools. You can watch it here if you prefer videos.
Tool 1: A 45mm Rotary Cutter and New Blades
Tool 2: Binder Clips (A pack of 10 will do)
Tool 3: Flat Head Pins, long and skinny
Tool 4: Pincushion (I like magnetic, but really only need something to move your pins around the room and keep them contained)
Tool 5: Something to mark your fabric (A regular pen, chalk marker, or pencil)
Tool 6: Scissors or Snips
Tool 7: Seam Ripper
Tool 8: New needles 80/20 for your sewing machine
Tool 9: Iron and pressing board, ironing board, or pressing mat
Tool 10: A cutting mat that measures at least 24” on one side
Tool 11: A ruler that measures 6” x 24” (There are rulers of all sizes, but if you can only buy one – this is the size I would have. I also like OmniGrid and I like for my ruler and mat to be from the same brand.)
MATERIALS NECESSARY TO MAKE QUILT
All quilts require some basic materials like fabric for the top and for the backing. They require batting, binding fabric, and thread. You simply can’t make a quilt without these items. Each pattern will have a list of the amount of each fabric necessary to make the quilt. It will also include the size of batting needed.
CHOOSING HIGH QUAlITY qUIlT fABRIC
First, you only want to purchase quilting weight 100% cotton fabric. Do not purchase blends or polyester. Be sure to check your labels and only get 100% cotton fabric for a quilt.
Now, you can certainly get cheaper fabric at places like Wal-Mart or Hobby Lobby, but friends, I really don’t recommend it. While you may pay half the price per yard, your quilt will likely begin to fade or pill before a high-quality fabric will. The thread counts are lower, and the fabric begins to lose its shape faster. If you are going to take the time to make a lovely quilt – you want it to be lovely for a very long time. Consider visiting a local quilt shop to select fabric. You will be able to feel the difference. Look for brands like Moda, RJT, Cotton + Steel, Art Gallery, and Free Spirit. There are others, but these are my favorites because I love their designers. Happy fabric equals a happy quilt.
HOW TO PURCHASE FABRIC FOr A QUIlT
Purchasing fabric for the first time can be intimidating. The pattern may tell you that “yardage” is required, or it might tell you to purchase fat quarters, Jelly Rolls, or Layer Cakes. What? A Layer Cake? Yes. Let’s look at the diverse ways that fabric is sold these days.
Yardage: When a pattern tells you to purchase a specific among of yardage it will read like: Red – 2.5 yards or Blue - .25 yard (1/4 yard). Fabric yardage is usually sold in quarter yards. A yard is 36” and a quarter yard is 9”. Half a yard is 18” and ¾ yard is 27” long. Yardage comes on a “bolt.” It usually measures 42” to 44” wide. It is folded in half with the wrong sides together and rolled up on a bolt. By rolling the right sides together, it allows you to see the right side or the printed (pretty) side of the fabric. The two edges of the fabric, where they come together on the bolt are called the selvage. On the selvage, you will find the name of the company, designer, and fabric line or collection.

After you bring your fabric home, if you open it up, it will measure the 42” to 44” wide. This is referred to as the Width of Fabric or WOF may be printed in a pattern.
Selvage: The natural edge of fabric which usually has little dots on one side where it is held onto the printing machine and a label on the other with manufacturer and designer names.
Width of Fabric (WOF): The WOF usually measures 42”/44” from selvage to selvage depending on the manufacturer.

Precuts: Precuts are a way to purchase fabric that is, as the name suggests, pre-cut to a specific size. Most precuts include one or more of each of the fabrics in a collection by a single designer. Lots of patterns are written for precuts and this will be indicated on the pattern. A number of Jittery Wings patterns are written to be Fat Quarter friendly as an example. The different types of precuts include:
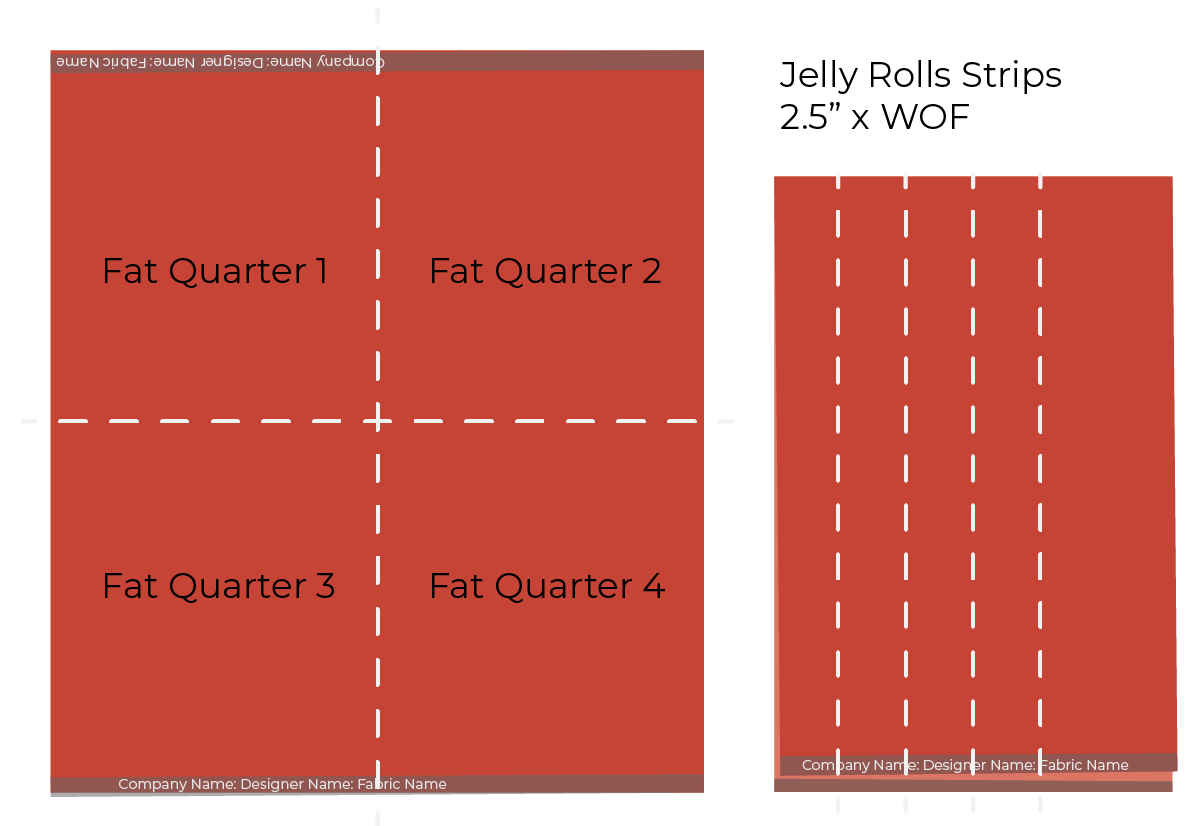
Fat Quarters (FQ): A quarter of a yard of fabric which usually measures 18” to 22” depending on the manufacturer of the fabric. Fat quarters may be sold individually or as a bundle from a full collection of fabric by a single designer. They may also be sold as curated bundles from a Quilt Shop online or in a physical location.
Fat 8ths: Like a Fat Quarter, the Fat 8th is when a yard of fabric is cut into 8ths. These are sold individually and in bundles. A Fat 8th measures 9” x 21” usually.
Half Yard Bundle: You can also buy pre-cut bundles of half yards of a full line of fabric. I will often do this for fabric lines I really like and worry the fabric won’t be around forever.
Jelly Rolls: A Jelly Roll is an actual roll of 2.5” x WOF strips from a single line of fabric by a designer. The edges are pinked to help prevent fraying.
Honey Buns: Like a Jelly Roll, except it measures 1.5” x WOF.
Jolly Bar: These precuts measure 5” x 10” and usually include a full line or most of a line by a single designer. The edges are pinked to help prevent fraying.
Mini Charm Pack: This includes a tiny 2.5” x 2.5” square for each fabric in a line. The edges are pinked to help prevent fraying.
Charm Pack: This includes a 5” x 5” square for each fabric in a line. The edges are pinked to help prevent fraying.
Layer Cake: This includes a 10” x 10” square for each fabric in a line. The edges are pinked to help prevent fraying.
Choosing a High-Quality Cotton Thread
I learned to sew making garments. Often with garments, when choosing thread, you want a polyester thread. I learned the hard way that when you make a quilt with polyester thread the shrinkage is so different that the thread looks wonky after washing.
For 100% cotton fabric in quilting, I recommend you use 100% cotton thread. When choosing thread for quilting, you also need to consider the weight and the ply. When looking at thread numbers the top number is usually associated with the weight and the bottom number with the ply. The ply shows how many threads are wound together to make a single strand of thread. So, if the thread reads 50/2 like my favorite quilting thread does that means it is a weight of 50 and a ply of 2.
How Thread Weight is Calculated
The way in which thread companies determine thread weight is inconsistent so it can be very confusing. To help you on your quilting journey, and to keep it simple, I will include my favorite company and how they determine their thread weight.
Aurifil Thread: For Aurifil, a hank is 840 yards or 770 meters. Their weight is determined by the number of hanks necessary to weigh 1 pound. That means that for their 50wt/2ply, there are 50 hanks in a pound of thread. This means that the lower the number, the thicker the thread because it takes fewer hanks to make up that single pound.
Choosing the Best Batting for Your Quilt
Like threads and fabrics, there are a lot of batting options on the market. Batting is made of various types of fibers like cotton, polyester, wool, and bamboo. You can also get blends. Like all things, there are good brands of batting and not-so-good ones. I am currently really loving Quilter’s Dream and Hobbs Battings.
Batting can is sold in individual pre-cut sizes like Crib, Twin, Throw, Queen, and King. It is also sold on long 10, 15, or even 30-yard rolls. Your quilt may be a size other than standard, so be sure to consider that when purchasing. You want your batting to be 3-5” larger on every side if you are having your quilt finished by a longarmer. If you are quilting it yourself, I prefer the batting to be 2-4” longer on all sides.
Before you select your first batting, here are the basics about batting you need to know.
Batting: Batting is the “fluff” that goes between the top of the quilt that you pieced and a large piece of fabric that is used as the backing.
Loft: Loft is how “much fluff” there is to the batting. A low loft means that the batting is flatter and less fluffy. A high loft means that the quilt will be very puffy between the stitches. The batting package will recommend the maximum width apart your stitching should be based on the level of the loft.
Scrim: Some cotton battings have scrim added to them. Scrim is a very thin, mesh-type stabilizer that is needle-punched into the batting. This addition gives batting added strength and stability. This can be helpful in preventing the batting from becoming distorted or stretching as you quilt it on the machine. If you plan to quilt a design with large spaces between the design, choosing batting with scrim can prove to be helpful.
Wool: Wool batting is excellent for warmer climate areas. If you are gifting a quilt to someone in Florida for example, wool is a great choice because it breathes and allows greater airflow. Wool is also a good choice for those who will be folding up the quilt for any reason and they don’t want it to have creases from the fold. Often show quilts will use wool batting. Wool is often the place where a high loft batting is best found. Wool may or may not have a degree of shrinking. The package will tell you.
Cotton: Cotton batting or an 80/20 cotton/poly blend often has a low loft by nature. This is where you will likely find scrim. This is good for baby blankets or a basic quilt for cooler temperatures.
Shrinkage: Batting often has a degree of shrinkage and will show on the package if that can be expected when washed. If you prewash your fabrics, note that you have likely preshrunk them, and the degree of batting shrinkage can make the quilt look more fluffy or bulky after washing. If you don’t prewash your fabrics, the level of fluffy or bulky will be minimized because the batting and fabric will more likely shrink together. (This is the way I prefer it.)
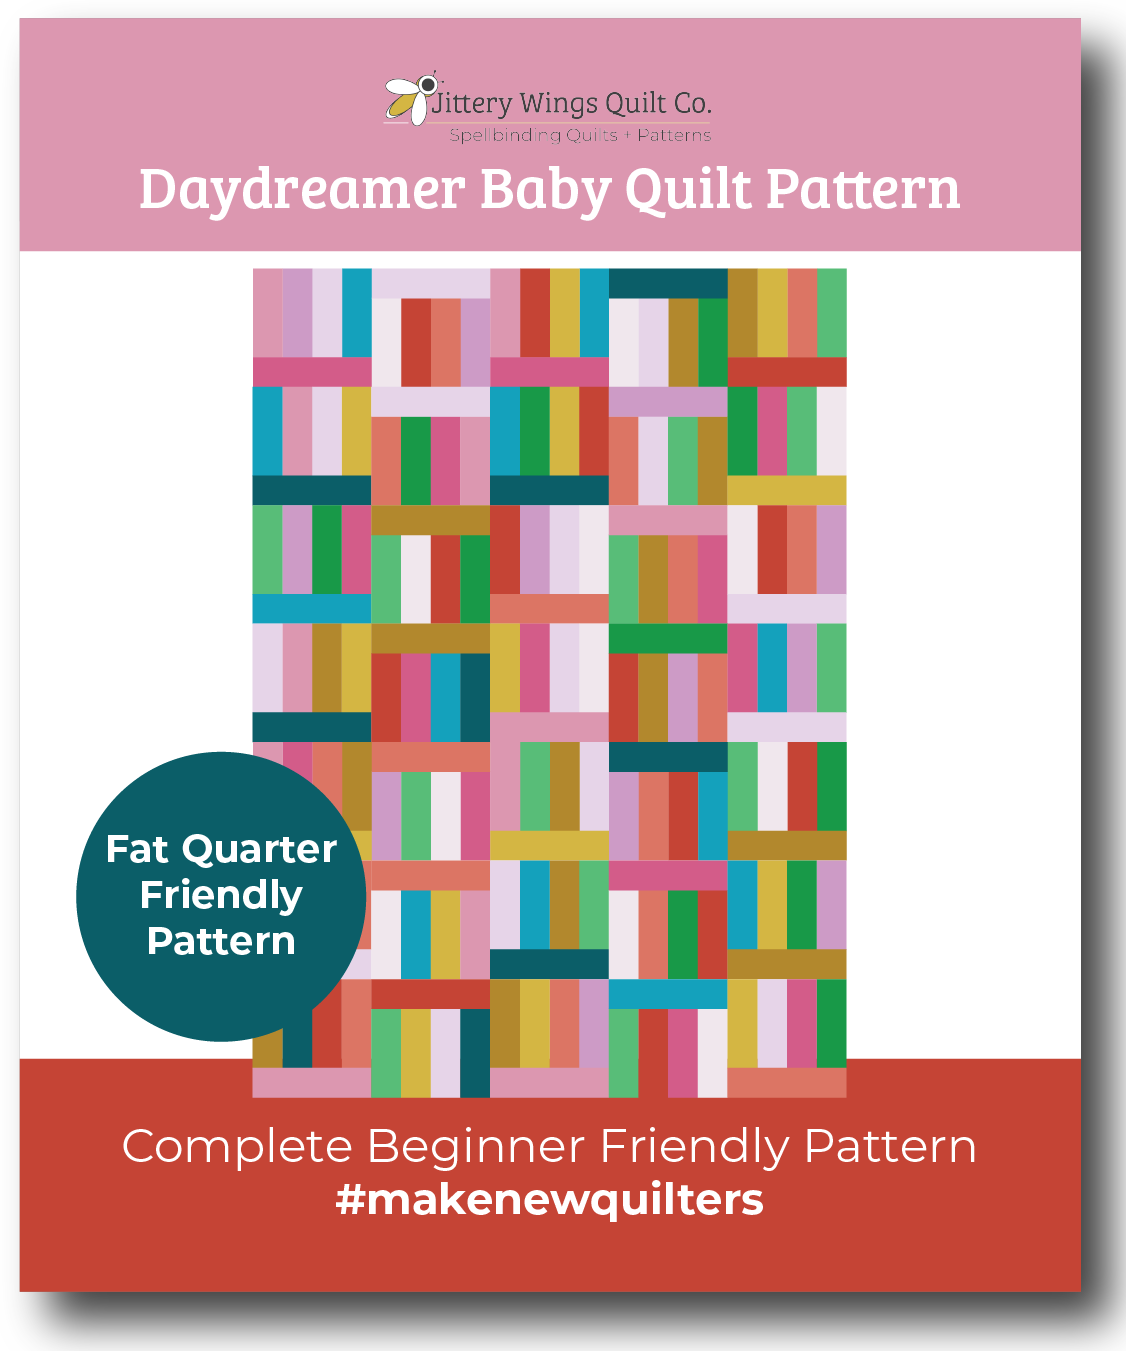
About the Daydreamer Baby Quilt Pattern
The Daydreamer Baby Quilt Pattern was specifically designed by me, Mitzie Schafer of Jittery Wings Quilt Co. to live into my goal of making new quilters. The pattern is free and includes everything a new quilter needs to know to make a lovely and modern baby quilt from start to finish. On any regular quilt pattern, the following information is usually included on the outside cover, so you know what you need while you are standing in a quilt shop. It can appear in abbreviated ways for more complex patterns as they assume the quilter already knows the basics.
Finished Quilt Size: 40” x 56”
Block Size before it is Sewn into the Quilt: 8.5” x 8.5”
Finished (Sew In) Block Size: 8” x 8”
Rows and Columns: 5” x 7”
Total Number of Blocks: 35
Total 2.5” x 6.5” Pieces Needed: 140
Total 2.5” x 8.5” Pieces Needed: 35
Skill Level: New Quilter, Beginner
Materials List for the Free Daydreamer Baby Quilt Pattern
This is the list of needs for making your Daydreamer Baby Quilt:
Fat Quarters: 10 Different Fabrics
Backing Fabric: 1 ¾ yards of a single fabric
Binding Fabric: ½ yard
Batting: 1 Crib size batting that measures at least 45” x 60”
Thread: A neutral color that matches all your fabrics for piecing. Like a grey. You will also need a color for quilting. One large size spool of Aurifil (as an example) will be plenty to do both if you use the same color.
Sewing Needles: 80/20 Universal
Basting: Either purchase large size “bent” quilting safety pins or a can of Odif 505 Basting Spray or something similar.
For my sample version, I have chosen to use a Free Spirit Fat Quarter Bundle of Unicorn Poop Solids from Tula Pink the Designer. There are 11 in the bundle, though I will only need 10 of them.
Preparing Your Fabrics
Should You Prewash Your Fabrics?
There is a bit of debate in the quilting world about whether you should prewash your fabrics. Like with all hobbies, there are purists who can suck the fun out of it and become “police.” Here’s what you really need to know to make the best decision for you.
Prewashing
My mom prewashes everything. Why? Because she is allergic to whatever they put on fabrics from the factory.
The BENEFITS of prewashing your fabrics include:
Preshrinking them
Getting the “color bleeds” out of the way before you have light and dark fabrics together in the washing machine as a quilt.
The DOWNSIDES of prewashing your fabrics include:
Fabric edges fray a good deal in the washing machine and dryer. Some people clip the edges and believe this helps. No matter how much I do this, I still lose around a ¼” from all sides. I also have a lot of strings to trim and clean off. This bothers my ADHD a lot!
All your fabrics have to be pressed really really well after coming out of the dryer.
It takes longer to get to your fabrics. The washing, drying, and the pressing process adds hours to your total making time.
You can’t really prewash precuts, so if you mix precuts and prewashed yardage in the same quilt, they will shrink differently during the quilt’s first wash.
Not Prewashing
I don’t prewash. Why? Because it annoys me. I have precuts and yardage, and I don’t want to keep up with what has been prewashed and what has not. I also like that my fabric and batting shrink together during the first wash. With the concern about colors bleeding, I use a LOT of color catchers and I have never had a single problem of bleeding with my high-quality fabrics.
Preparing Your Fabrics for Your First Quilt
Whether you prewash or not, you want to make sure that your fabrics are pressed well.
If you have precuts – don’t handle them more than you need to. The more you move fabric around and touch it, the more it will distort the weave and cause the fabric to lose its shape.
If you have yardage – I like to keep my yardage folded like it was on the bolt. Opening it up makes it difficult to cut strips. Keeping it folded and matching up the selvages makes it much easier to manage.
Should You Starch Your Fabrics?
I do starch my fabrics. I use Best Press, but any starch will work. I find it helps the fabric hold its shape especially before cutting and before basting the quilt. What about just using steam you ask? Well, like prewashing, this is based on your preference. There are long-time professional quilters who use steam. There is also information out there about the steam and heat shrinking the fabric a little each time which can cause your fabric pieces to become the incorrect size. I haven’t tried it, so I can say either way, but it seems logical.
When you are pressing fabric in quilting, it isn’t the same as ironing your clothes. Ironing involves placing the iron on the fabric and literally pressing down while sliding the iron around. This WILL distort the fabric. It will loosen the weave. Do not “iron.”
Instead, press. Place the iron on the fabric, hold it for a short bit and then lift and move.

Fat Quarter unfolded before starching and pressing. You can see how the creases are prominent in the fabric.

Fat quarter after pressing. You can see that some of the creases are still faint. I don’t worry too much about this. I press one side and turn the fat quarter over to press the other side.
Cutting Your Fabrics for Your First Quilt
Cutting your fabrics correctly is a critical step in a lovely quilt. Incorrect cuts can not only waste fabric but cause frustration when you begin trying to match up your seams. The Golden Rule for Quilting is “measure twice and cut once.”
Learn to Use Your Rotary Cutter
I have a full video tutorial on how to use a rotary cutter. You can watch that here. When using a rotary cutter, there are things you must keep in mind. It is simple in theory, but I do encourage you to practice and improve your skills until they become natural to you. It is a superior method to using scissors. It is faster, more accurate, and your cuts will be much cleaner.
1. Keep your rotary cutter closed after each use so you don't accidentally hurt yourself or a little person/fur baby.
2. Always cut away from you or across the top. Never cut back toward you or under your arm.
3. Make a first cut to give yourself a clean line to begin all other cuts from. Line up the edge of your ruler with a line on the mat.
4. Keep three points of pressure with your fingers. If at least one finger can be on the edge of the ruler and equally on the fabric/mat, that is the strongest position.

5. Keep your rotary cutter straight up and down so the blade is a 90-degree angle to the mat and rides along the edge of the ruler.
6. Walk your hand up the ruler maintaining pressure to keep it next to the rotary cutter. As you run the cutter up the edge of the ruler, be mindful of keeping the cutter next to/touching the ruler. There is a tendency to veer away from the ruler, which will make your cuts wonky.
7. If your cutter is skipping places where it cuts there may be dirt on your mat or fabric or you need a new, sharper blade.
8. After your first edge is clean, you can turn your fabric to line that up with a new line on your mat to position yourself for your next cut.
9. MEASURE TWICE - CUT ONCE! Count in both directions because you can see things differently.
10. Keep turning the ruler and/or the fabric to line up the ruler on each new cut until your piece is the size you need.
Instructions for Cutting Your Fabric for the Daydreamer
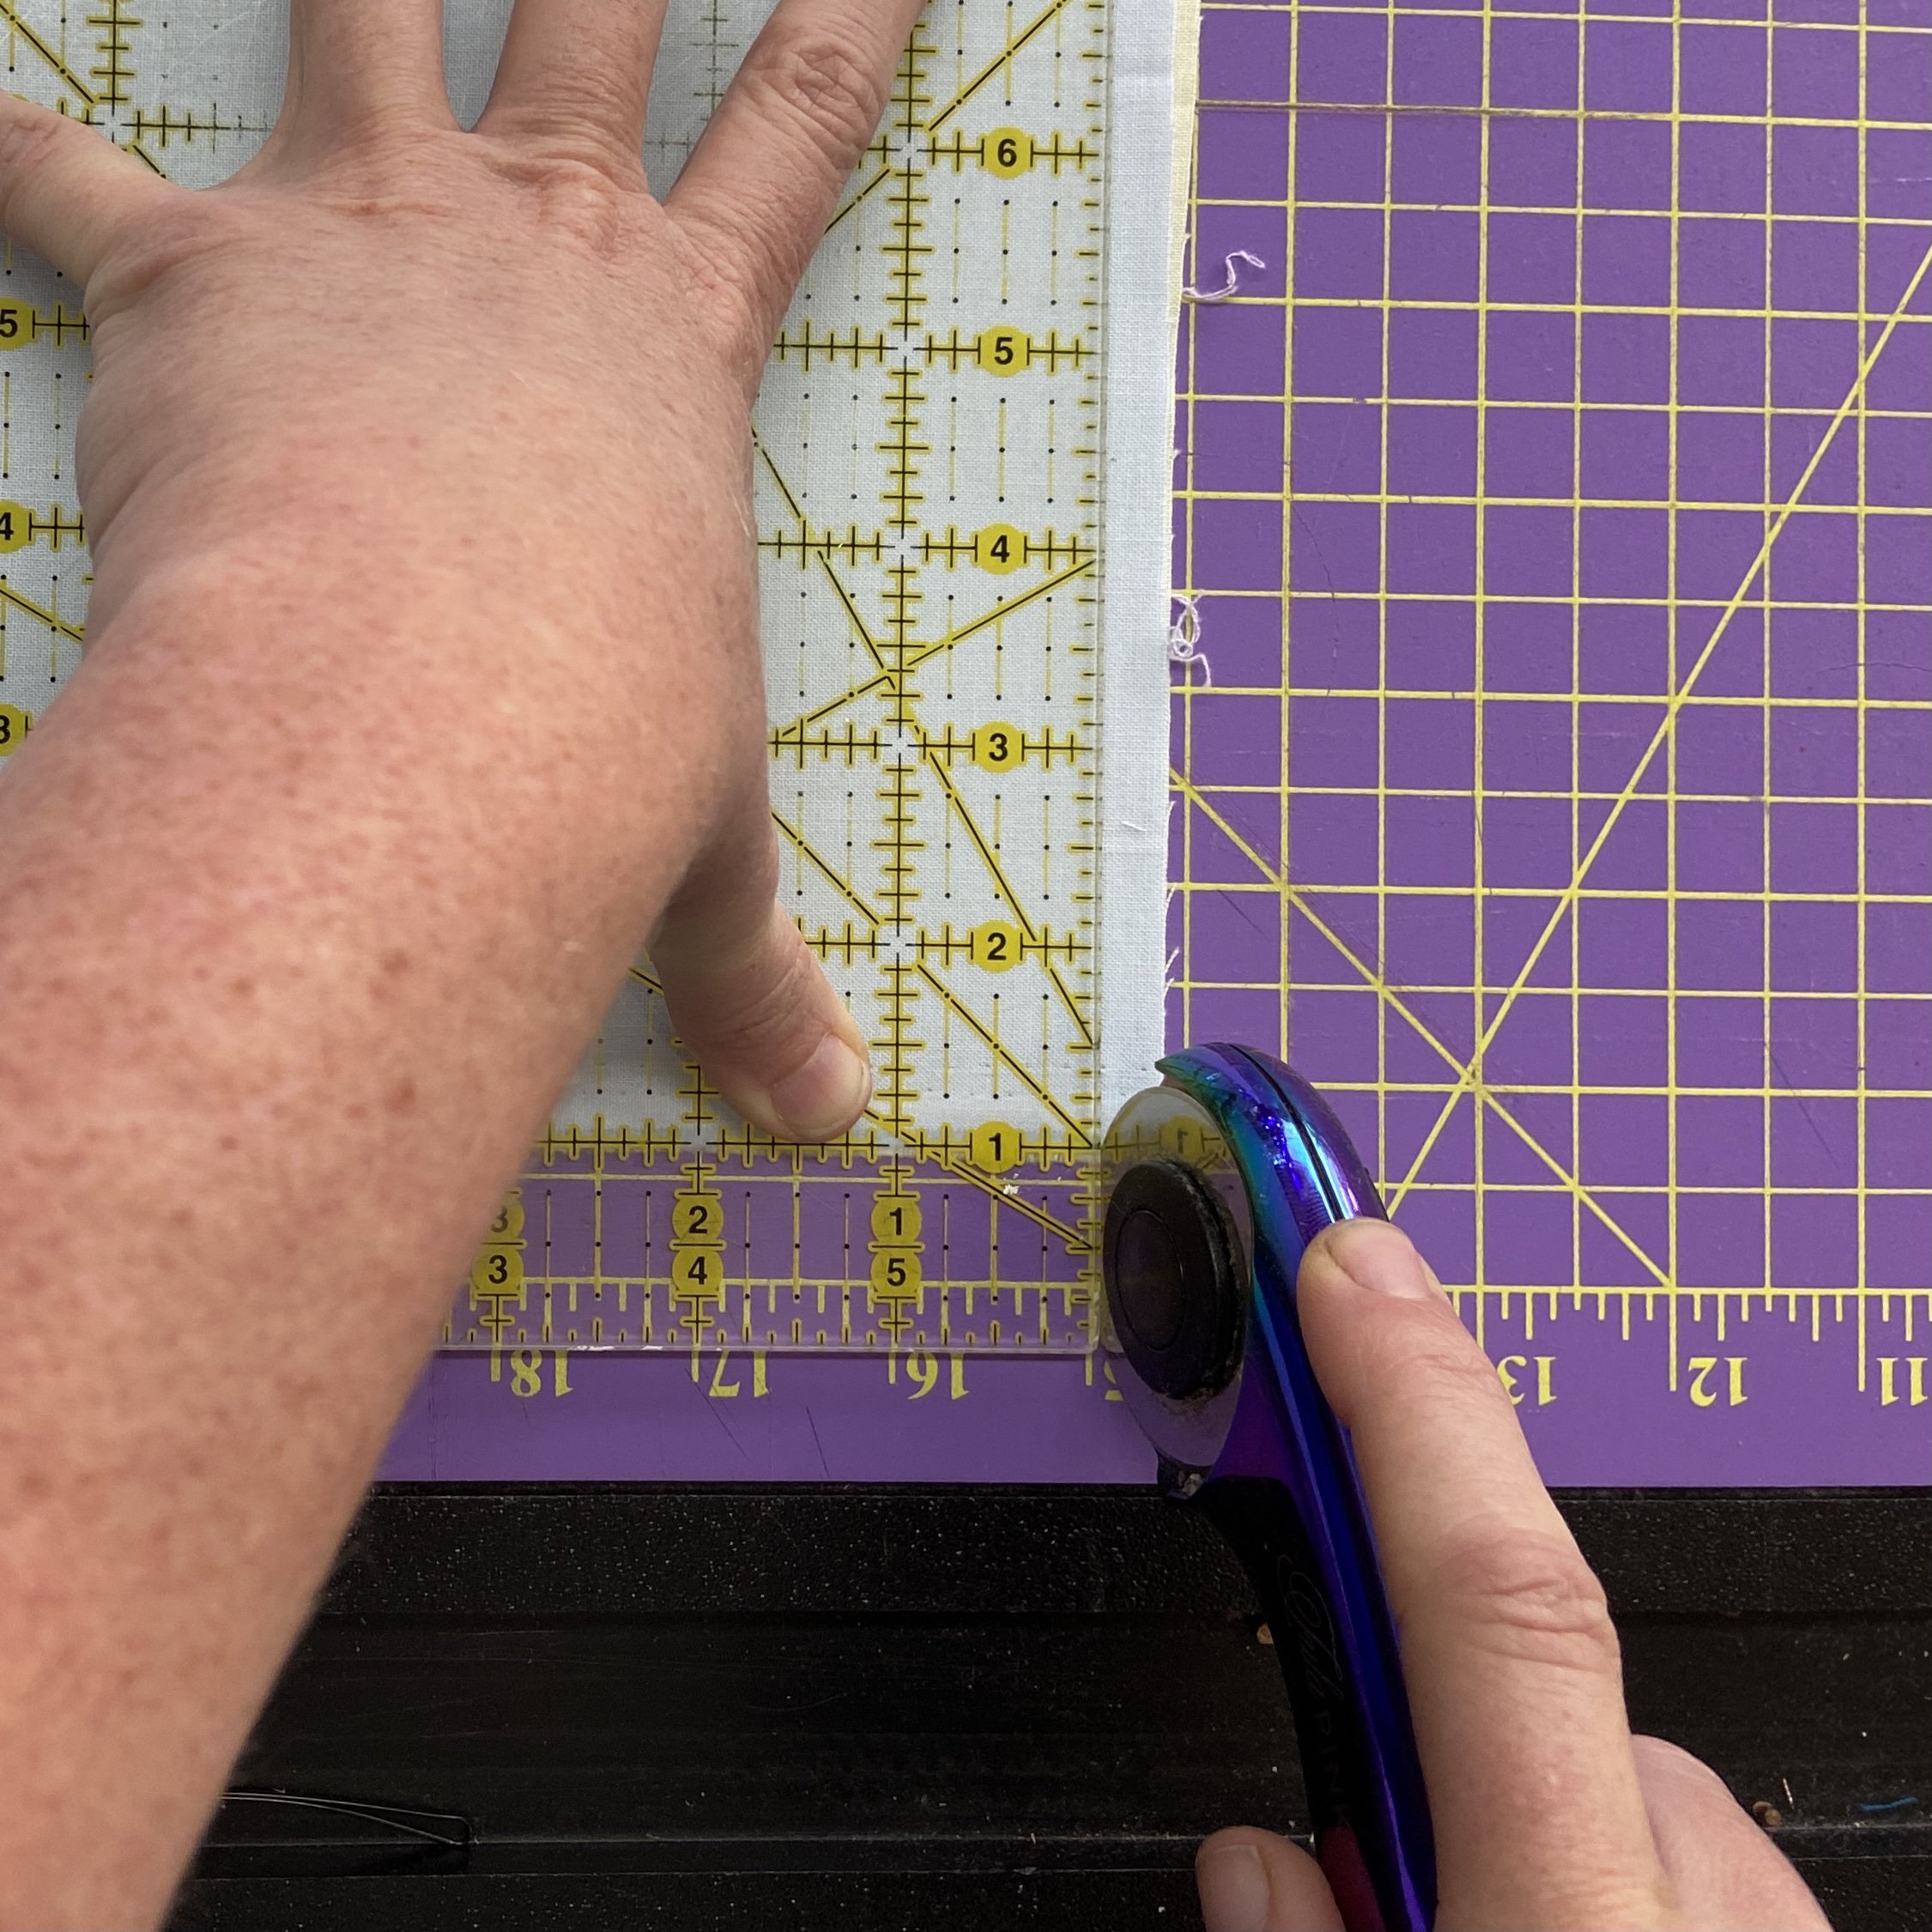
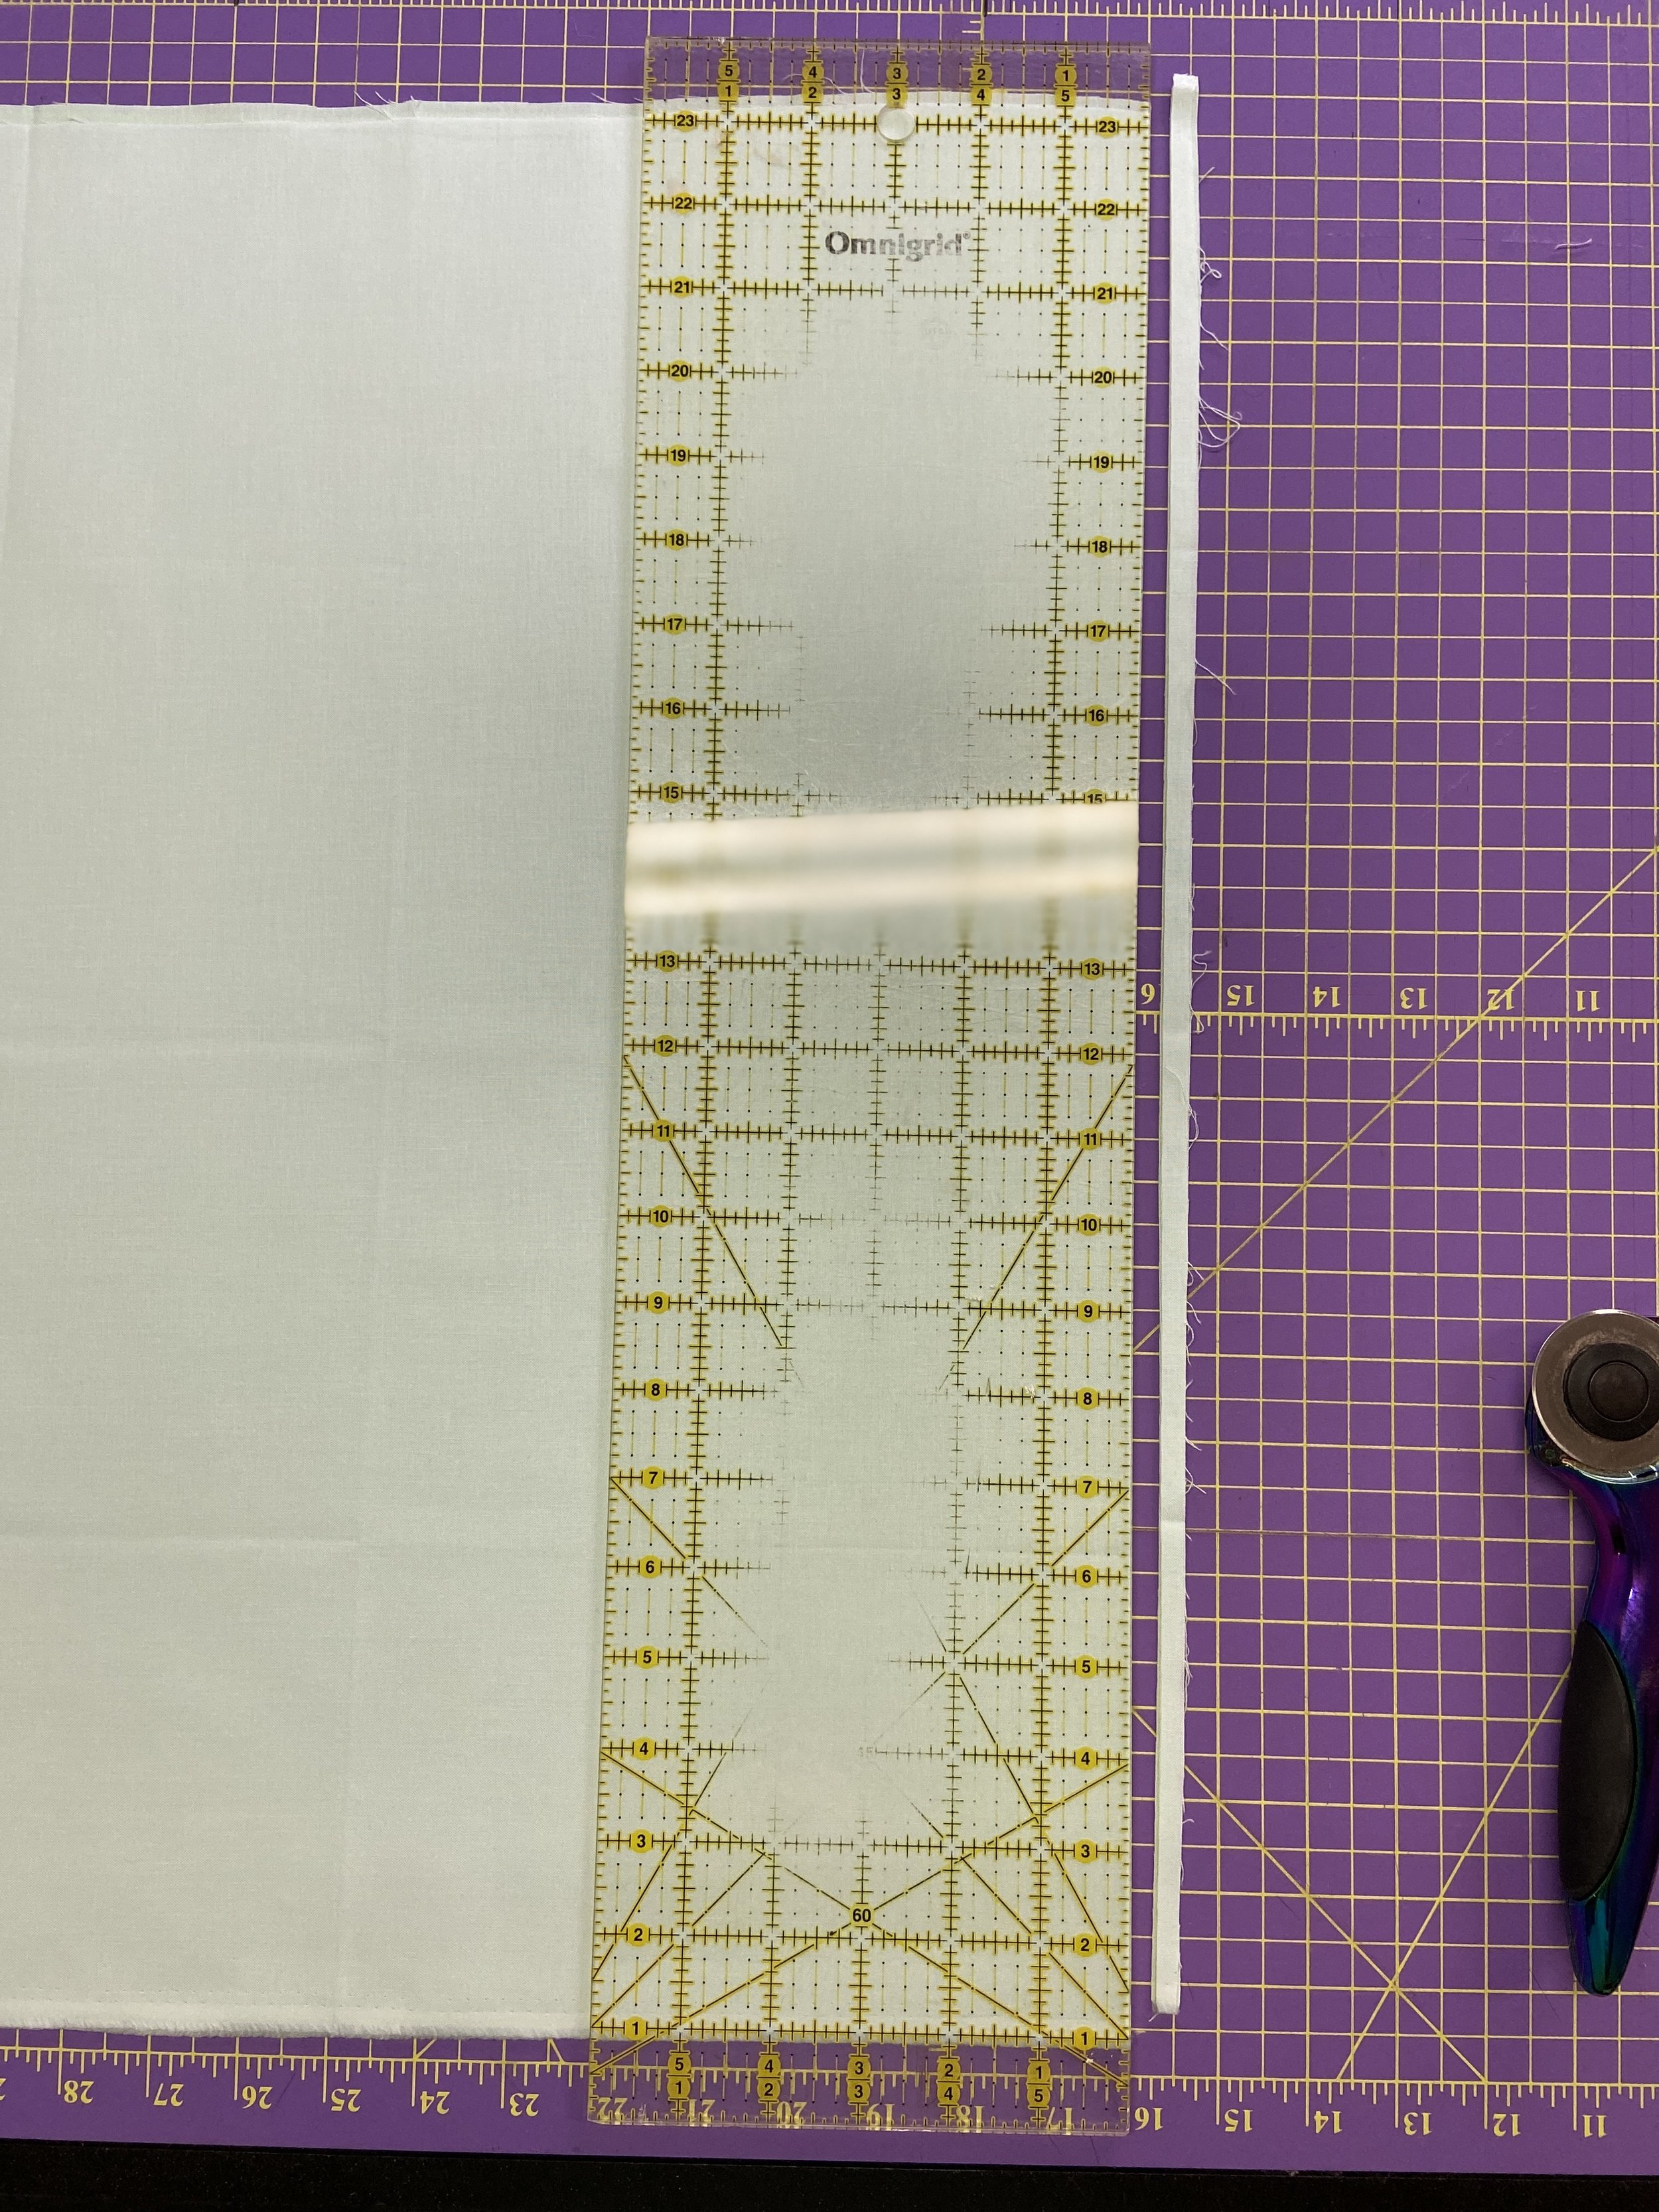
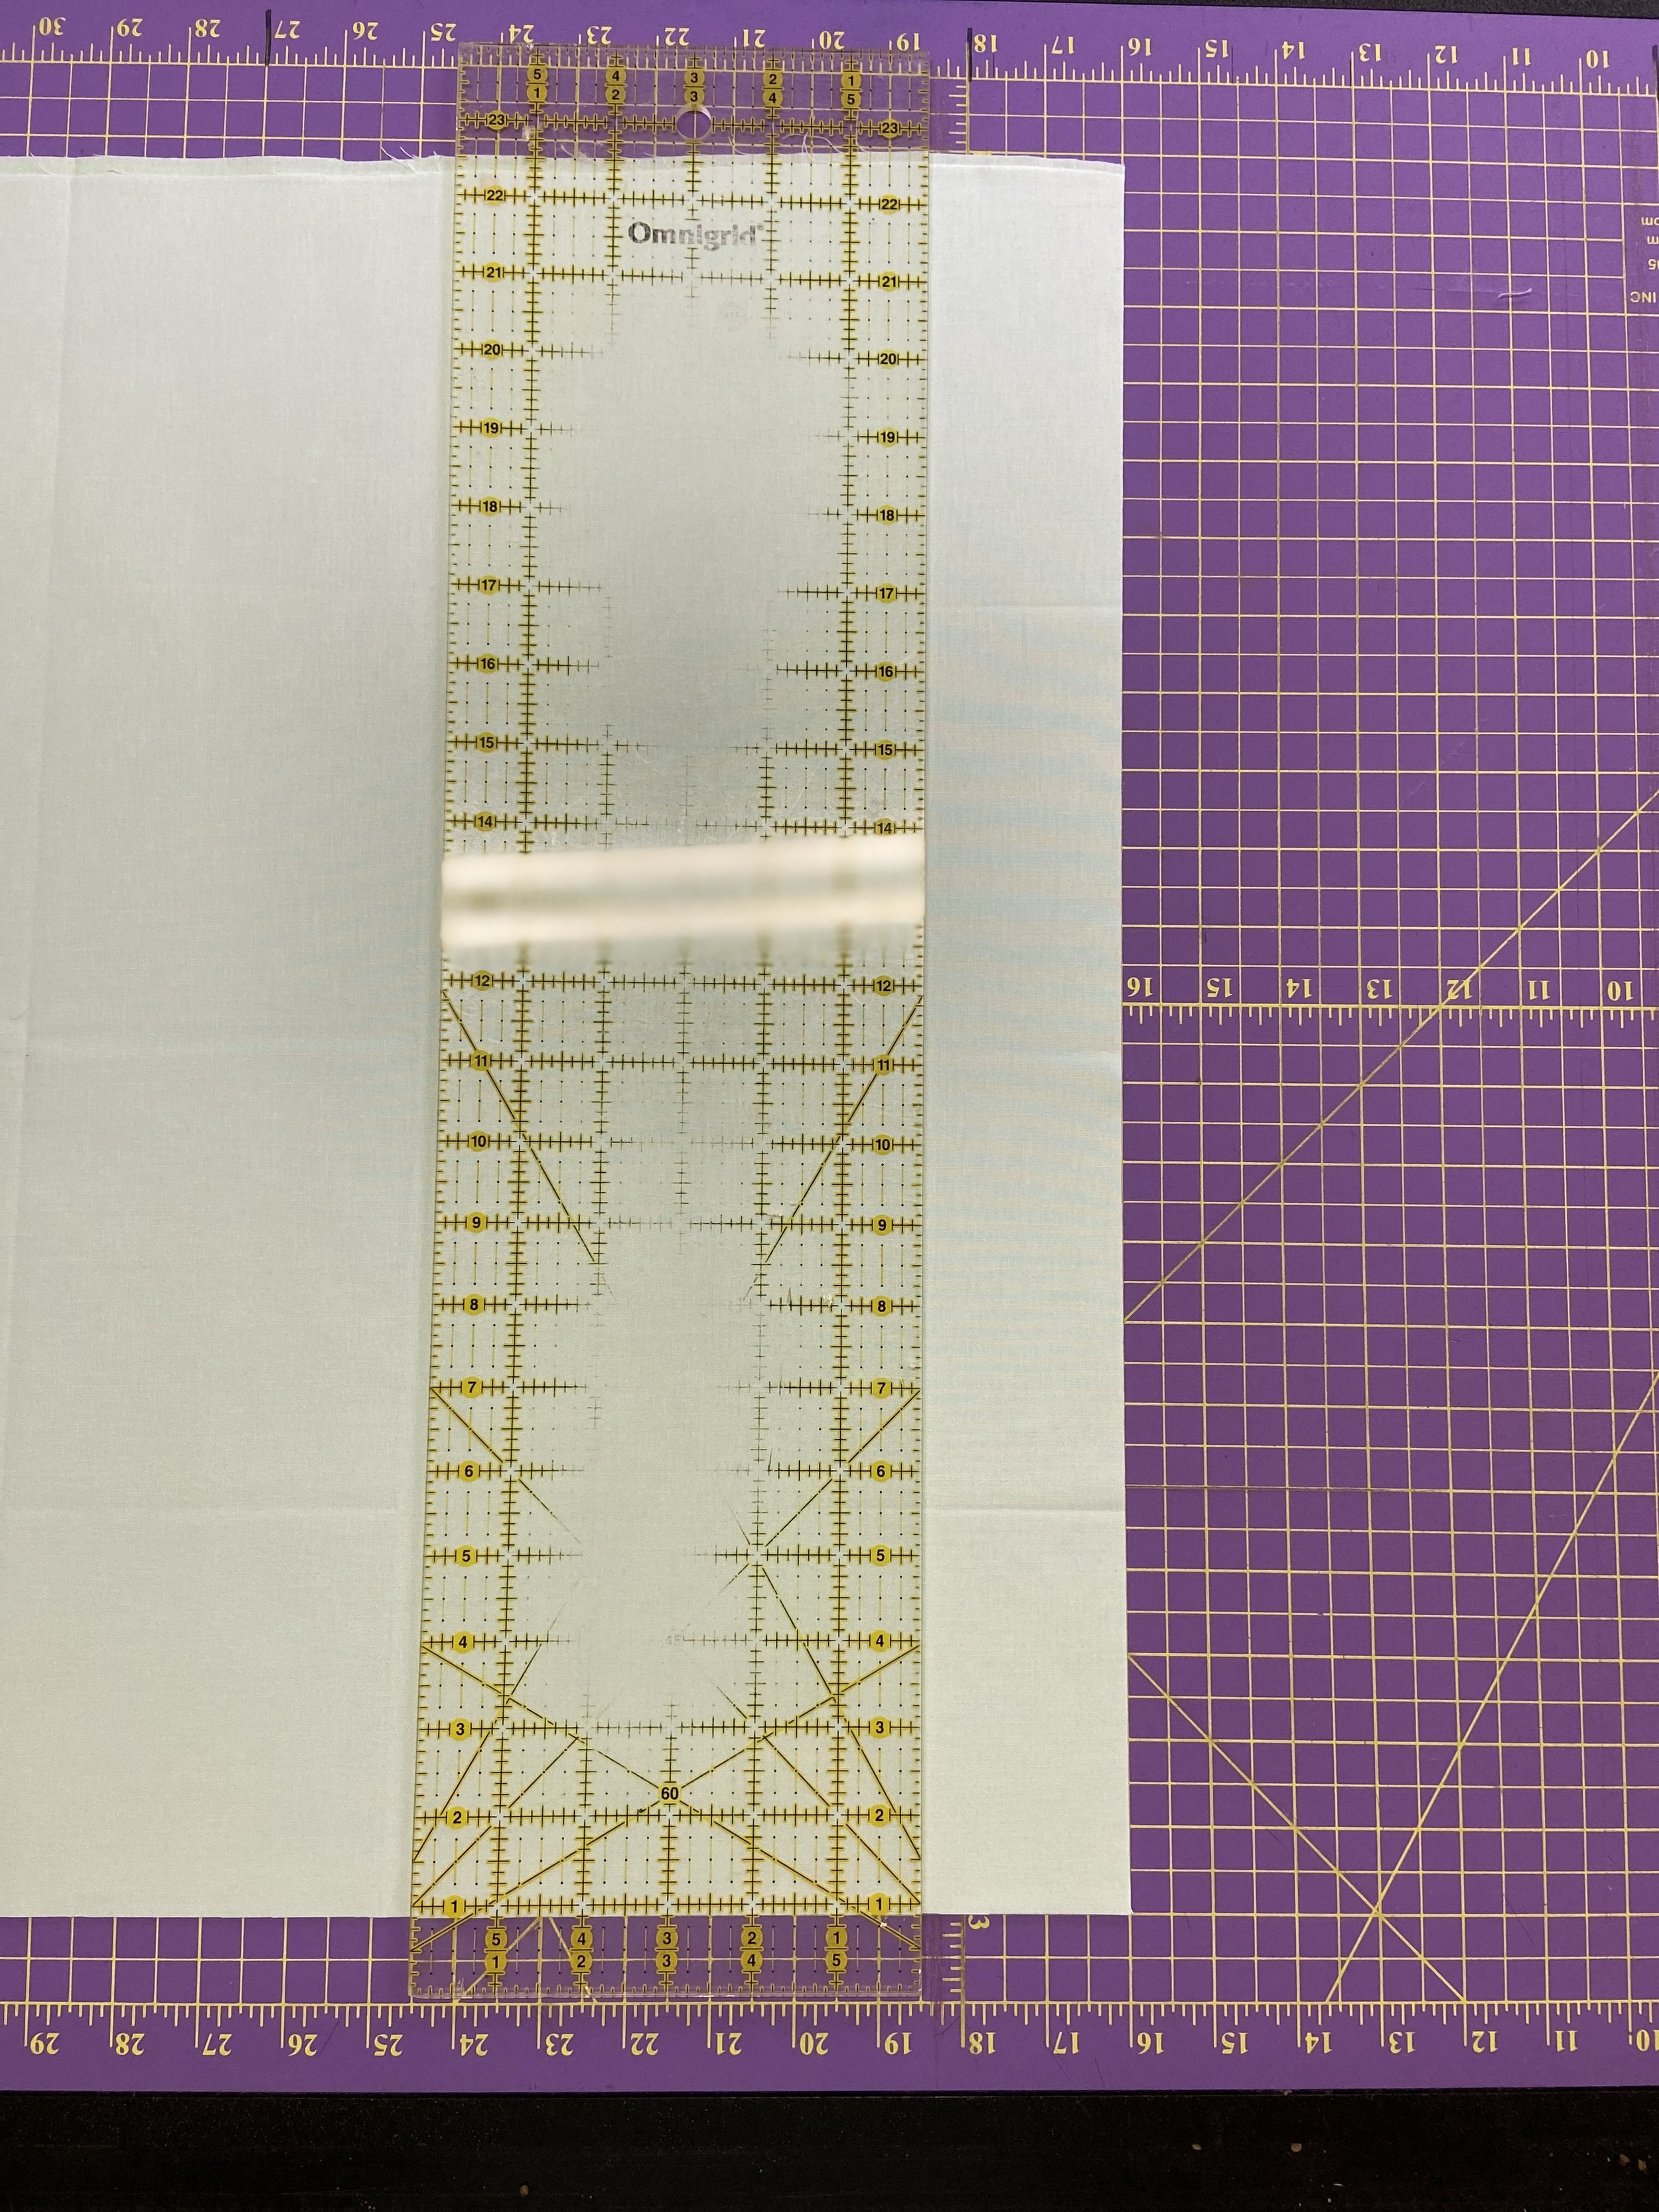
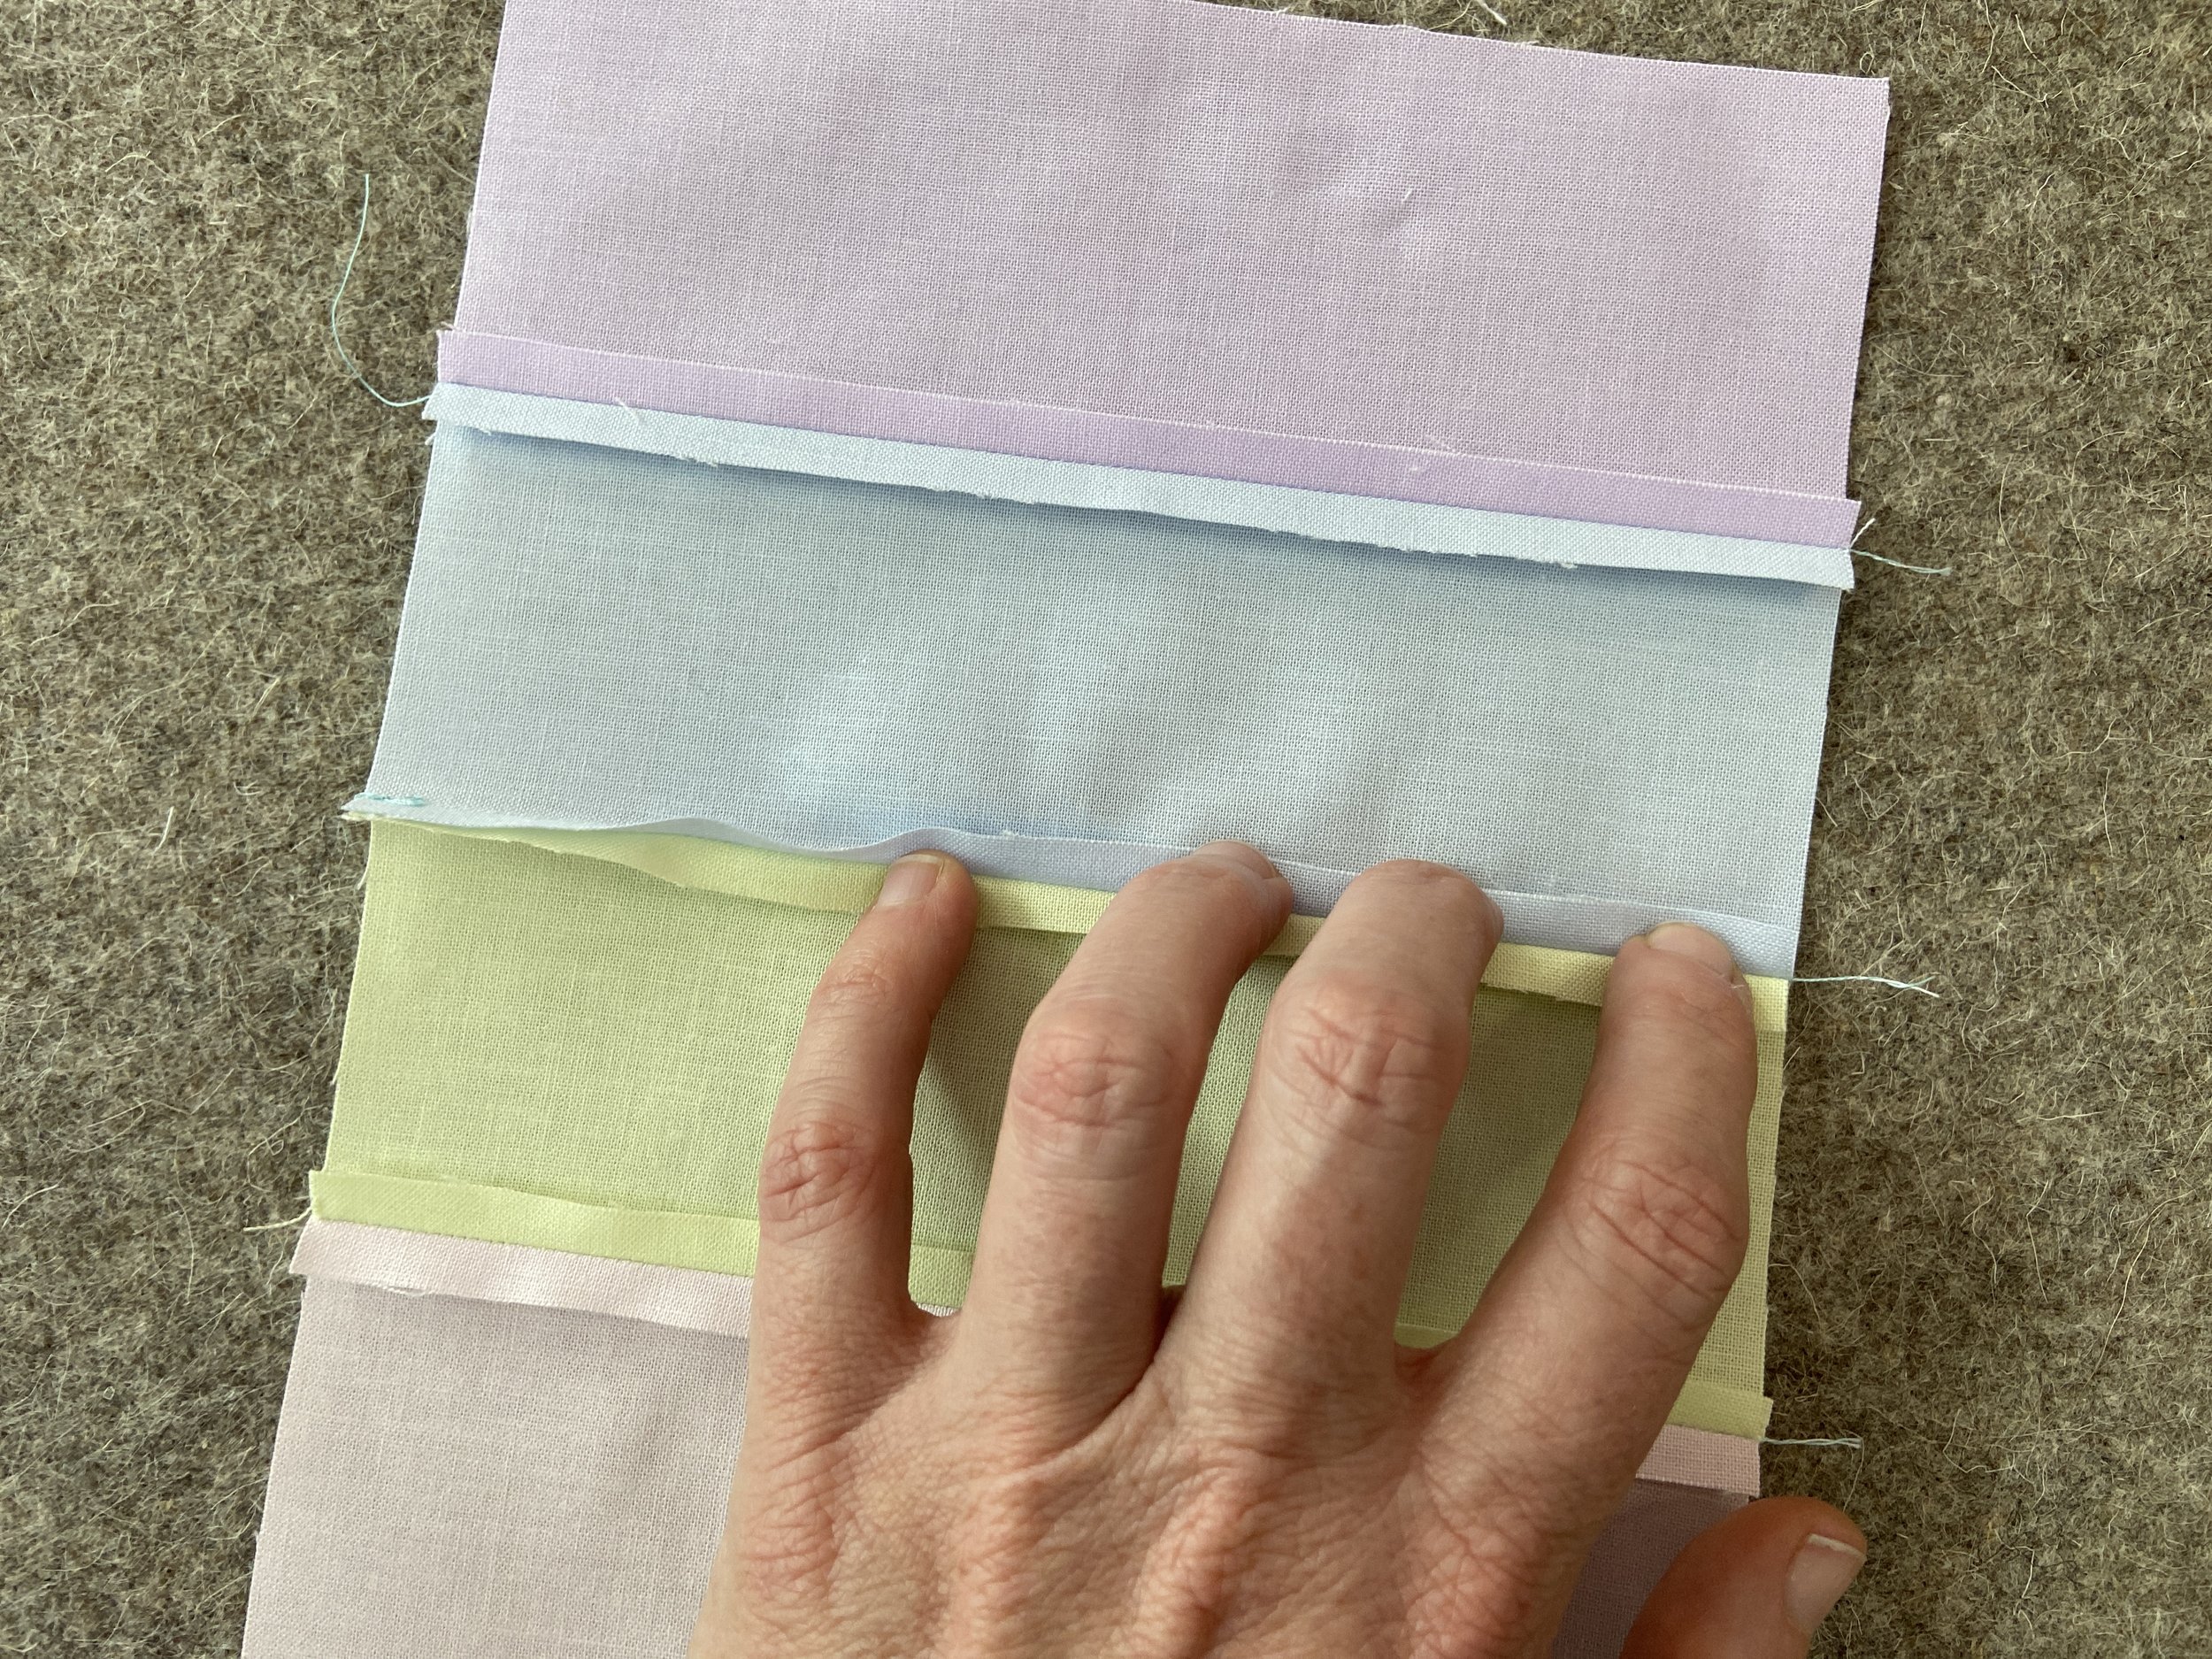
Begin by cutting strips. Start by cutting the first raw and uneven edge off the fat quarter. Lay one fat quarter on the cutting mat.
Step 1: Line up the 21/22” edge of the fat quarter so the raw edge goes over the line you want to use as your first cut. You can see in the picture where my finger is located that the raw uneven edge is consistently over the line for 16” and I cut on that line.
In the images below, you can see how I lined up the ruler’s edge along the 16” line. Look at the bottom and at the top of the fabric to ensure it is lined up.


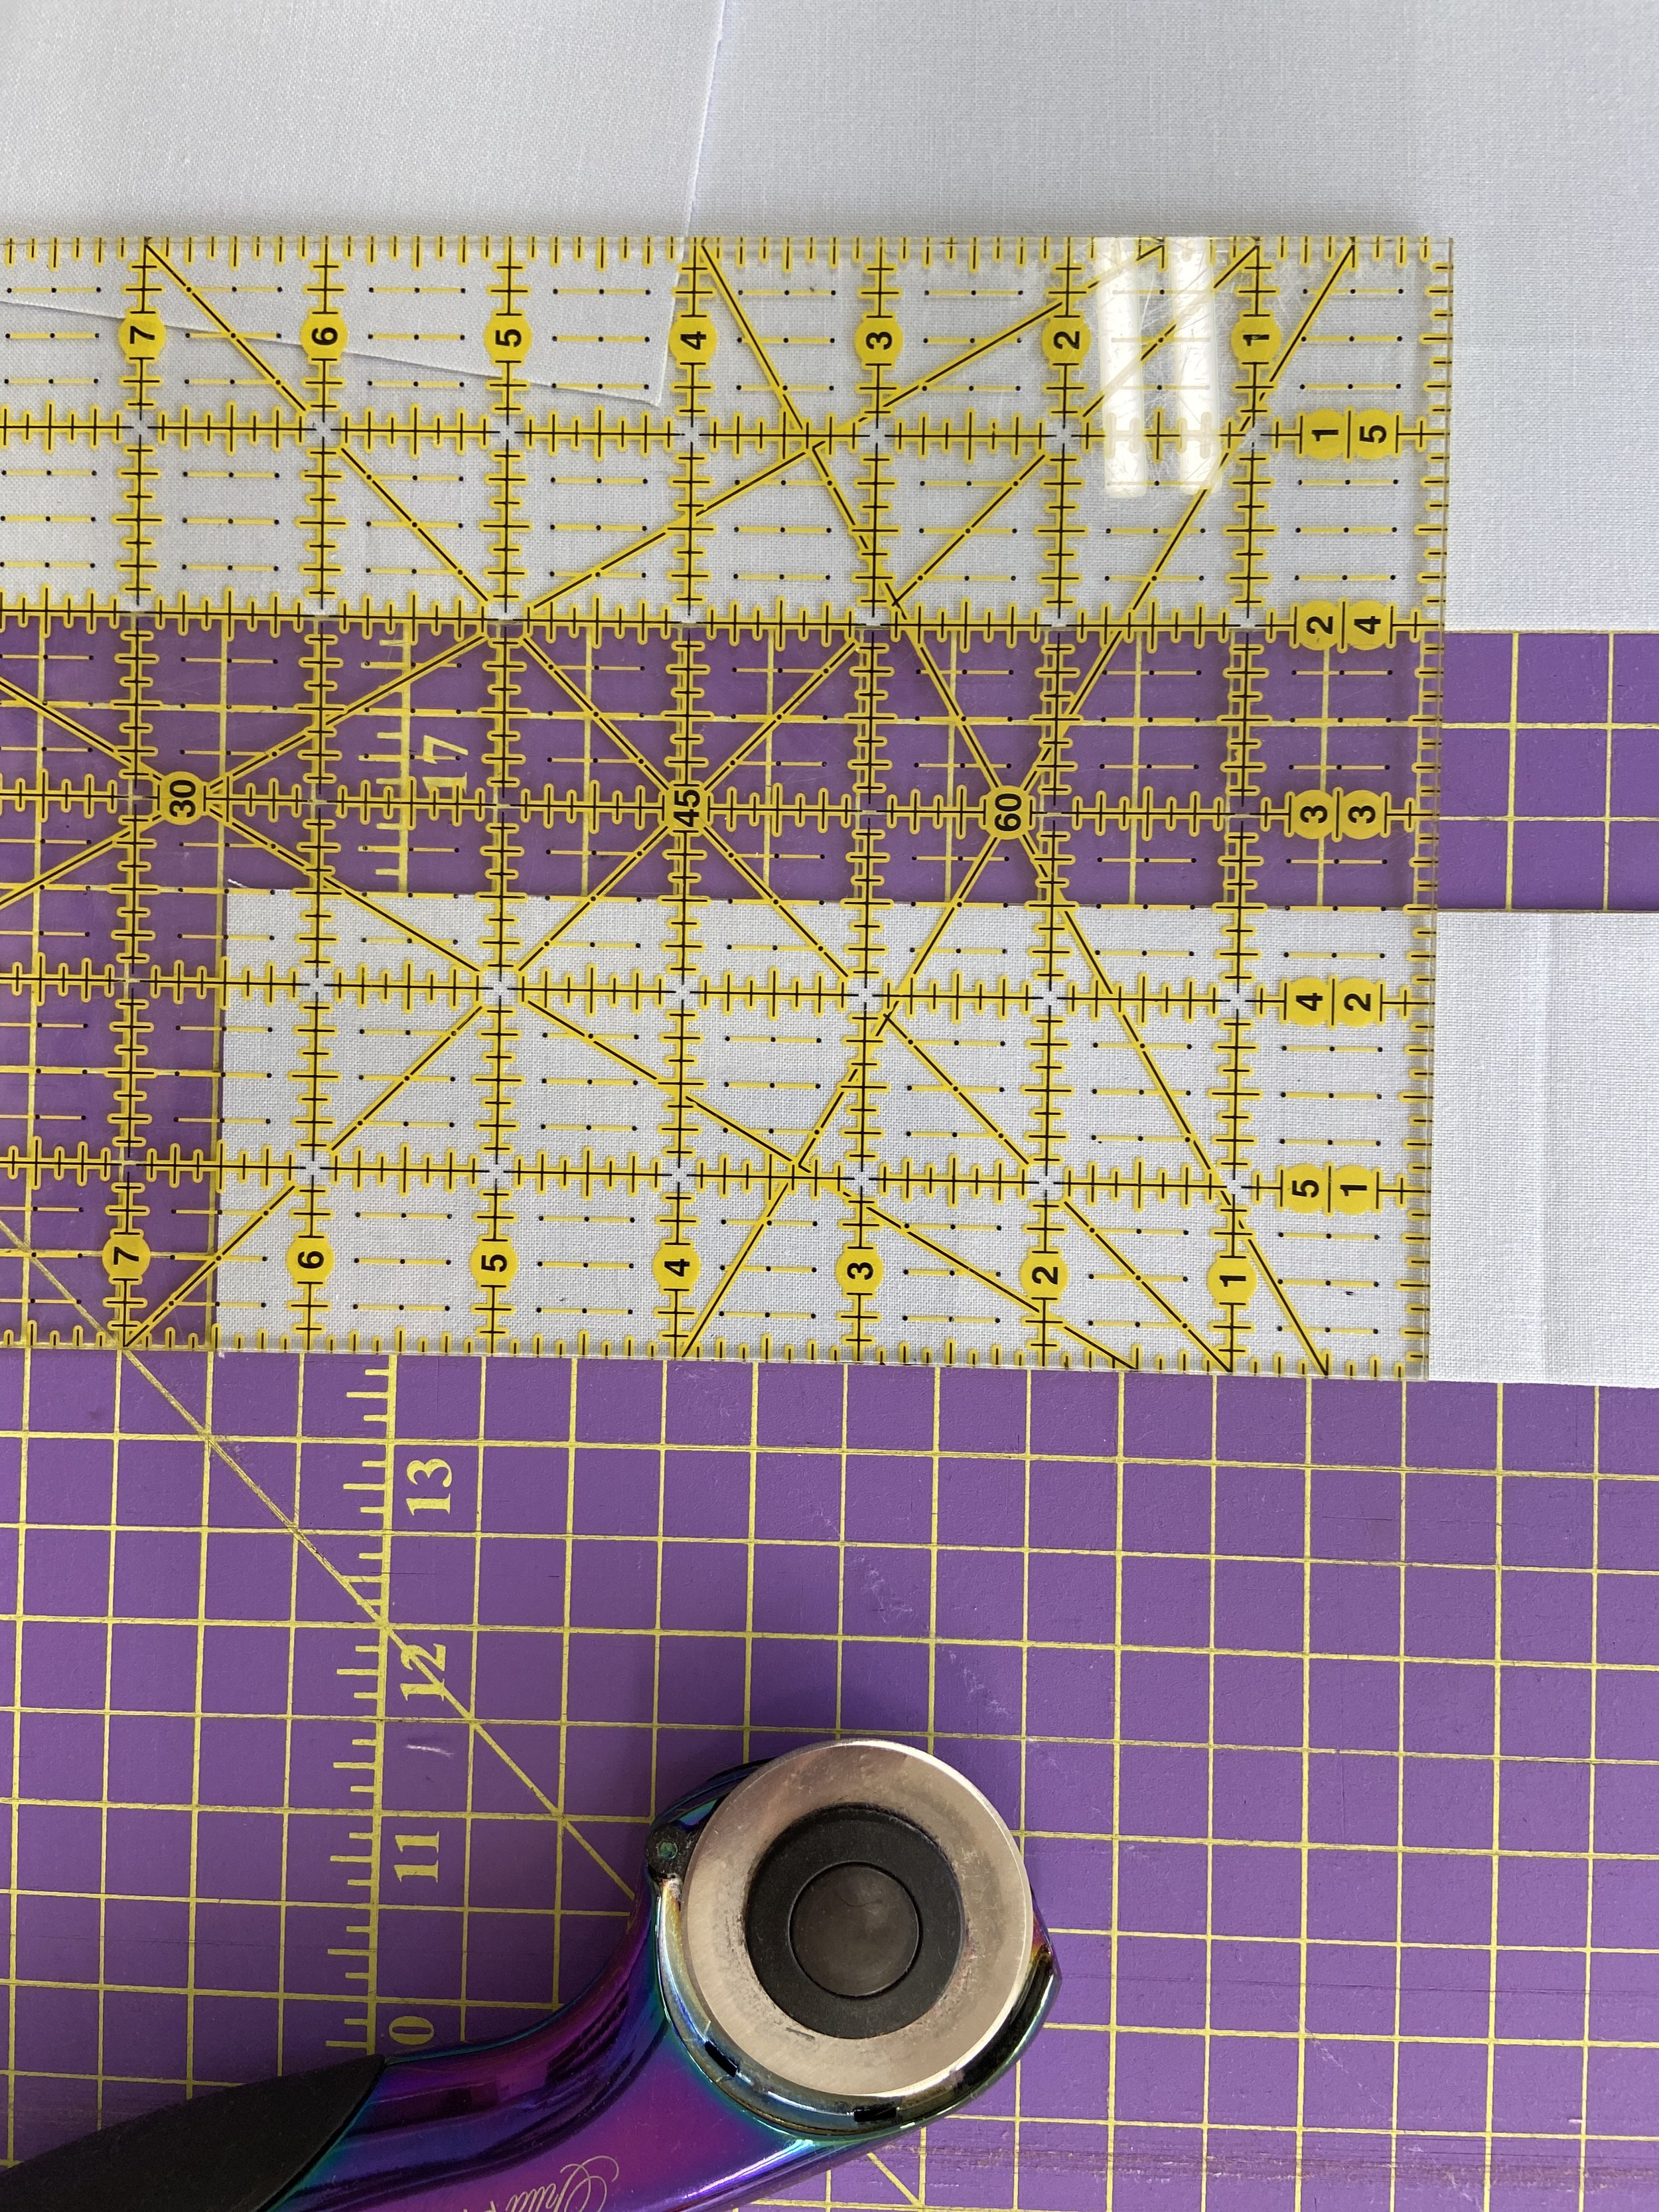
Step 2: After you make the first cut to create a clean edge, then you can begin moving the ruler over 2.5” to make your strips.
Step 3: I like to slide the strip over a bit, so I don’t accidentally cut the remaining fabric. Line up both of the long sides of the strip along a line on the mat. Line up the ruler along the bottom selvage and cut that away.
Step 4: Then line up the bottom of the ruler with the 8.5” mark on the ruler. Then line the sides of the strip up with the edge of the ruler and the 2.5” mark. This will allow you to cut across the top to make an 8.5” x 2.5” strip.
Step 5: For this first strip from the fat quarter, move the ruler up to the remainder of the strip and cut a second 8.5” strip like you just did. You can get two of your 2.5” x 8.5” pieces from a single strip.
Step 6: Now, go back to the rest of the fat quarter. Cut a new 2.5” strip and repeat the process to make two more 2.5” x 8.5” strips.
Step 7: After you cut 4 total 2.5” x 8.5” pieces from the fat quarter, but a new 2.5” strip and repeat the process to make three of your 2.5” x 6.5” pieces. You can get three from each strip. The process is the same, except you line the ruler up on the 6.5” line. You can get 5 more strips which will give you a total of 15 of the 2.5” x 6.5” pieces from each fat quarter.
Step 8: Repeat this exact process with all your Fat Quarters. After some practice you can also stack up 2 or 3 fat quarters and cut them all at the same time. Make stacks of your pieces and make sure you have 35 of the 2.5” x 8.5” pieces and 140 of the 2.5” x 6.5” pieces.


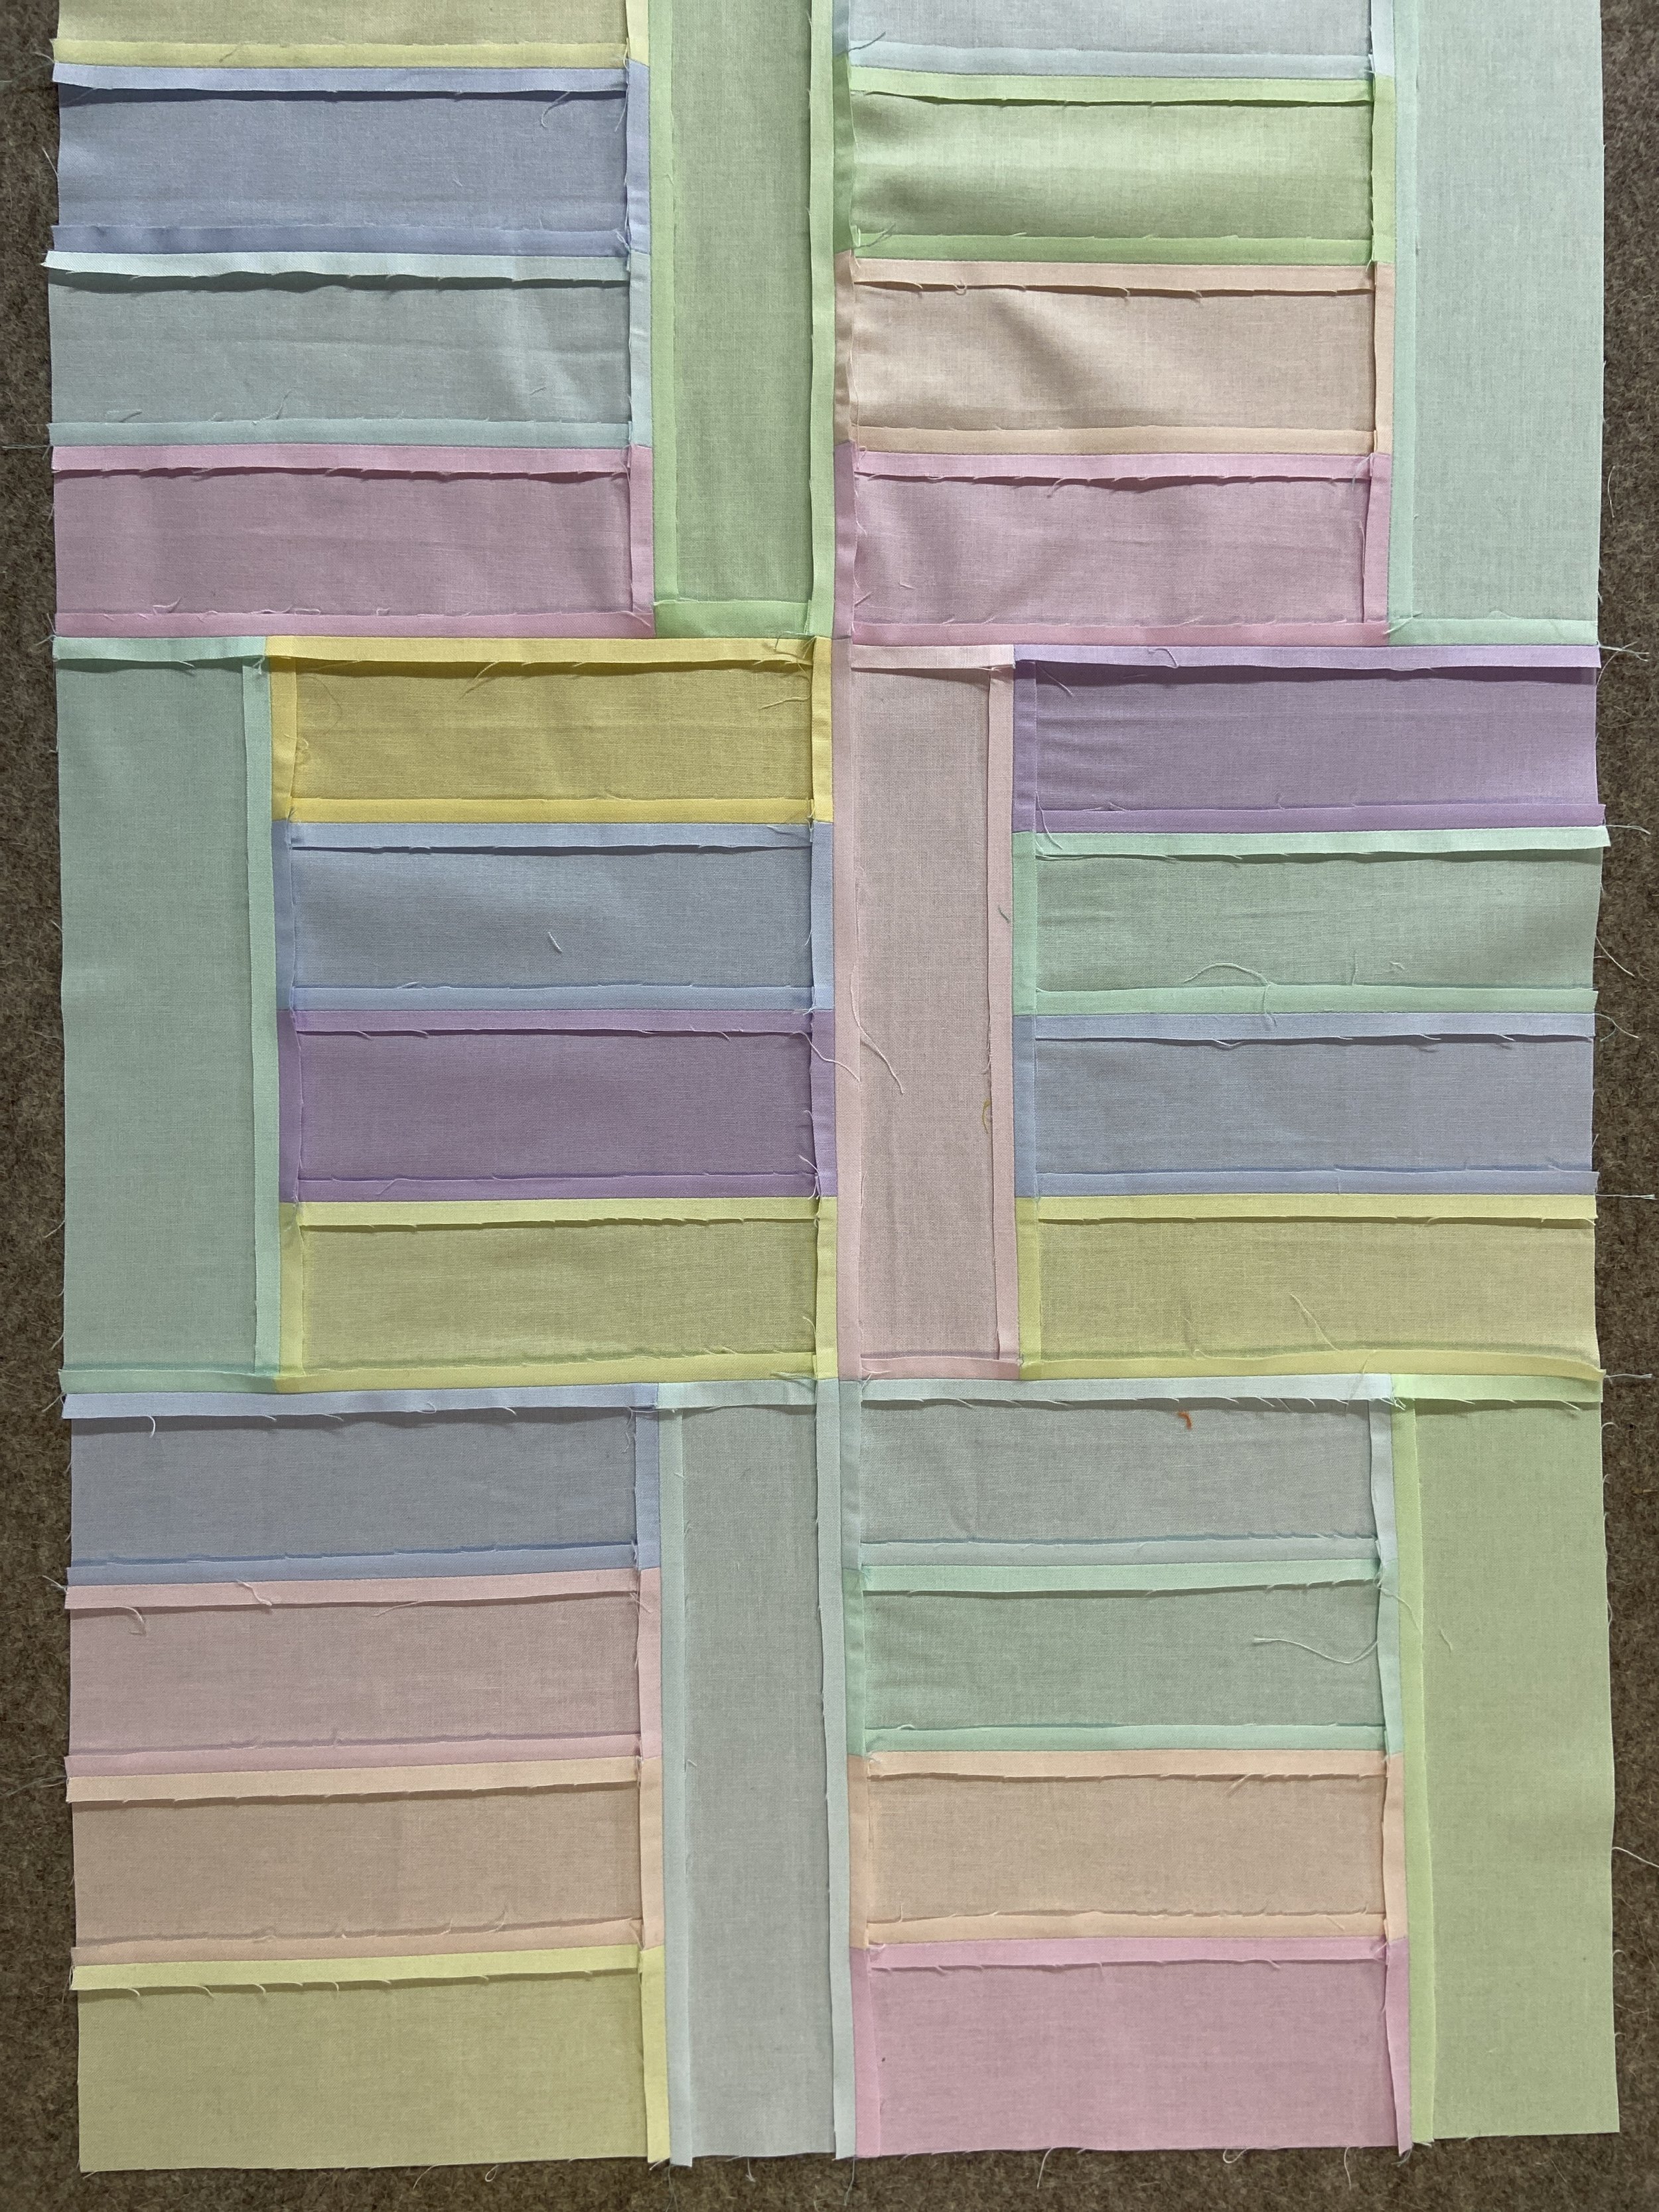
Lay Out Your Blocks for Your First Quilt
I really like to have a design wall, which in its simplest form is a piece of batting hanging on something like a board or wall. You can also lay the blocks out on a table or the floor if clean.
You have two choices for layout. First, you can literally lay all your blocks out and then sew each block together. This will allow you to determine your color placement before sewing the blocks together. The second option is to sew 4 of your 2.5” x 6.5” strips together and then add the 2.5” x 8.5” to the end without planning ahead. After all your blocks are sewn together, then you can play around with them on the design wall. This is what I call, “controlled improv.” You can read more about that here. Regardless of the layout option you select, this is how you sew each of the blocks together.
How to Sew a ¼” Quilt Seam
If you started your sewing journey making garments, you are likely familiar with a 5/8” seam allowance. My first quilt used a 5/8” seam allowance and well, it was bulky and clunky.
For a quilt, the seam allowance should always be ¼” unless otherwise stated in the pattern. This length maximizes your fabric and minimizes your bulk.
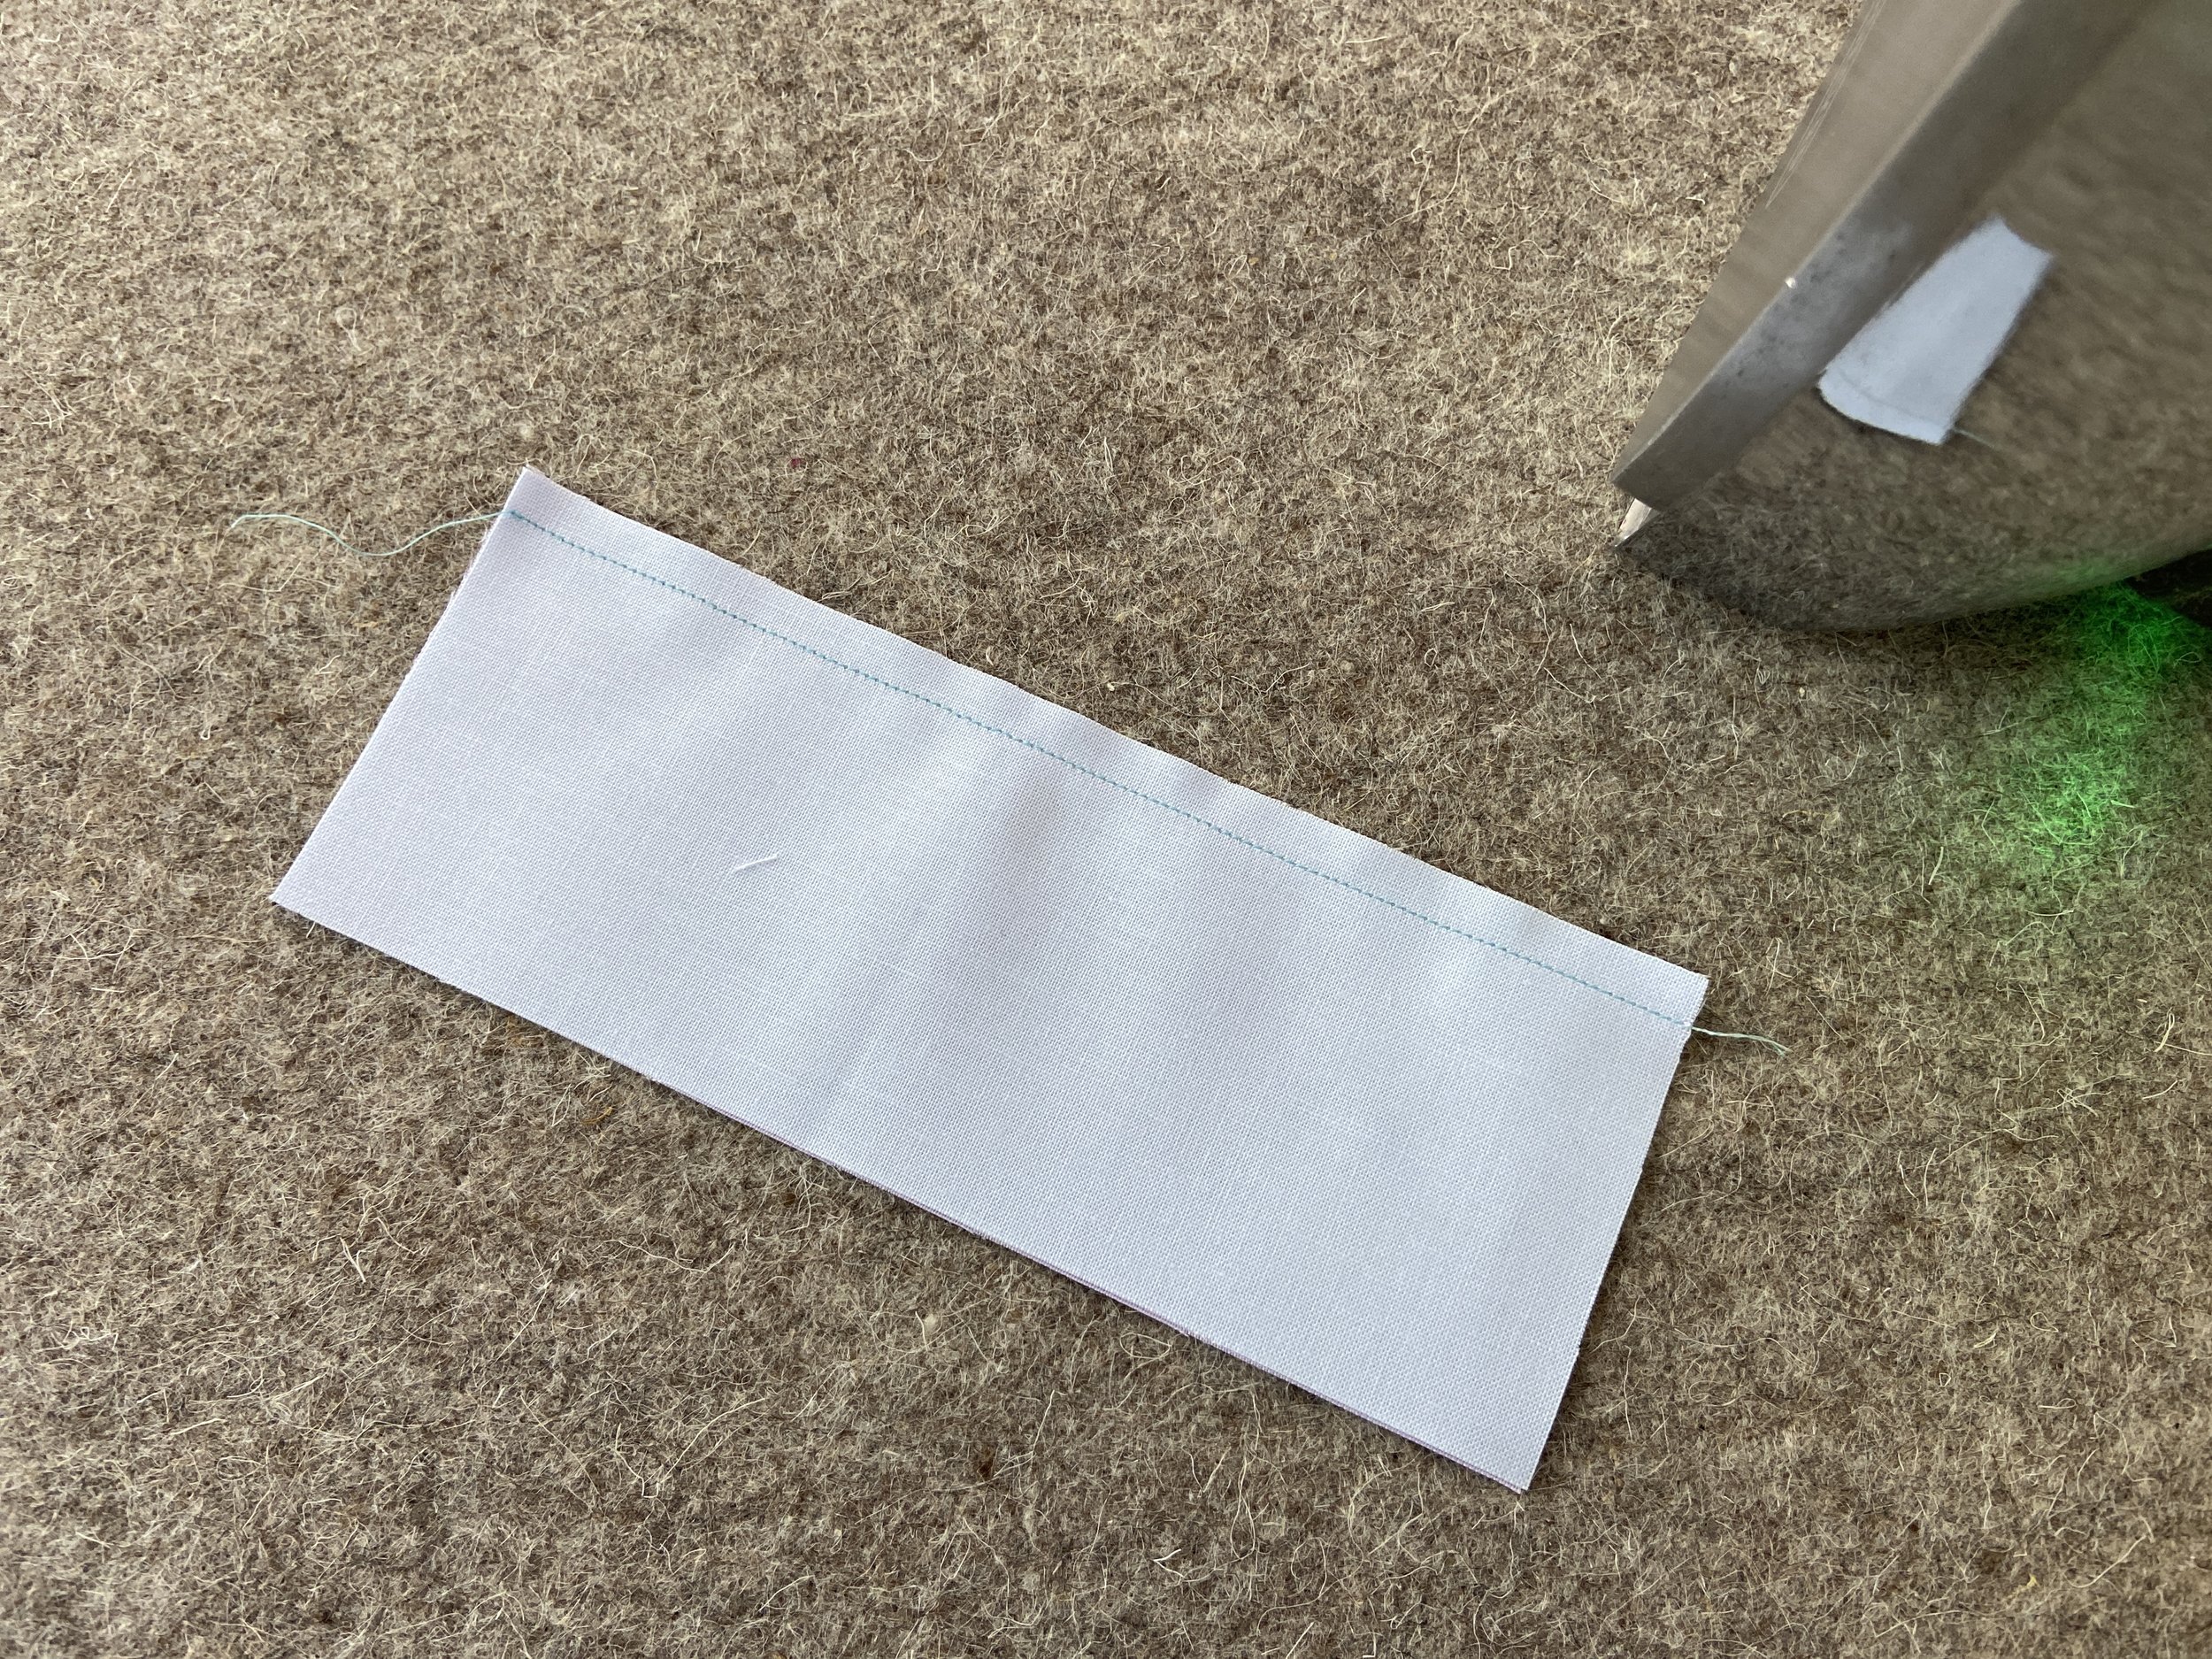
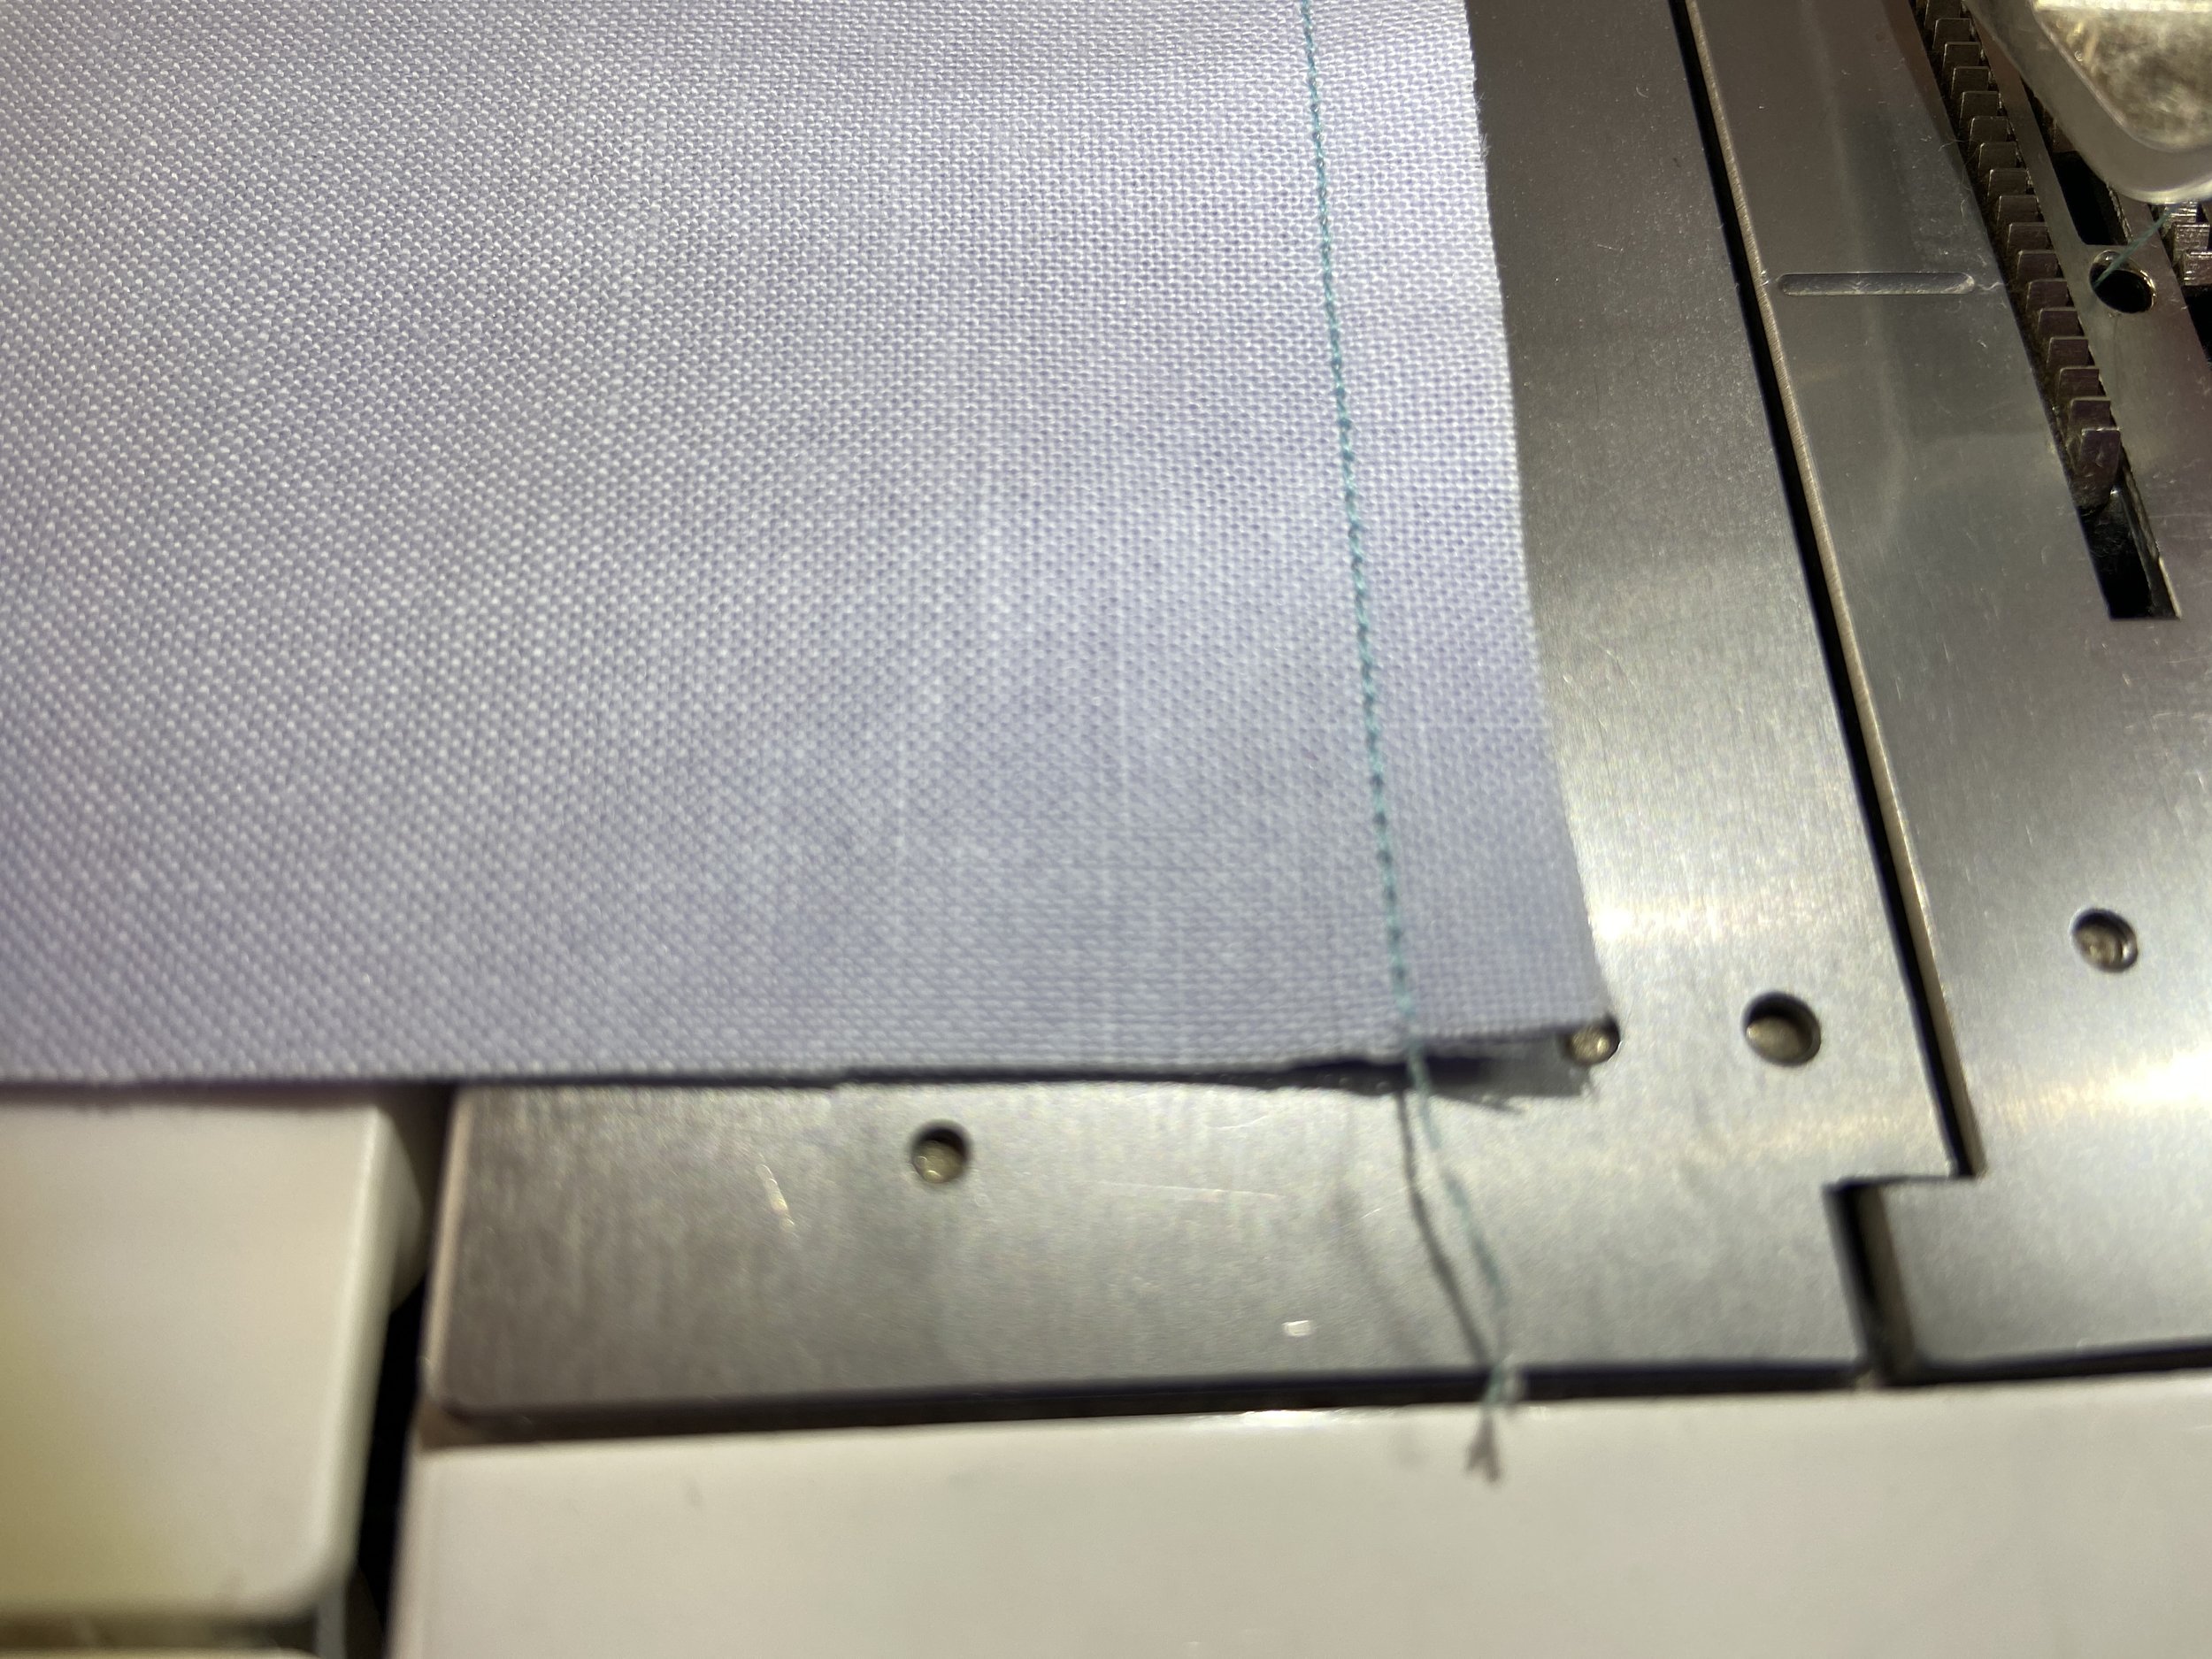
To sew a quilt seam, first begin by turning the two pieces right sides together (RST) and matching up the top, side, and bottom edges of the two pieces.
Set your stitch length on the sewing machine to 1.5 - 1.8. I like 1.8 on my machine. This is the number of stitches per length. On my machine it is a dial. On others it is a digital setting.

Next Place the end of the two pieces under the presser foot at the very end. Begin stitching two stitches to start the machine. Backstitch two stitches to “lock” your stitches and keep them from unraveling during movement. Line up the edge of the ¼” presser foot (shown here) with the edge of the fabric. The fabric should not stick out beyond the presser foot. There is usually a ¼” seam line on the metal place of the sewing machine to help you follow.
Go slow! This is not a race. The slower and more controlled you begin, the better your seams will turn out.
Sew all the way to the end.
¼” Seam Allowance: A quarter-inch seam allowance is used in quilting to piece blocks together. A 5/8” seam allowance is generally used in garment sewing. If you use a 5/8” seam allowance in quilting, the quilt blocks will not come out as intended.
Wrong Sides Together (WST): The wrong side of the fabric refers to the back of the printed fabric. It is usually lighter in color and not as pretty. Solids usually look the same on both sides.
Right Sides Together (RST): The right side of the fabric refers to the printed or “pretty” side of the fabric. When sewing seams, the right sides of both fabrics go together. You may see, “Place fabrics RST” in the piecing instructions.

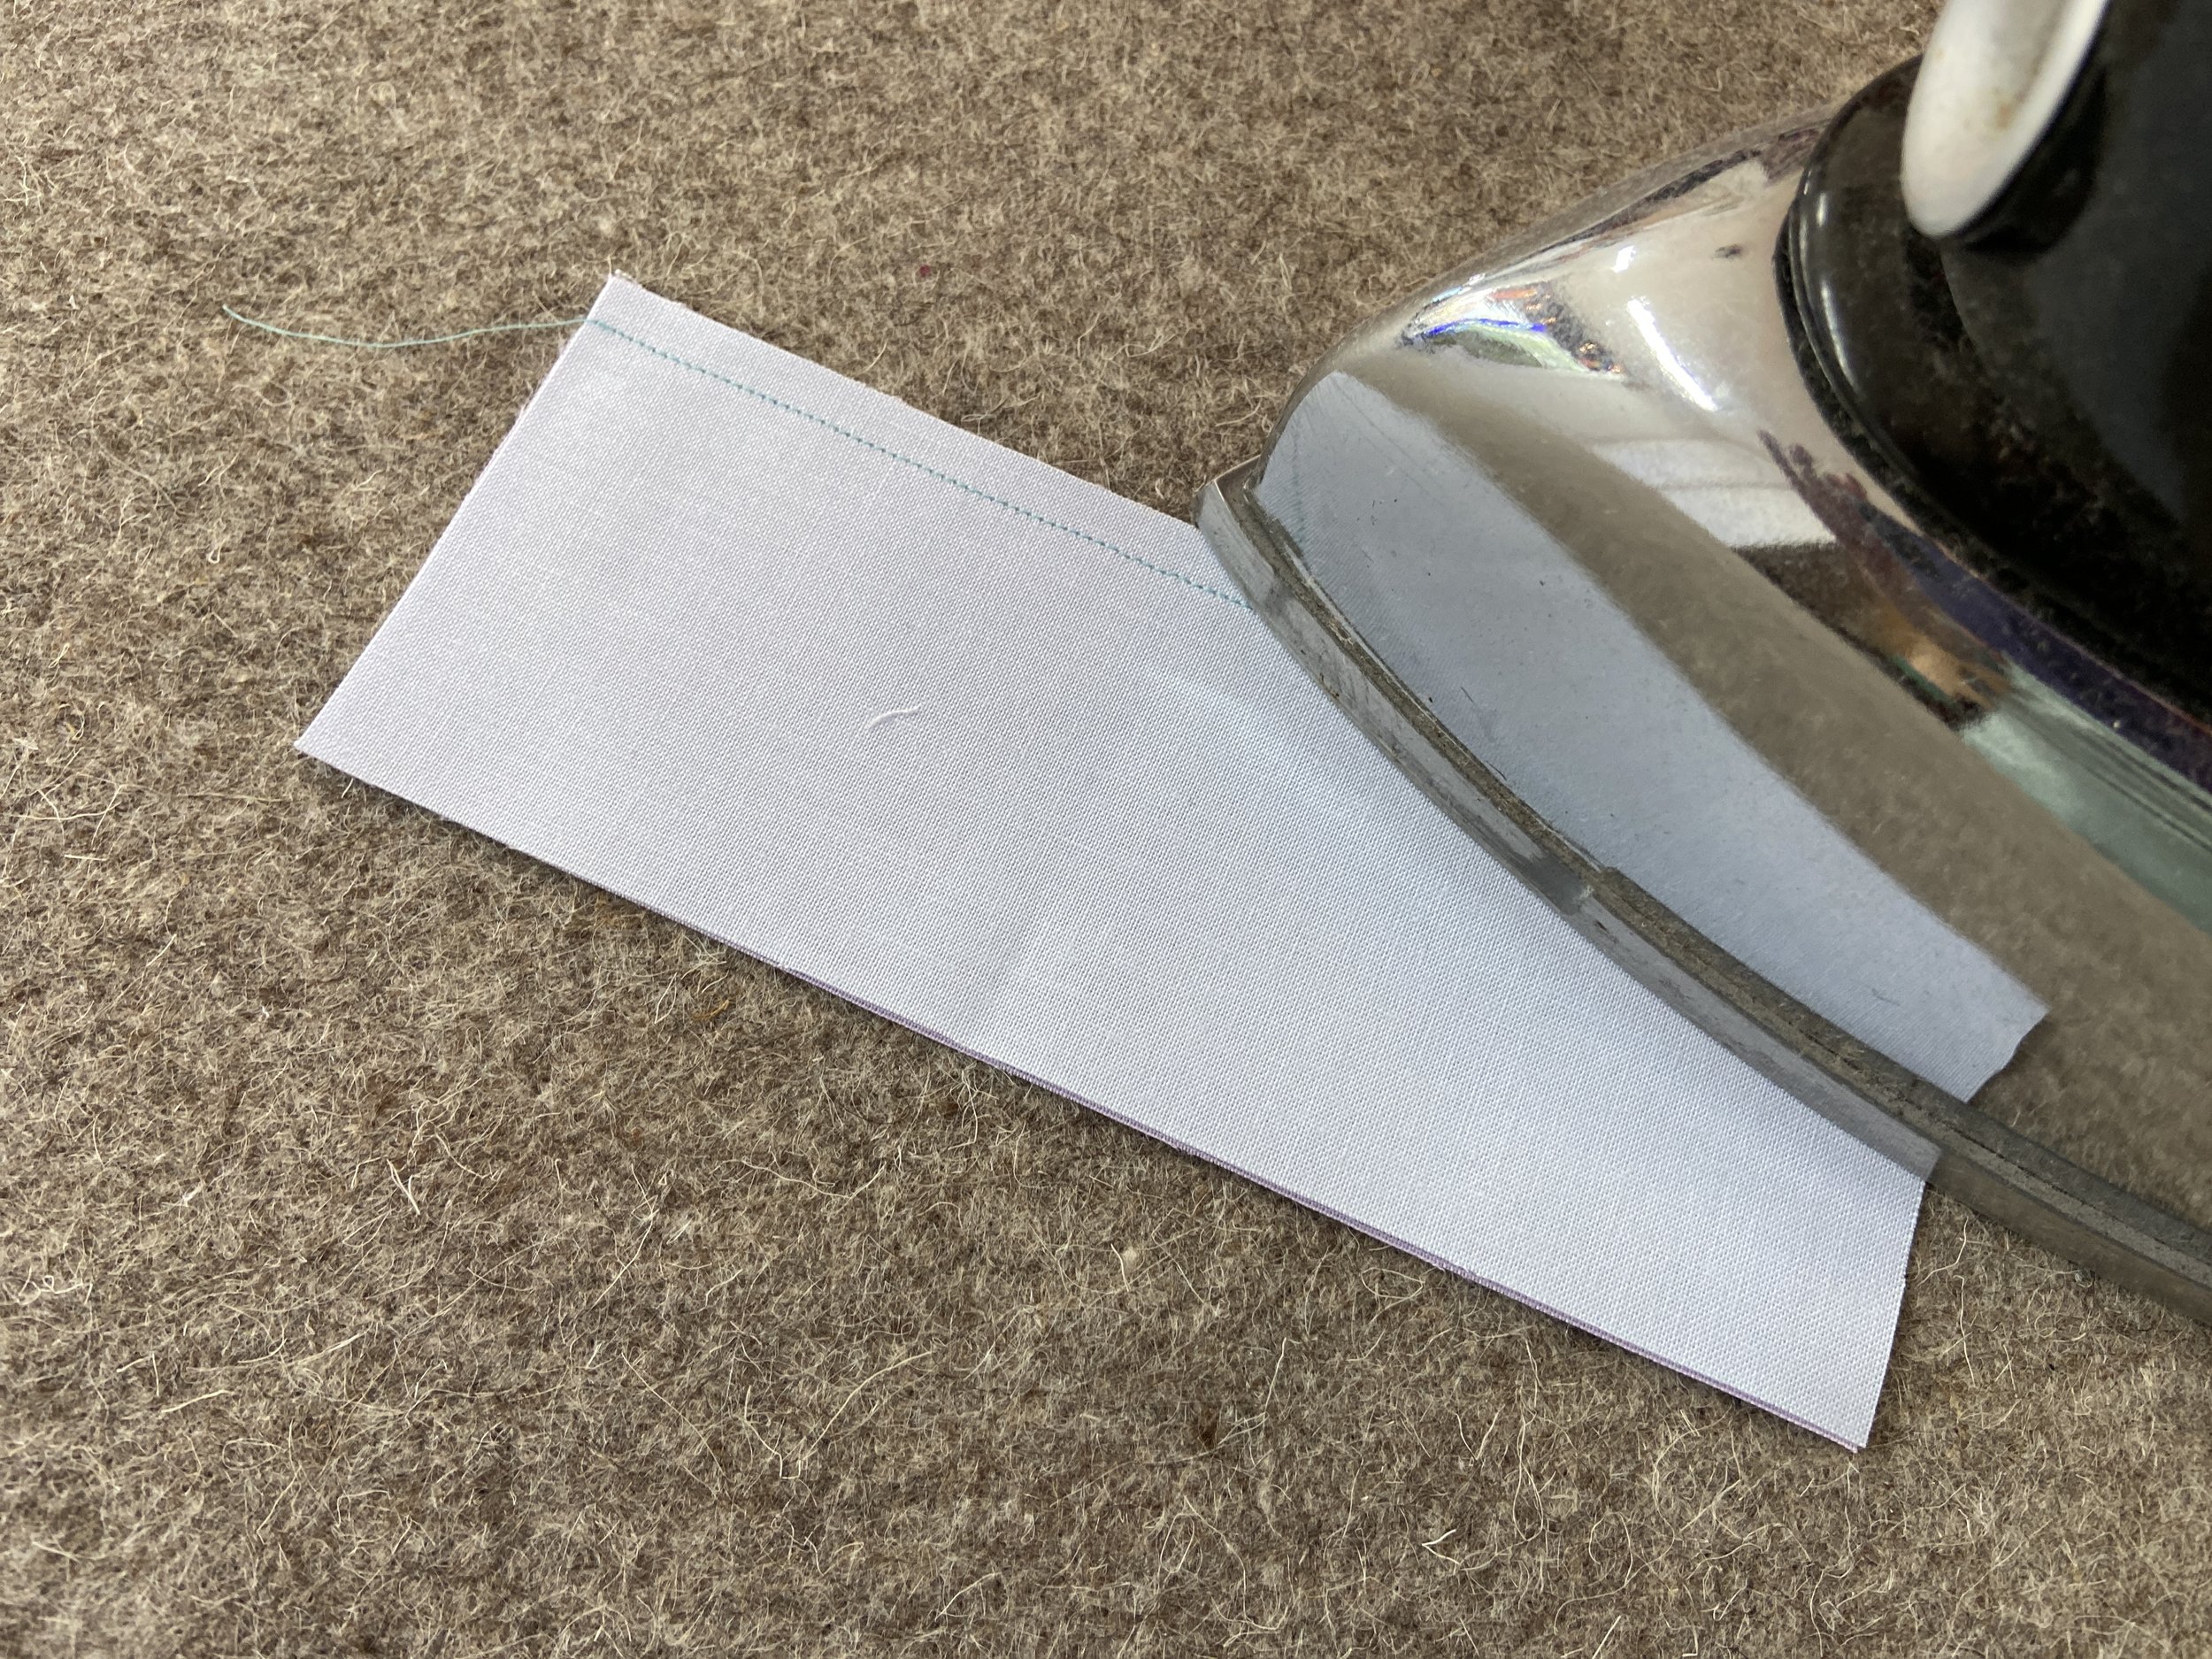
How to Press Your Seams on Your First Quilt
When you begin pressing seams, you can either press them open or to the side, but for this quilt, we will press our seams open.
Pressing Seams Open: To press your seams open, first press them closed. What? I know, hang with me. As soon as you pull the stitched seam off the sewing machine, the seam is flat, and the fabrics are together.
Lay the sewn-together fabric pieces on the pressing board and place the iron on the visible stitches. This is called “setting the stitches.” The heat of the iron helps the stitches set into the fabric. It also warms up the fabric so you can finger press the seam open.
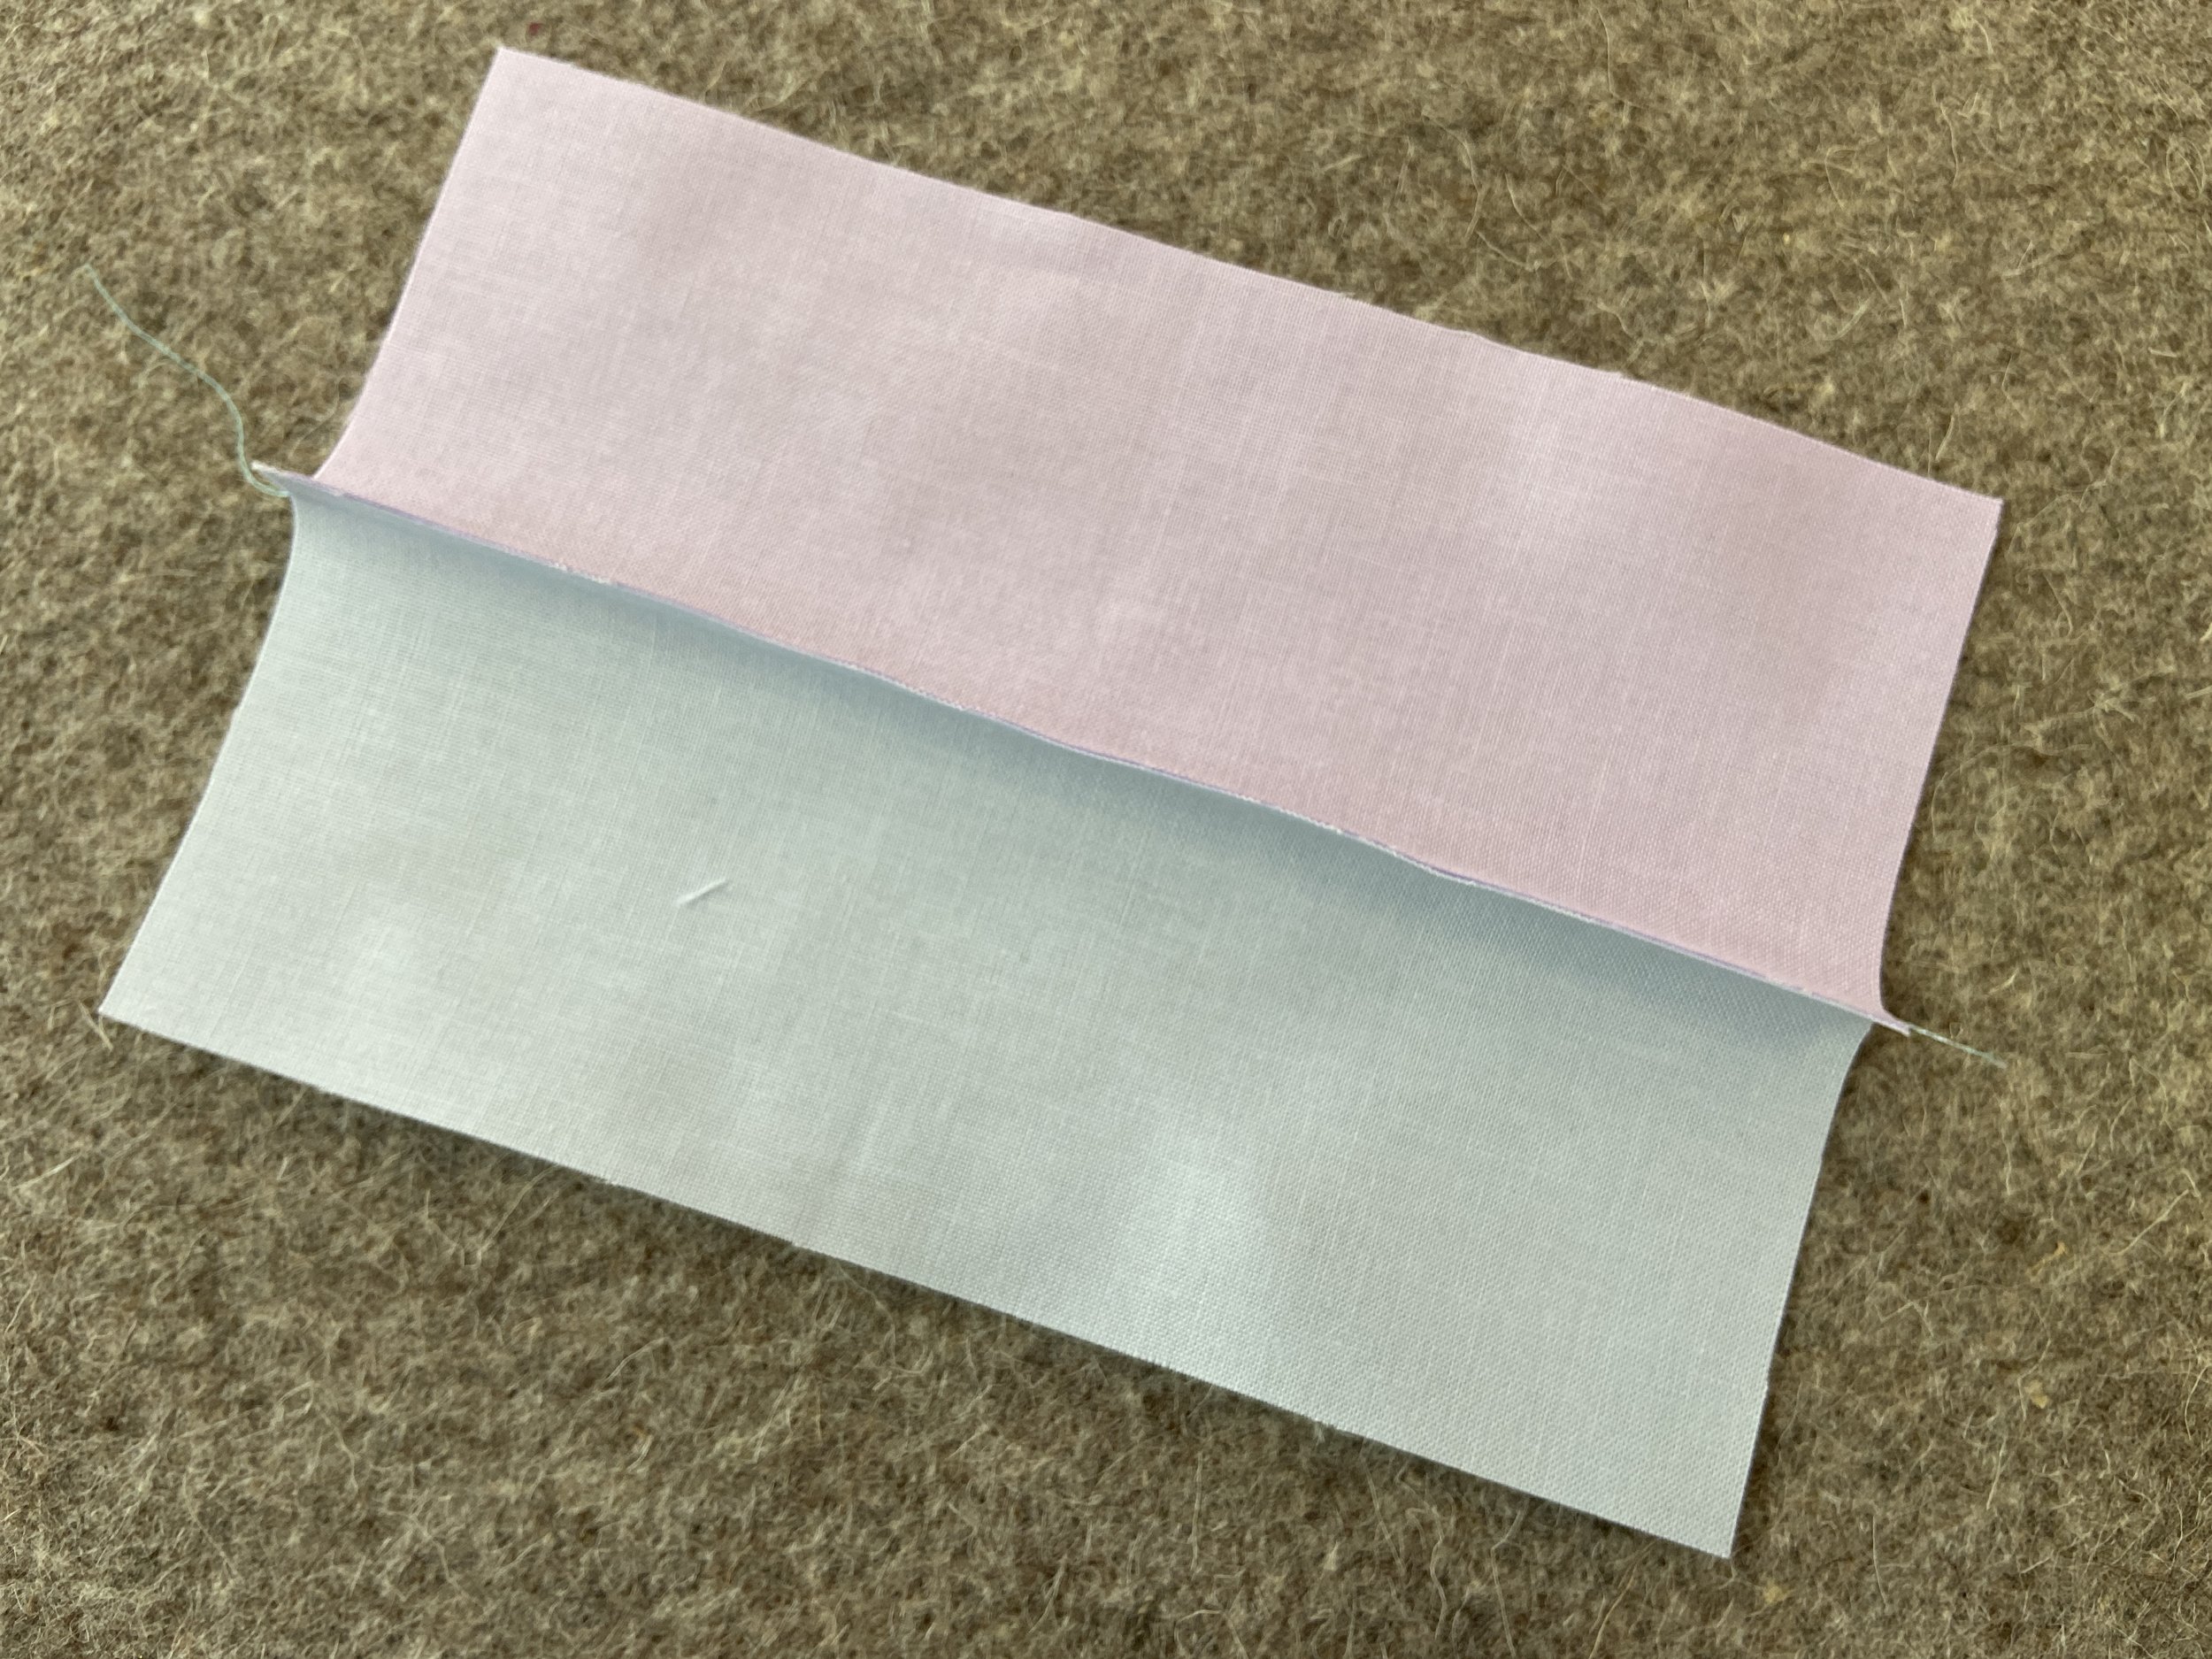
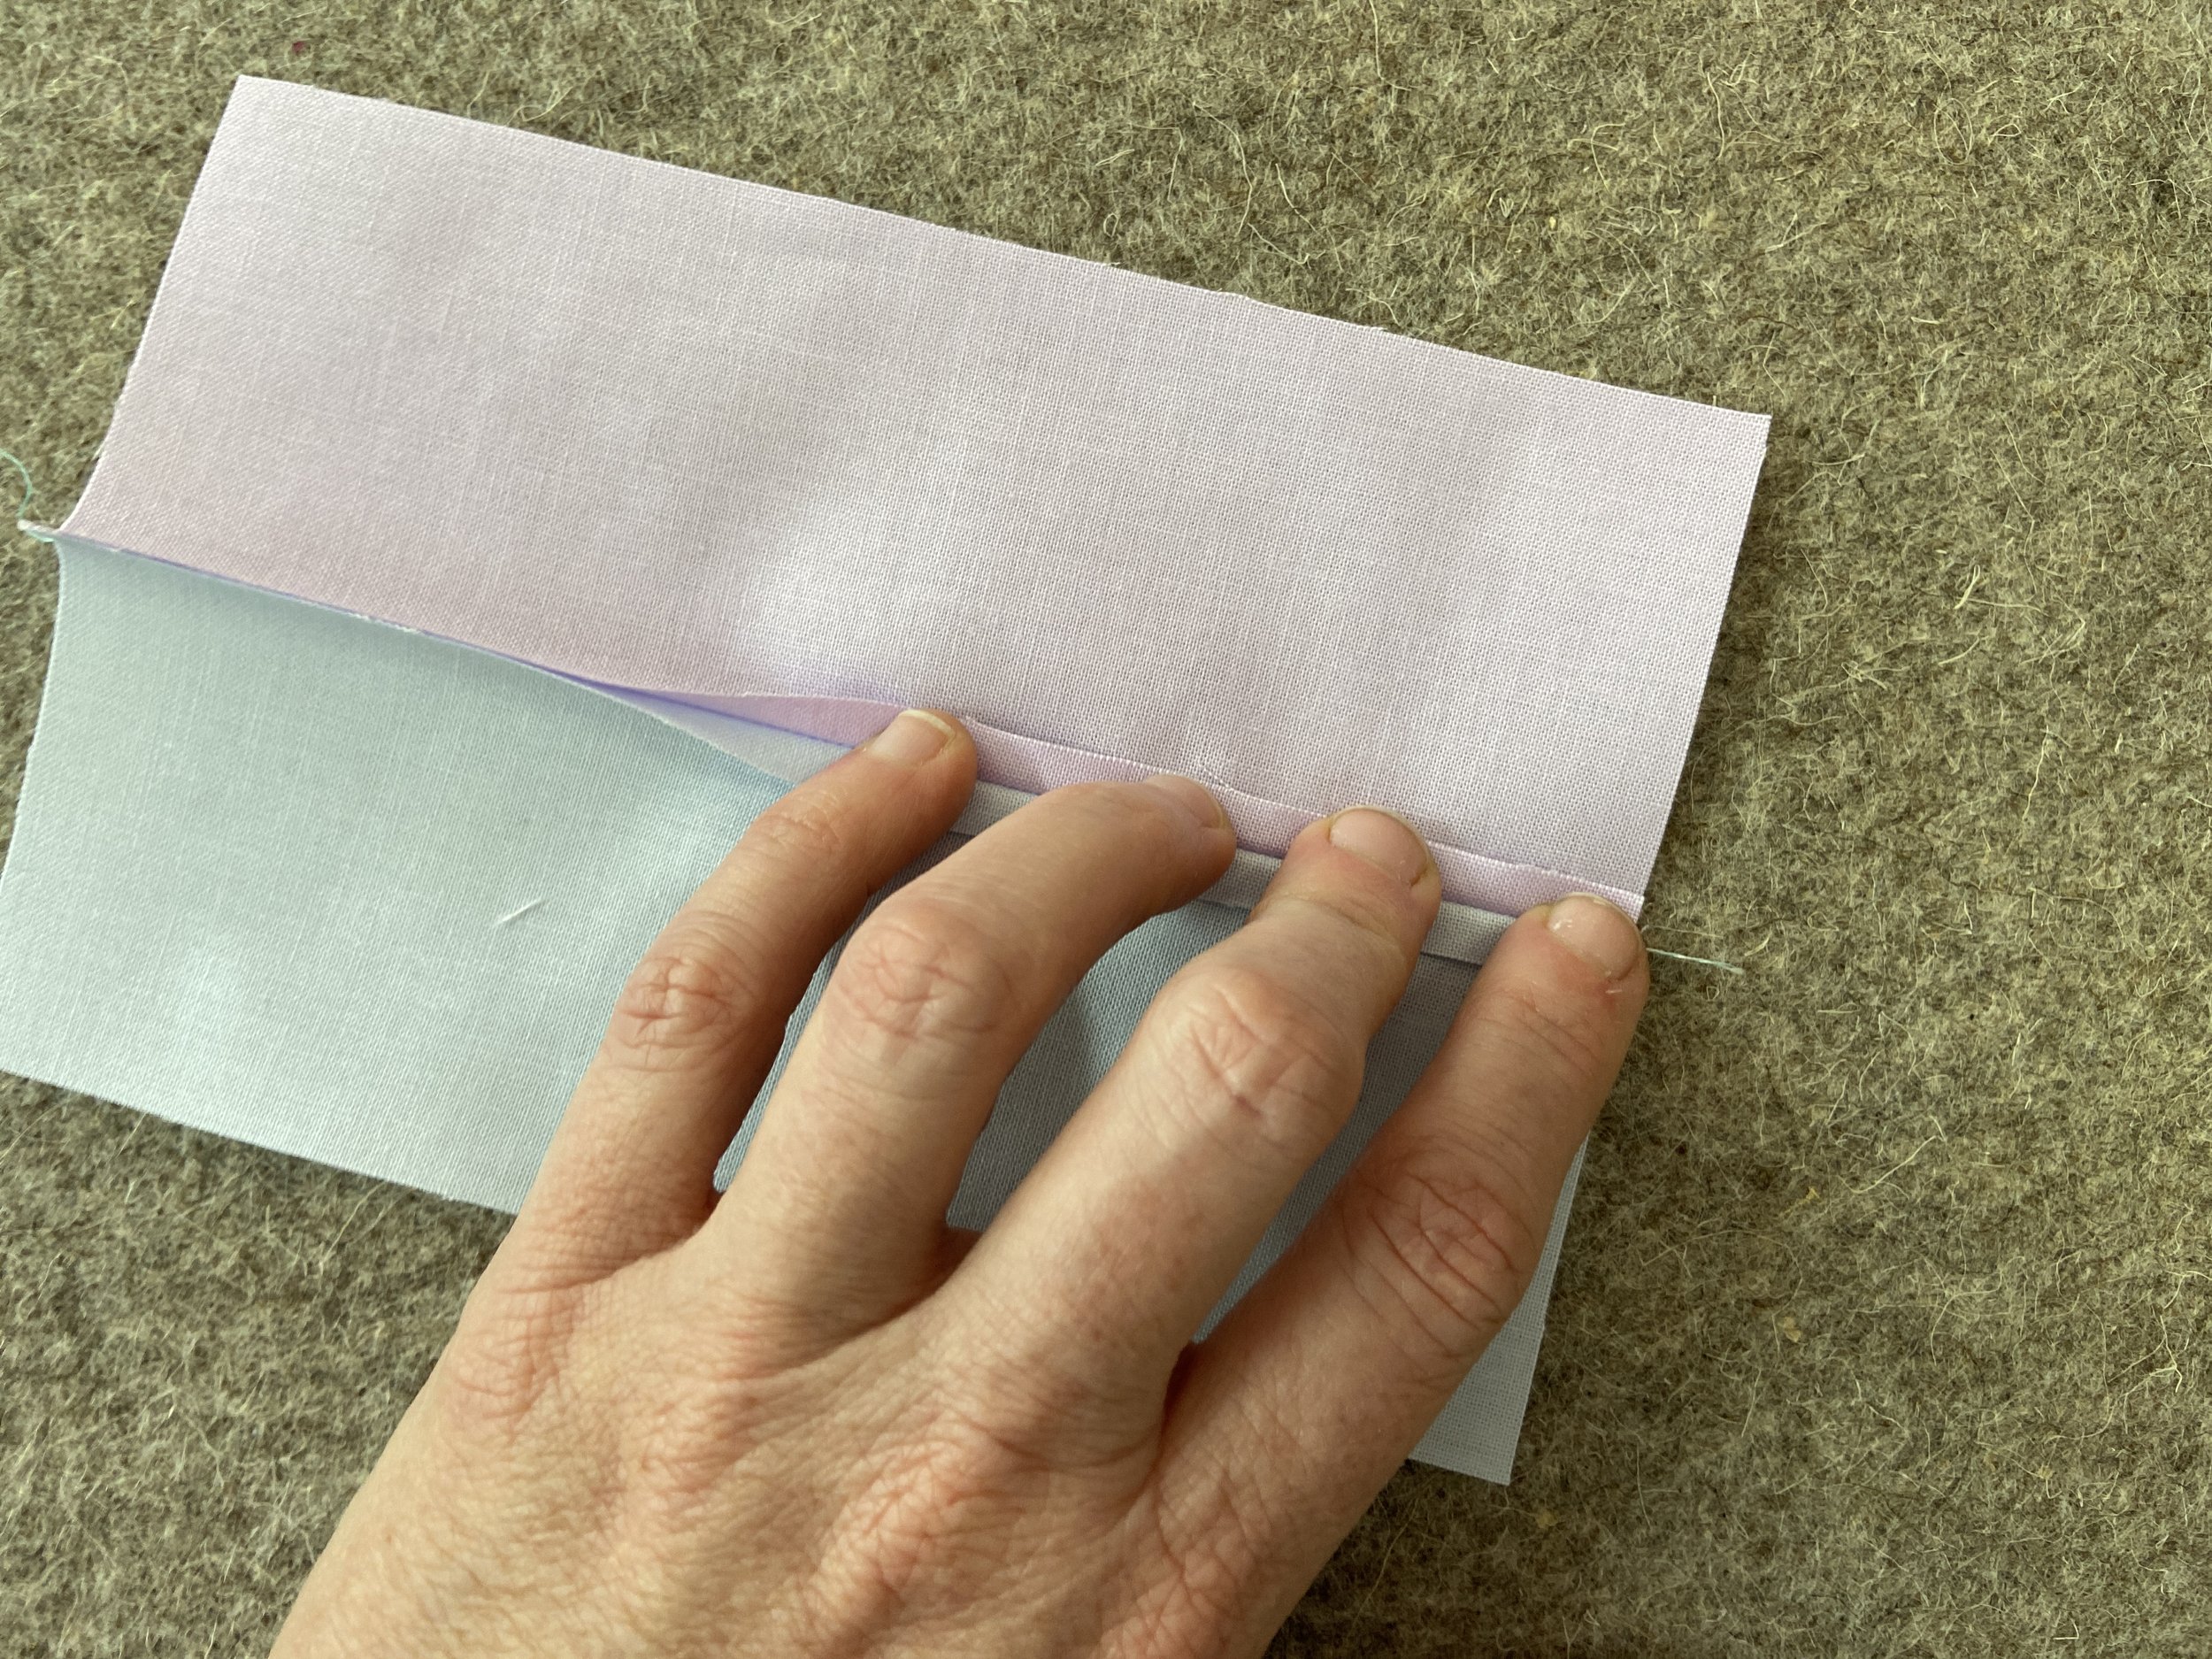
Next, open the seam up while it is still warm, and finger press it open. The right sides of the fabric will be face down on the mat.
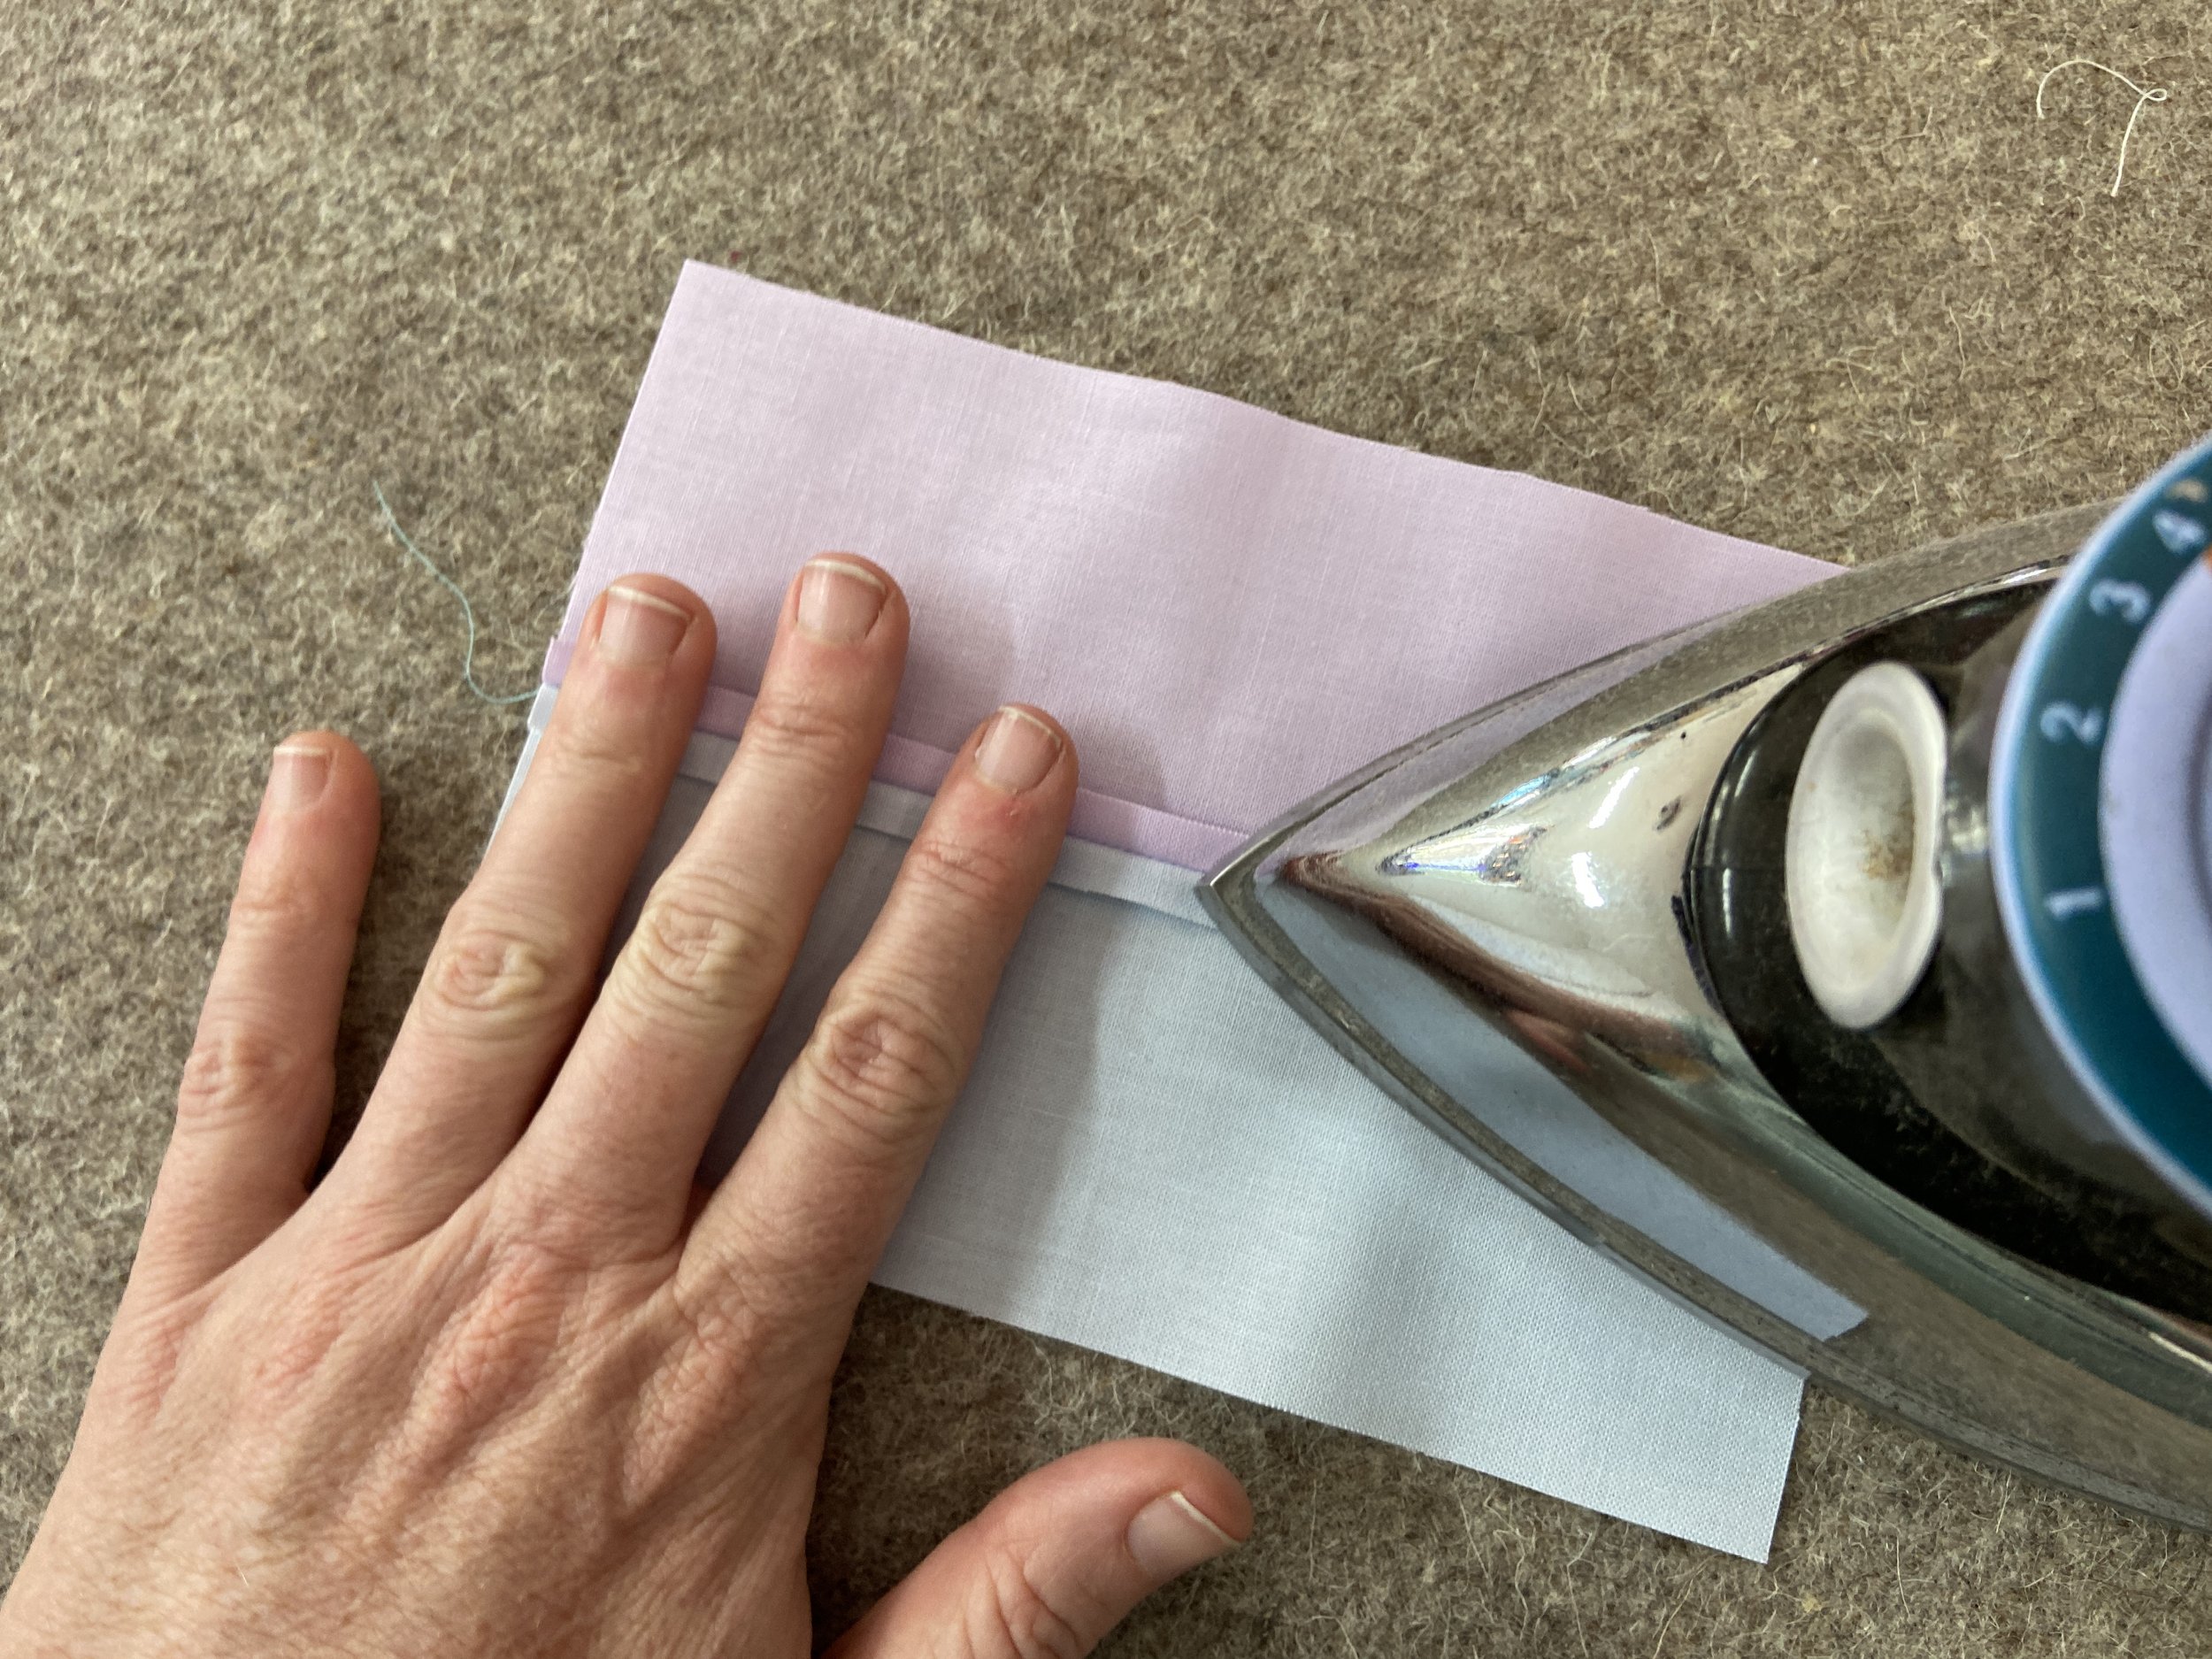
Then press the seams open with the iron. This is also an appropriate time to use starch.
When you are finished, your seams will look like this on the back.
They will look like this on the front – nice and flat. You should never skip this step. Taking the time to press will help your seams come together much better when you sew the blocks together.

Begin Sewing Together Your Blocks for Your First Quilt

Now it is time to sew each individual block together. If you laid out all your blocks, you may lay the first block on a small board to bring it to your sewing machine.
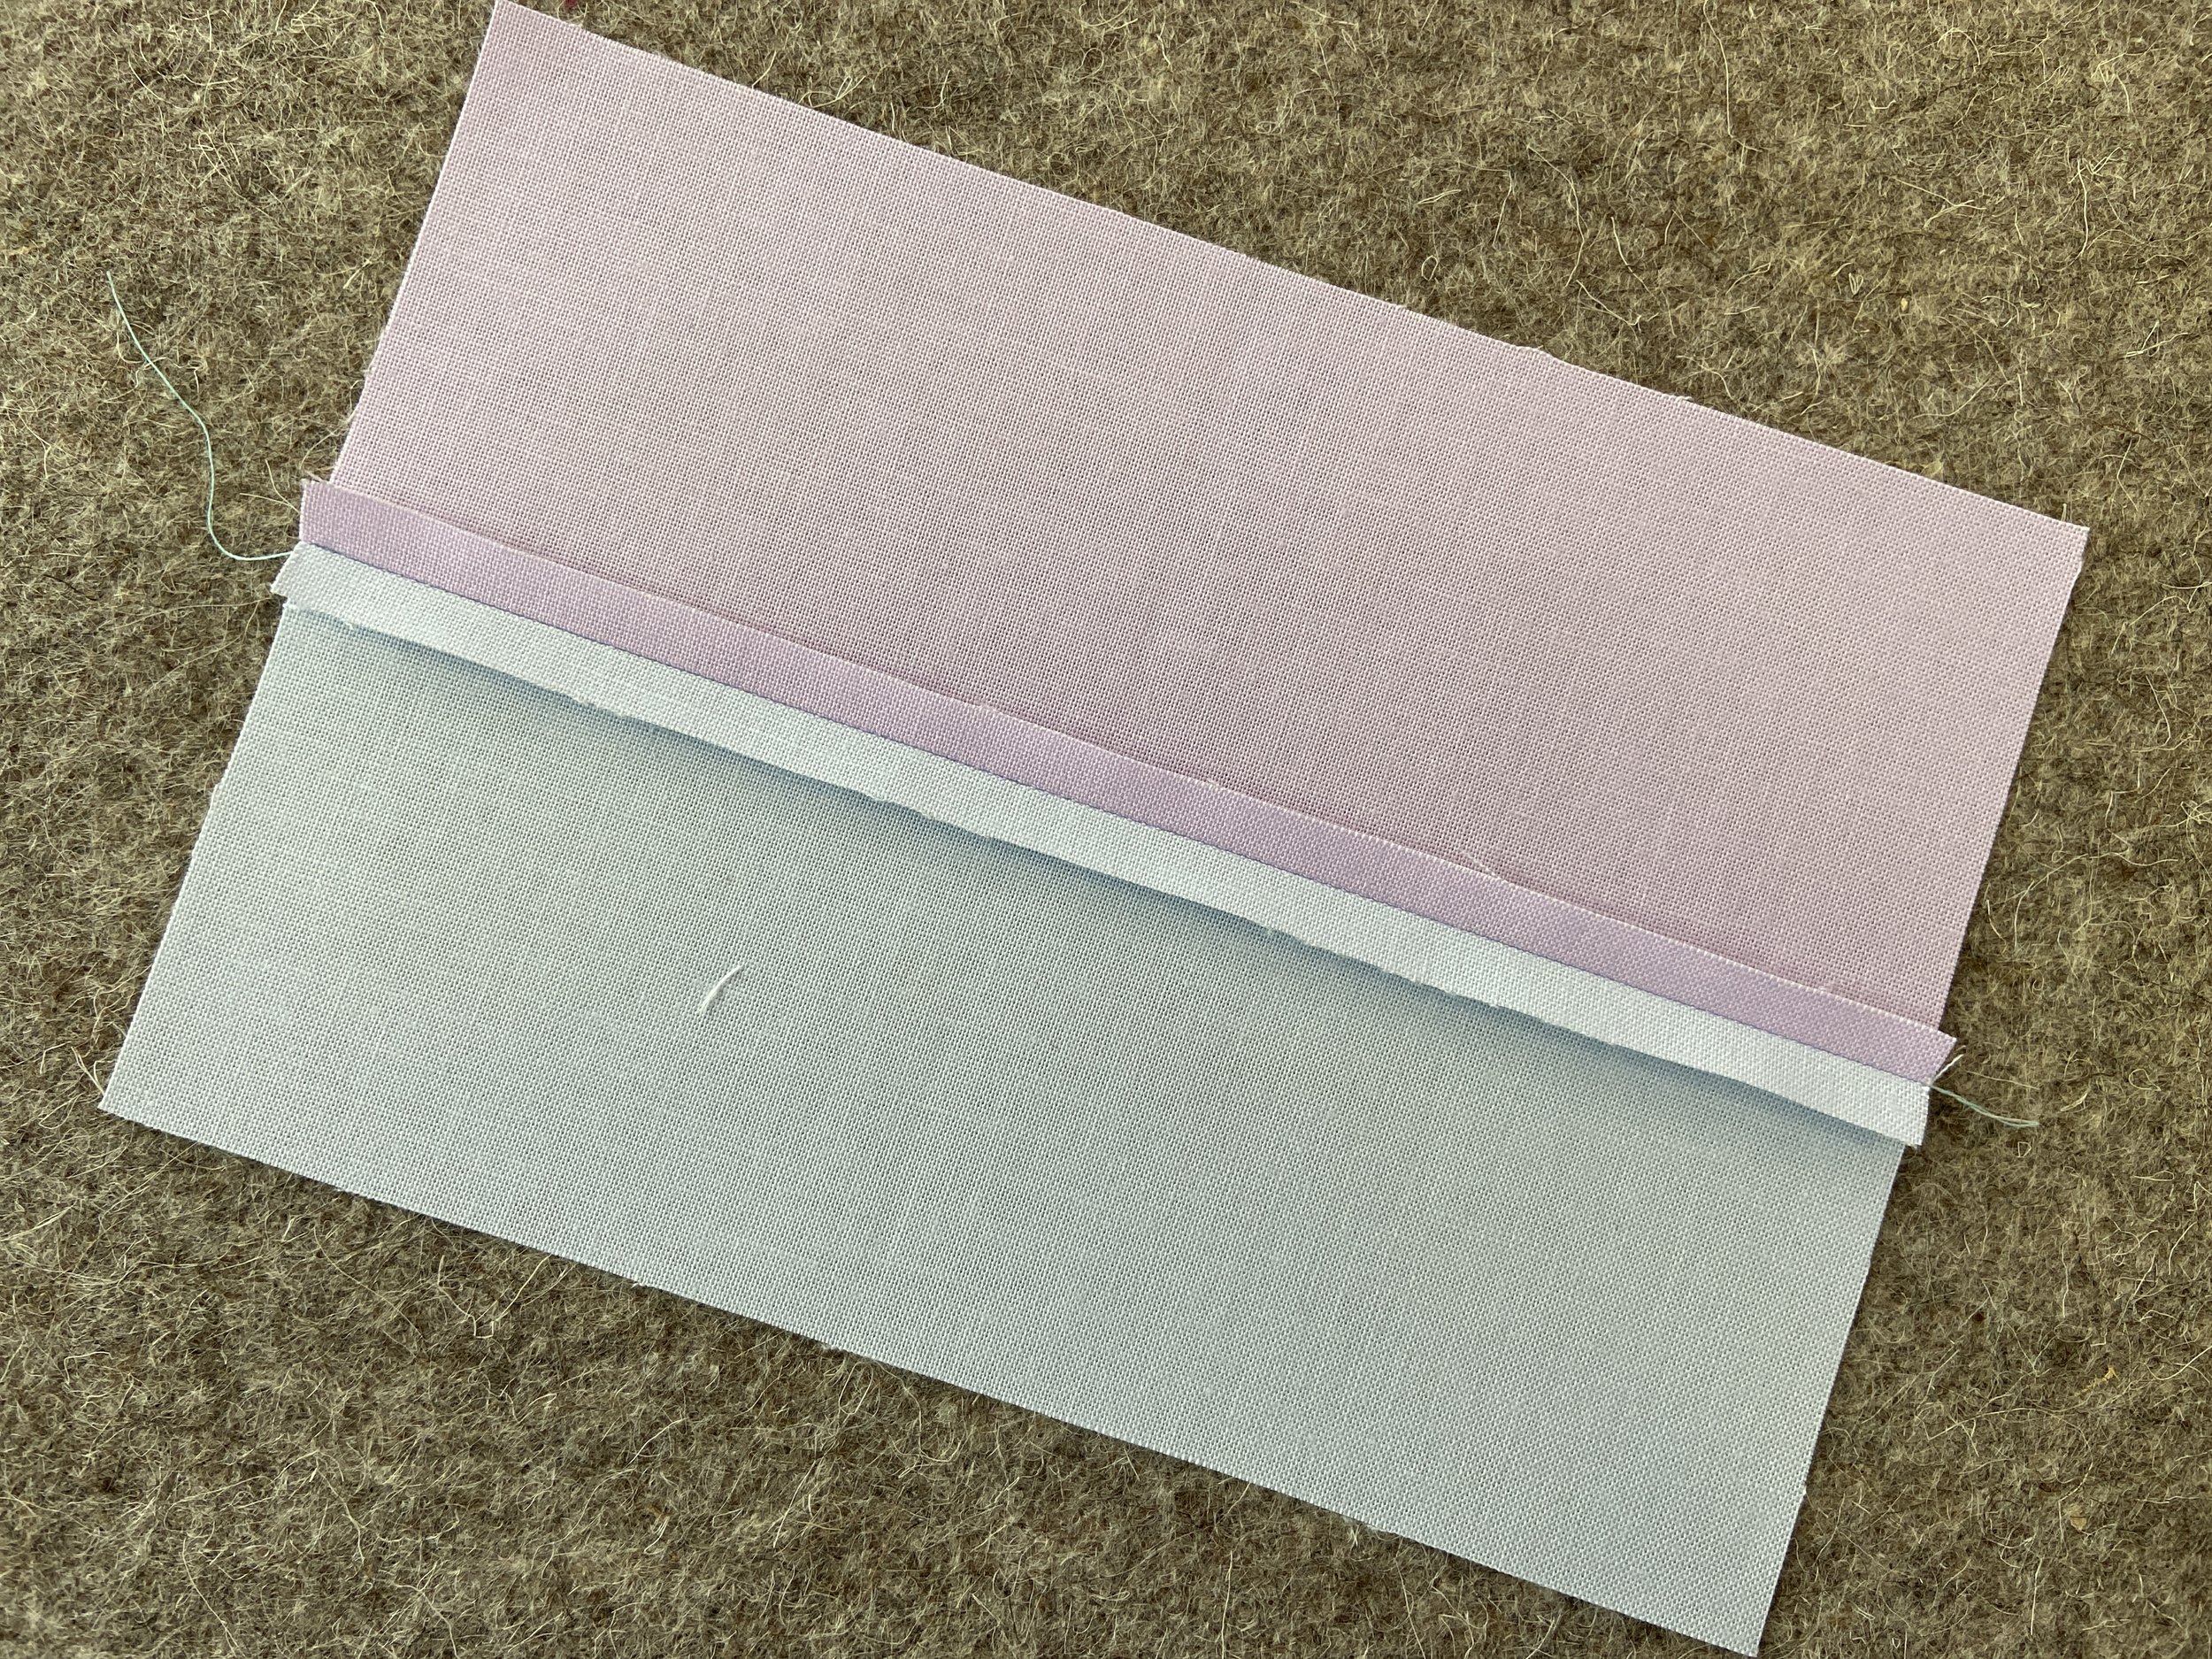
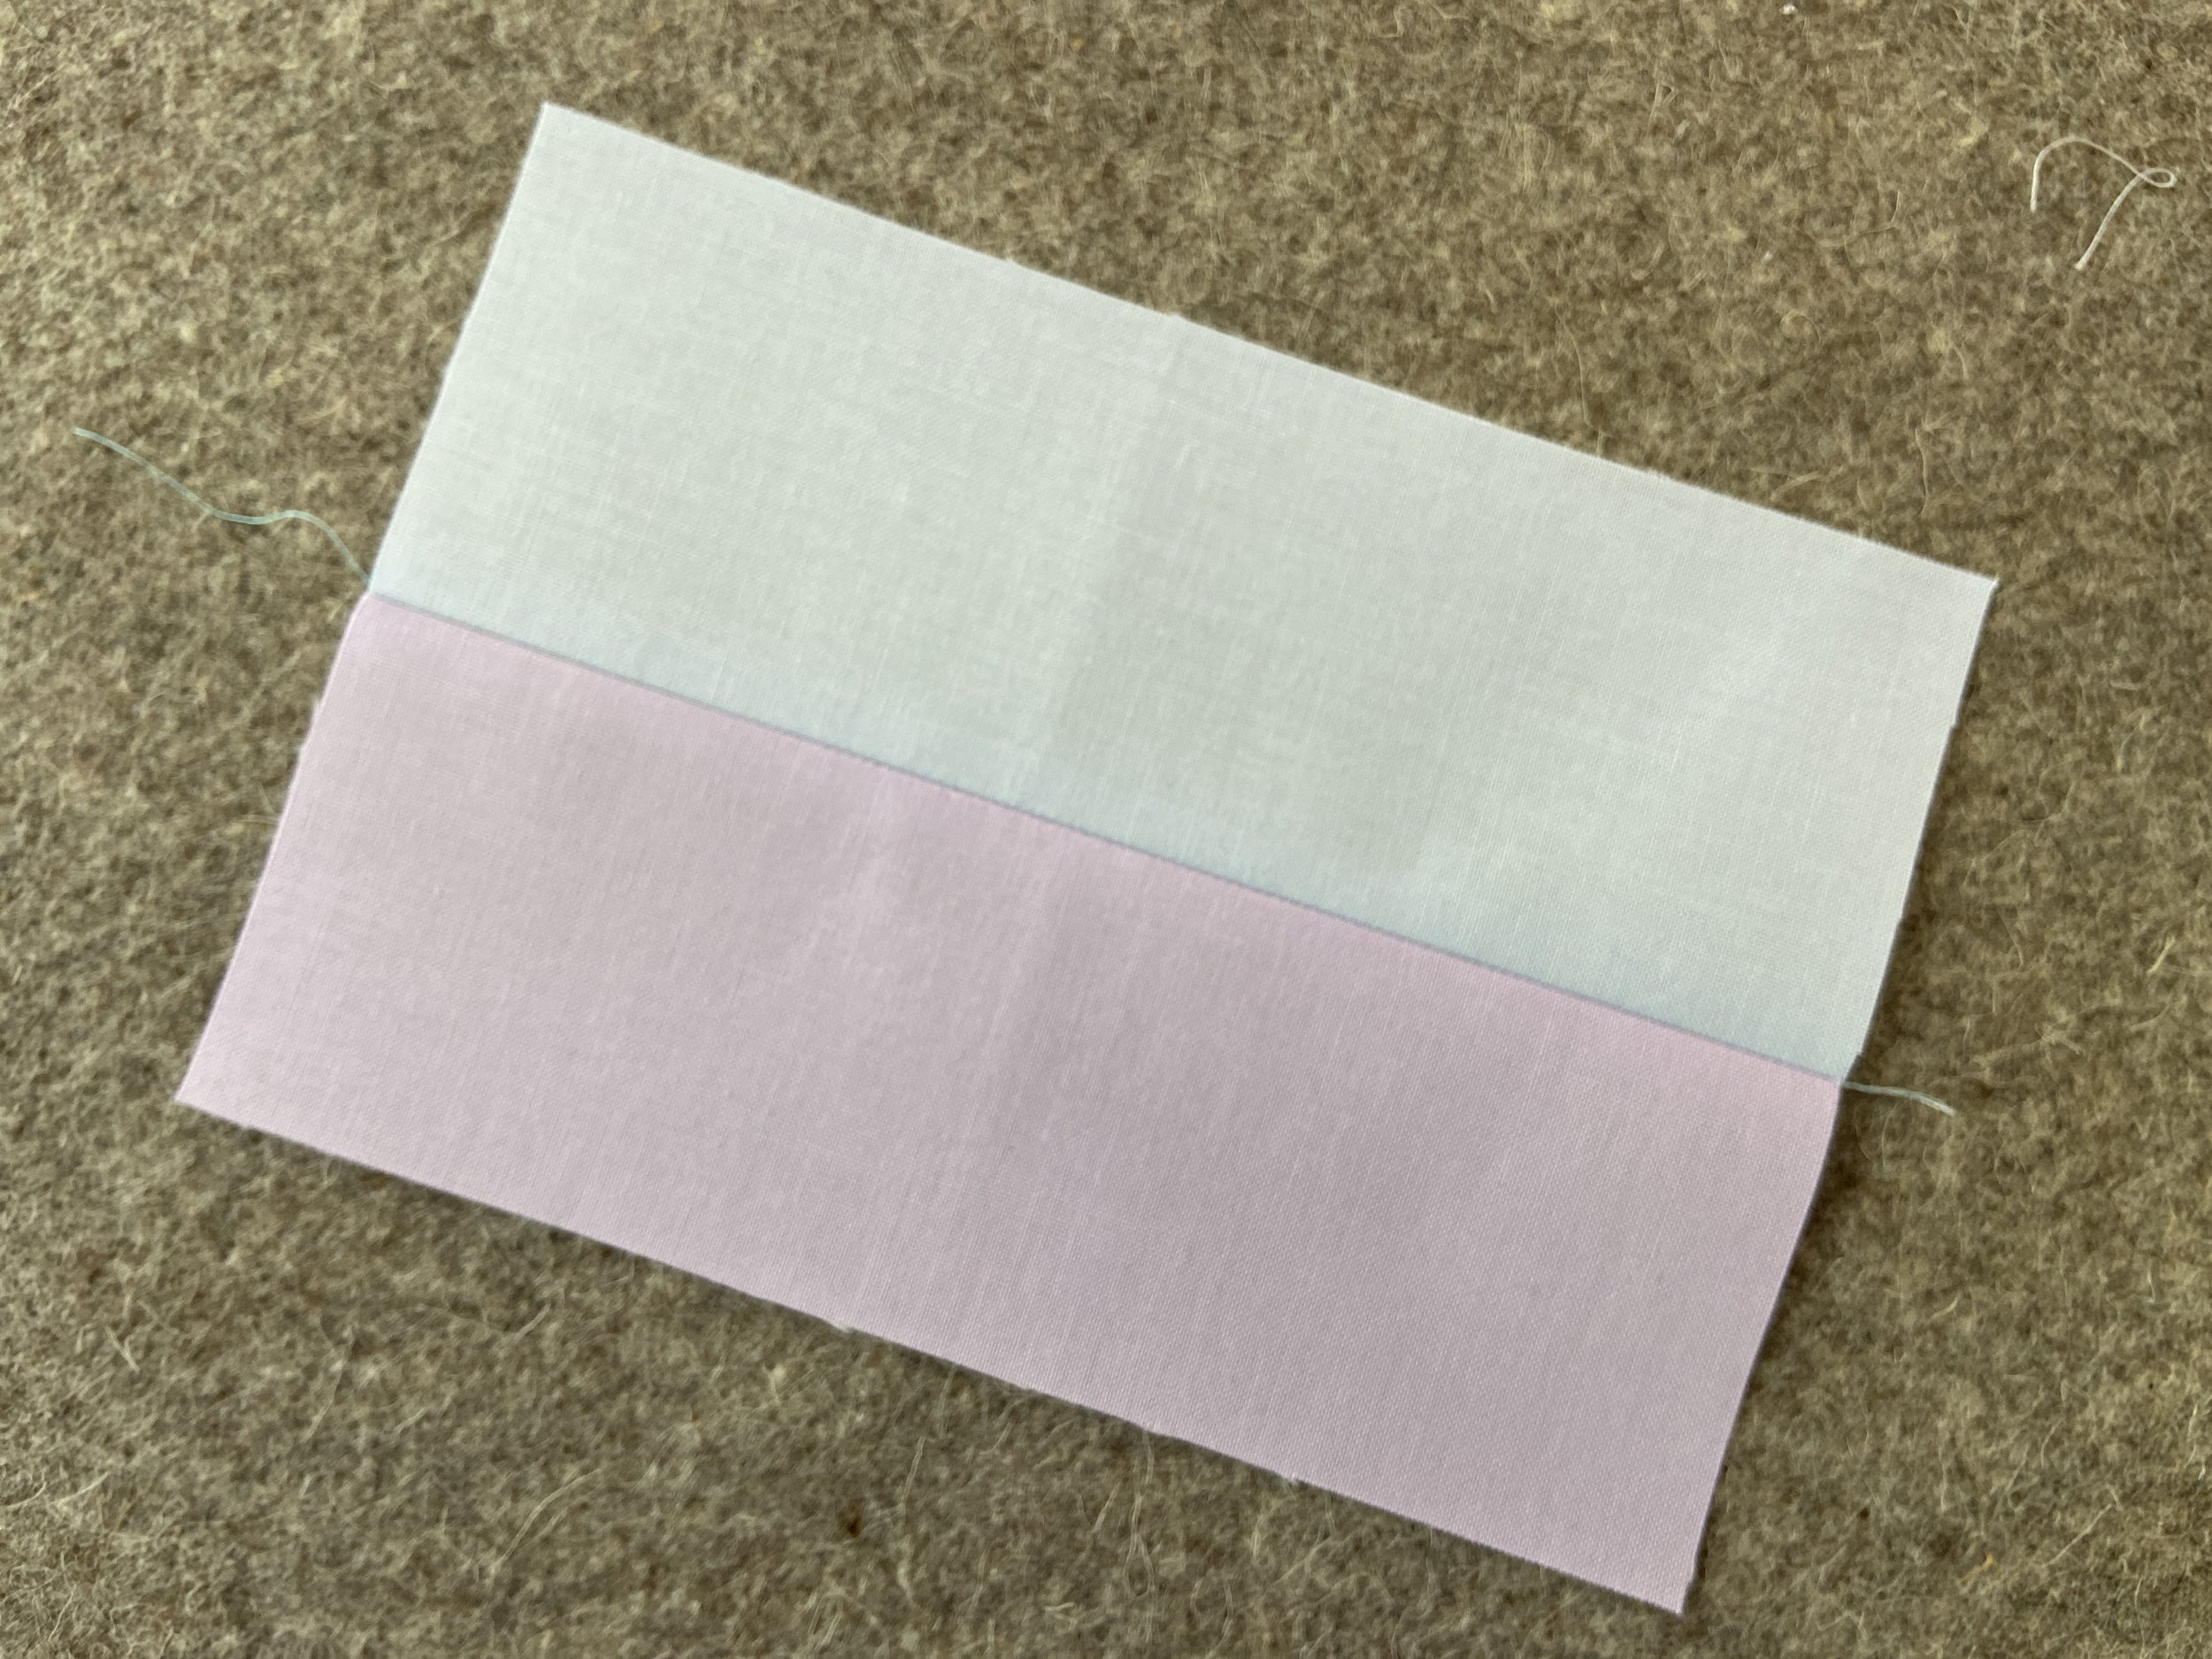
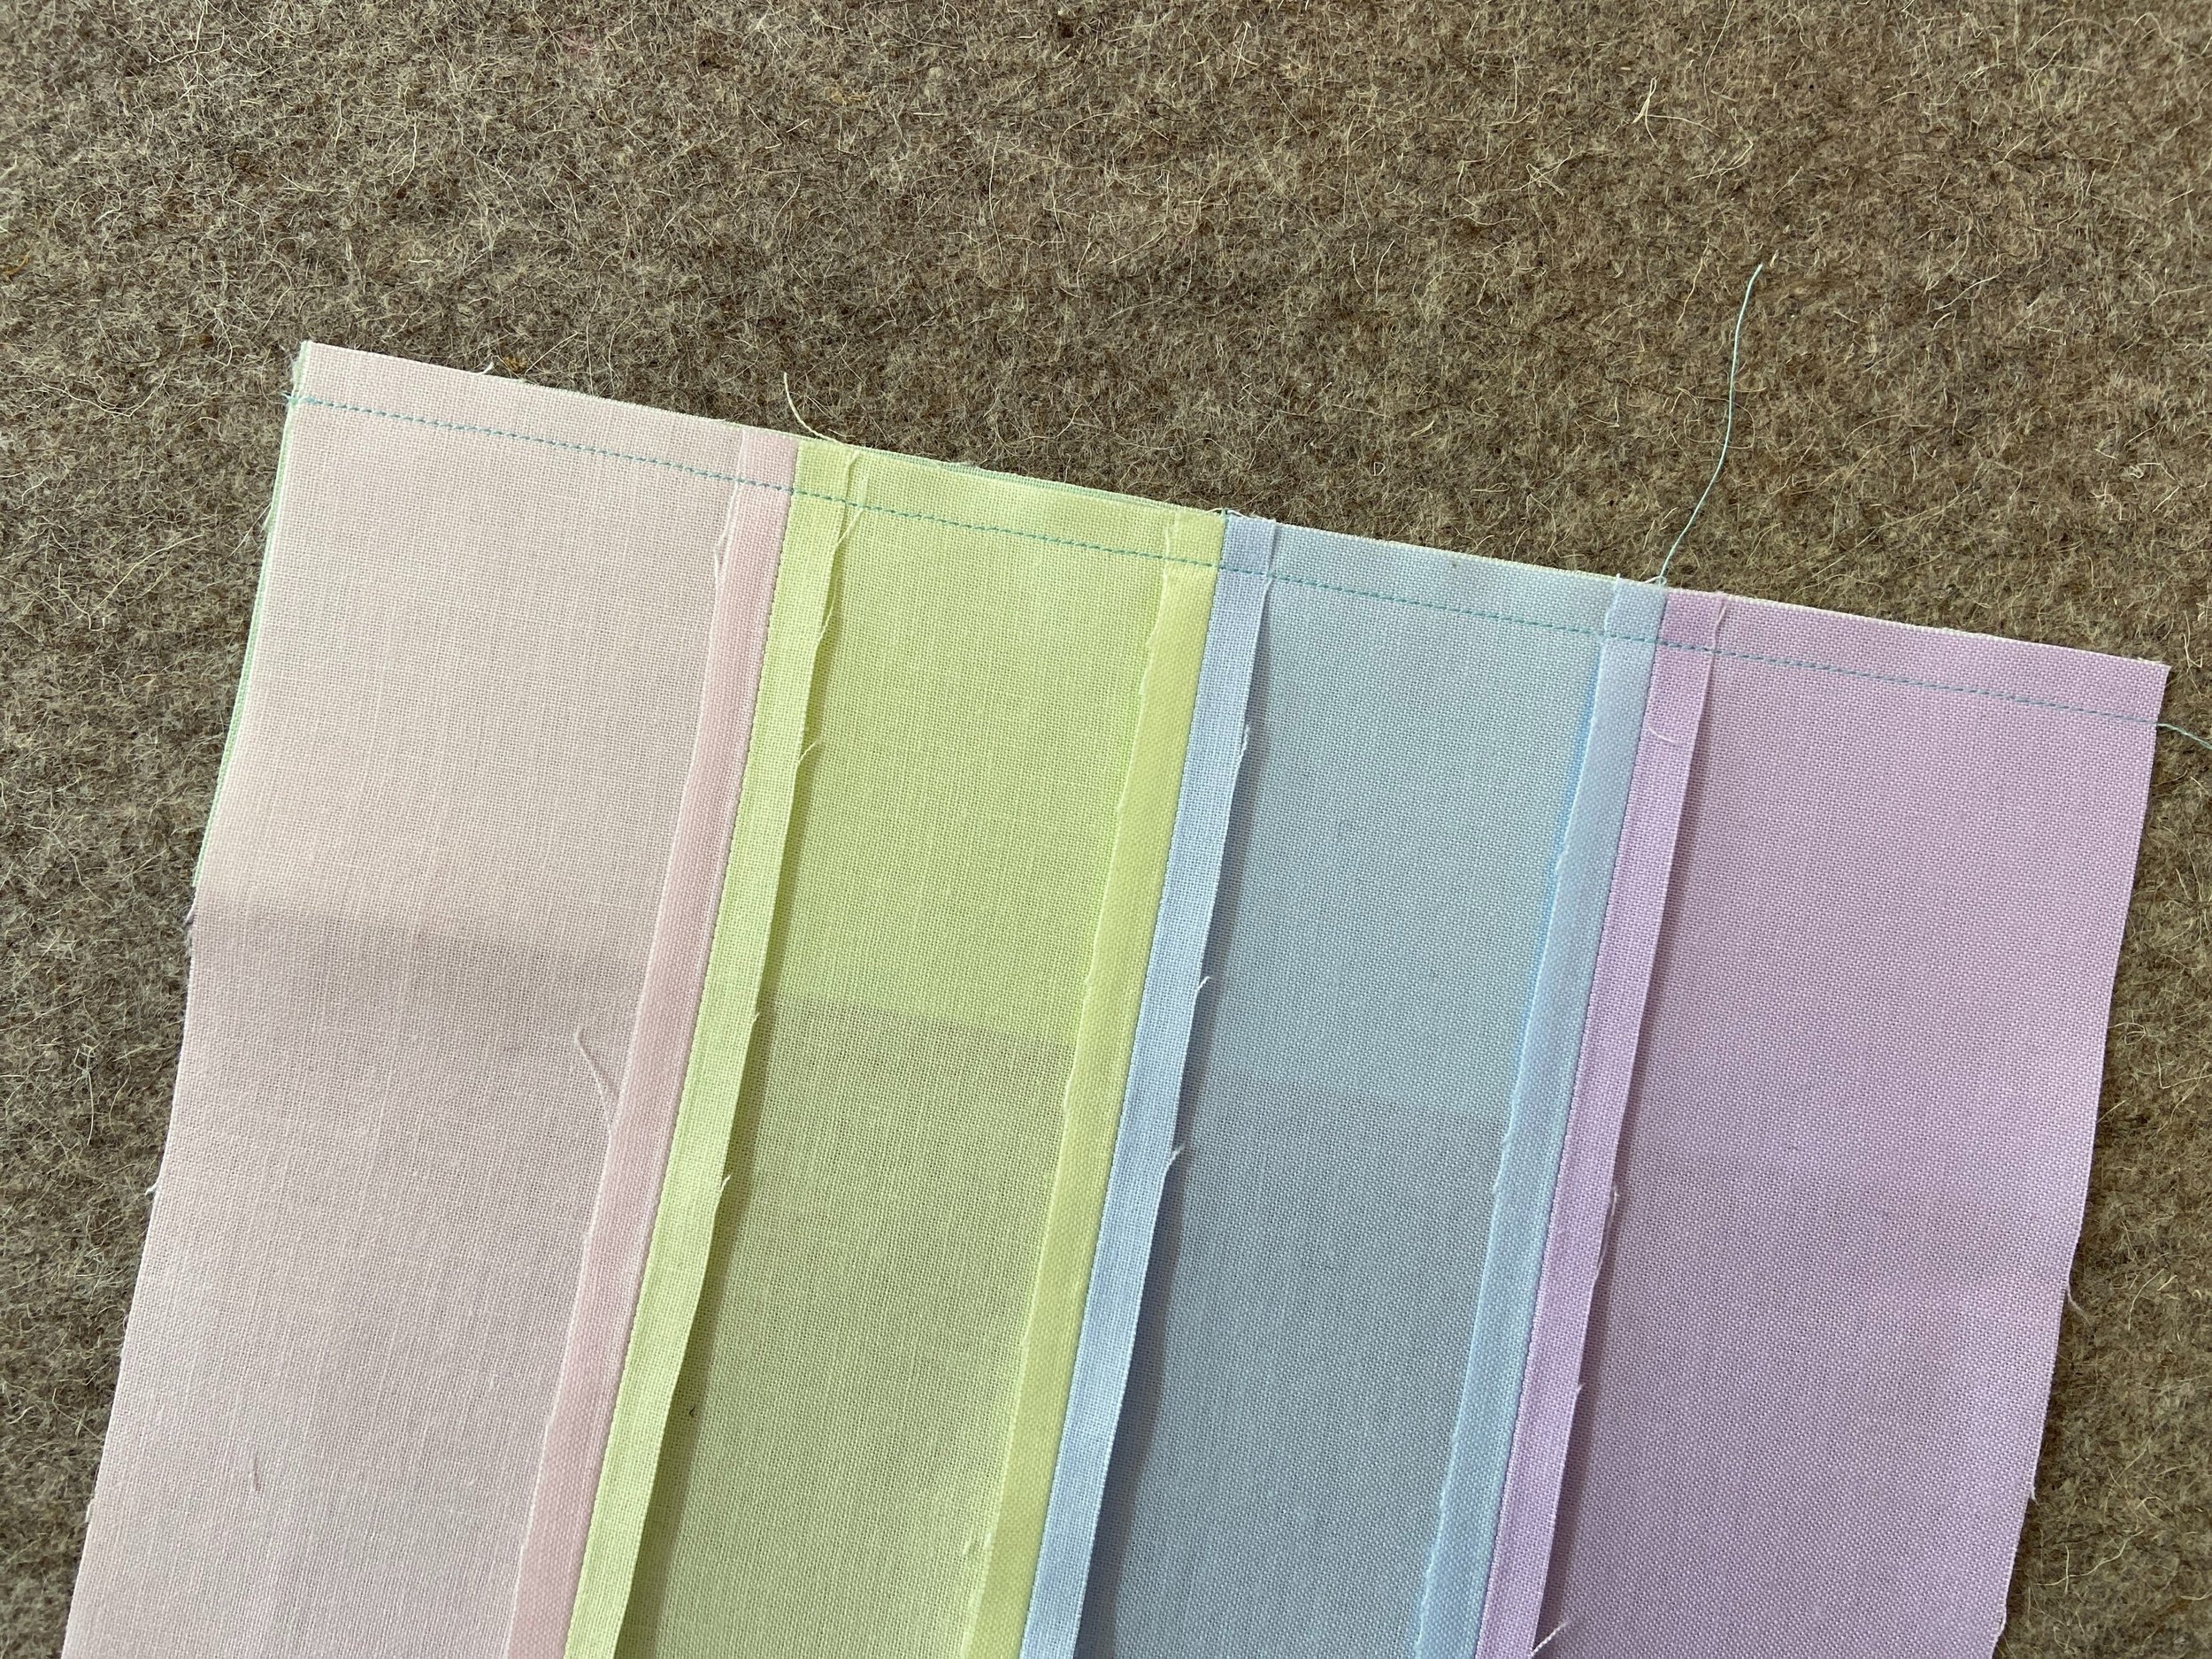
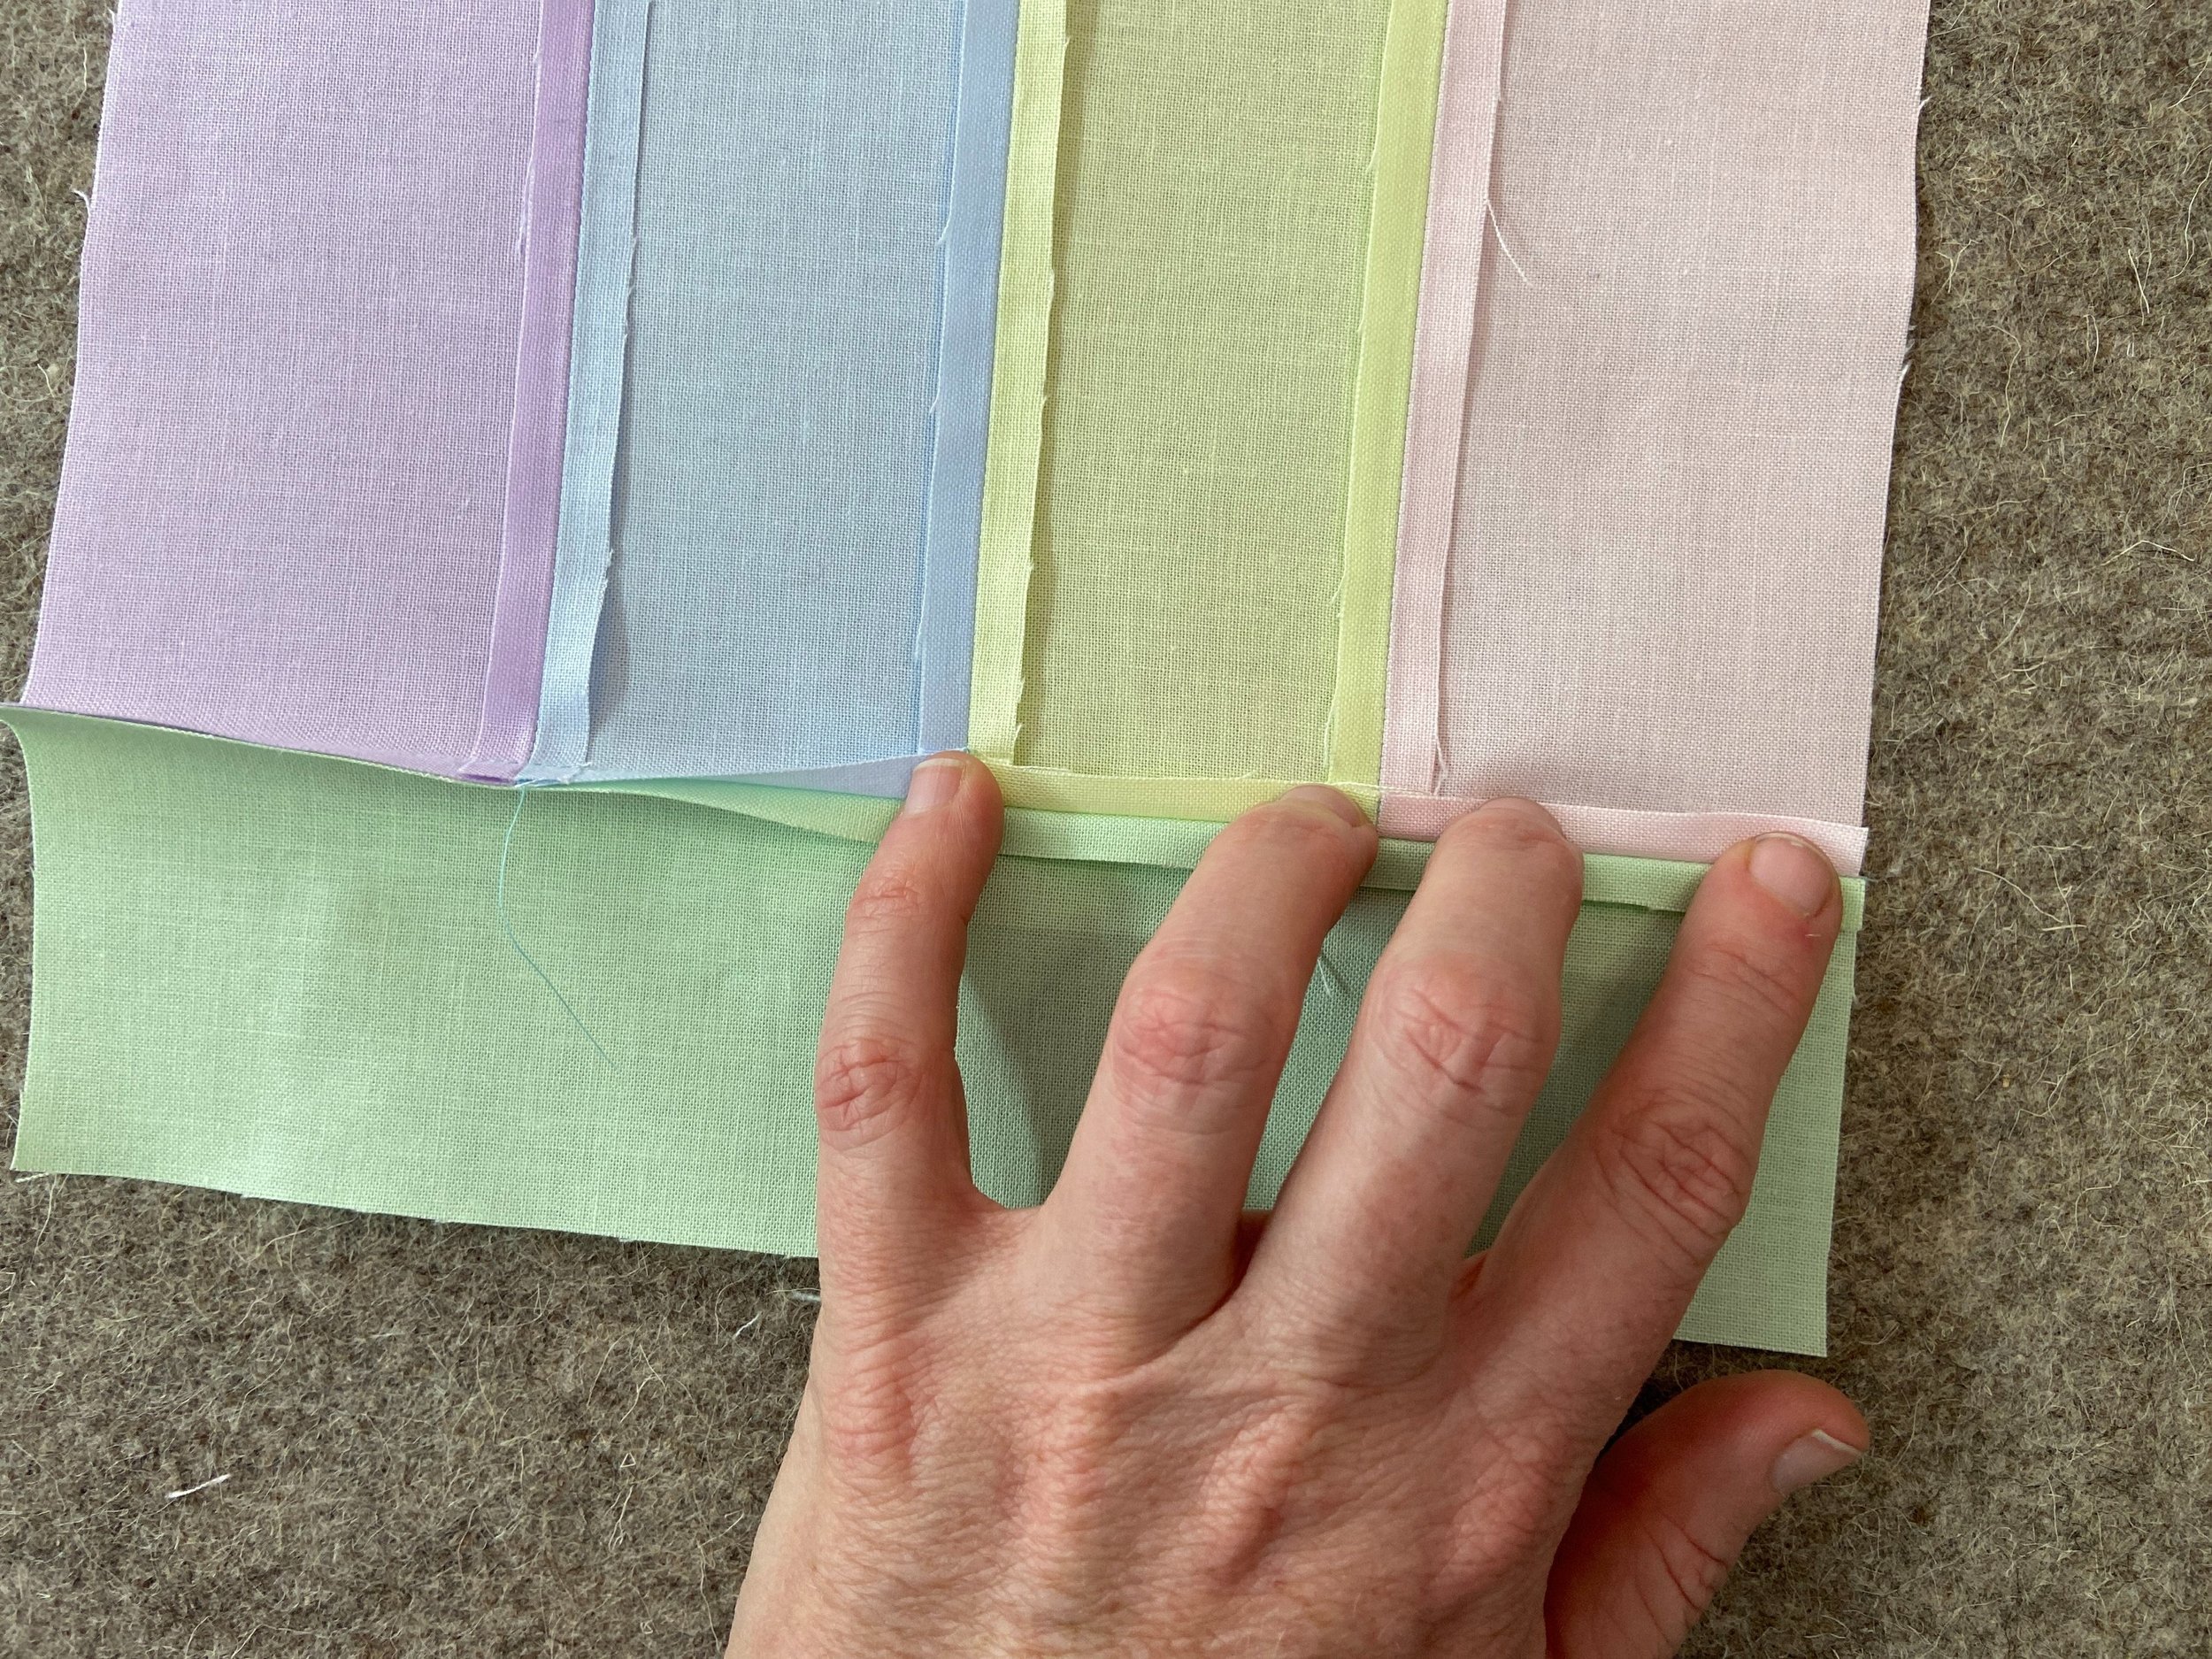
Step 1: In the picture above, we will begin by sewing the 2.5” x 6.5” strips together two at a time. Sew the pink to the yellow. Then sew the blue to the purple. You can sew these, one right after the other. This is called Chain Stitching or Chain Piecing.
Chain Piecing: When you need to sew seams for a significant number of the same type of blocks, you can begin running them through your sewing machine one right after the other without cutting threads. It is faster and saves you on the thread. Once you finish with a single chain, you can clip the blocks apart by snipping the threads keeping each block connected.
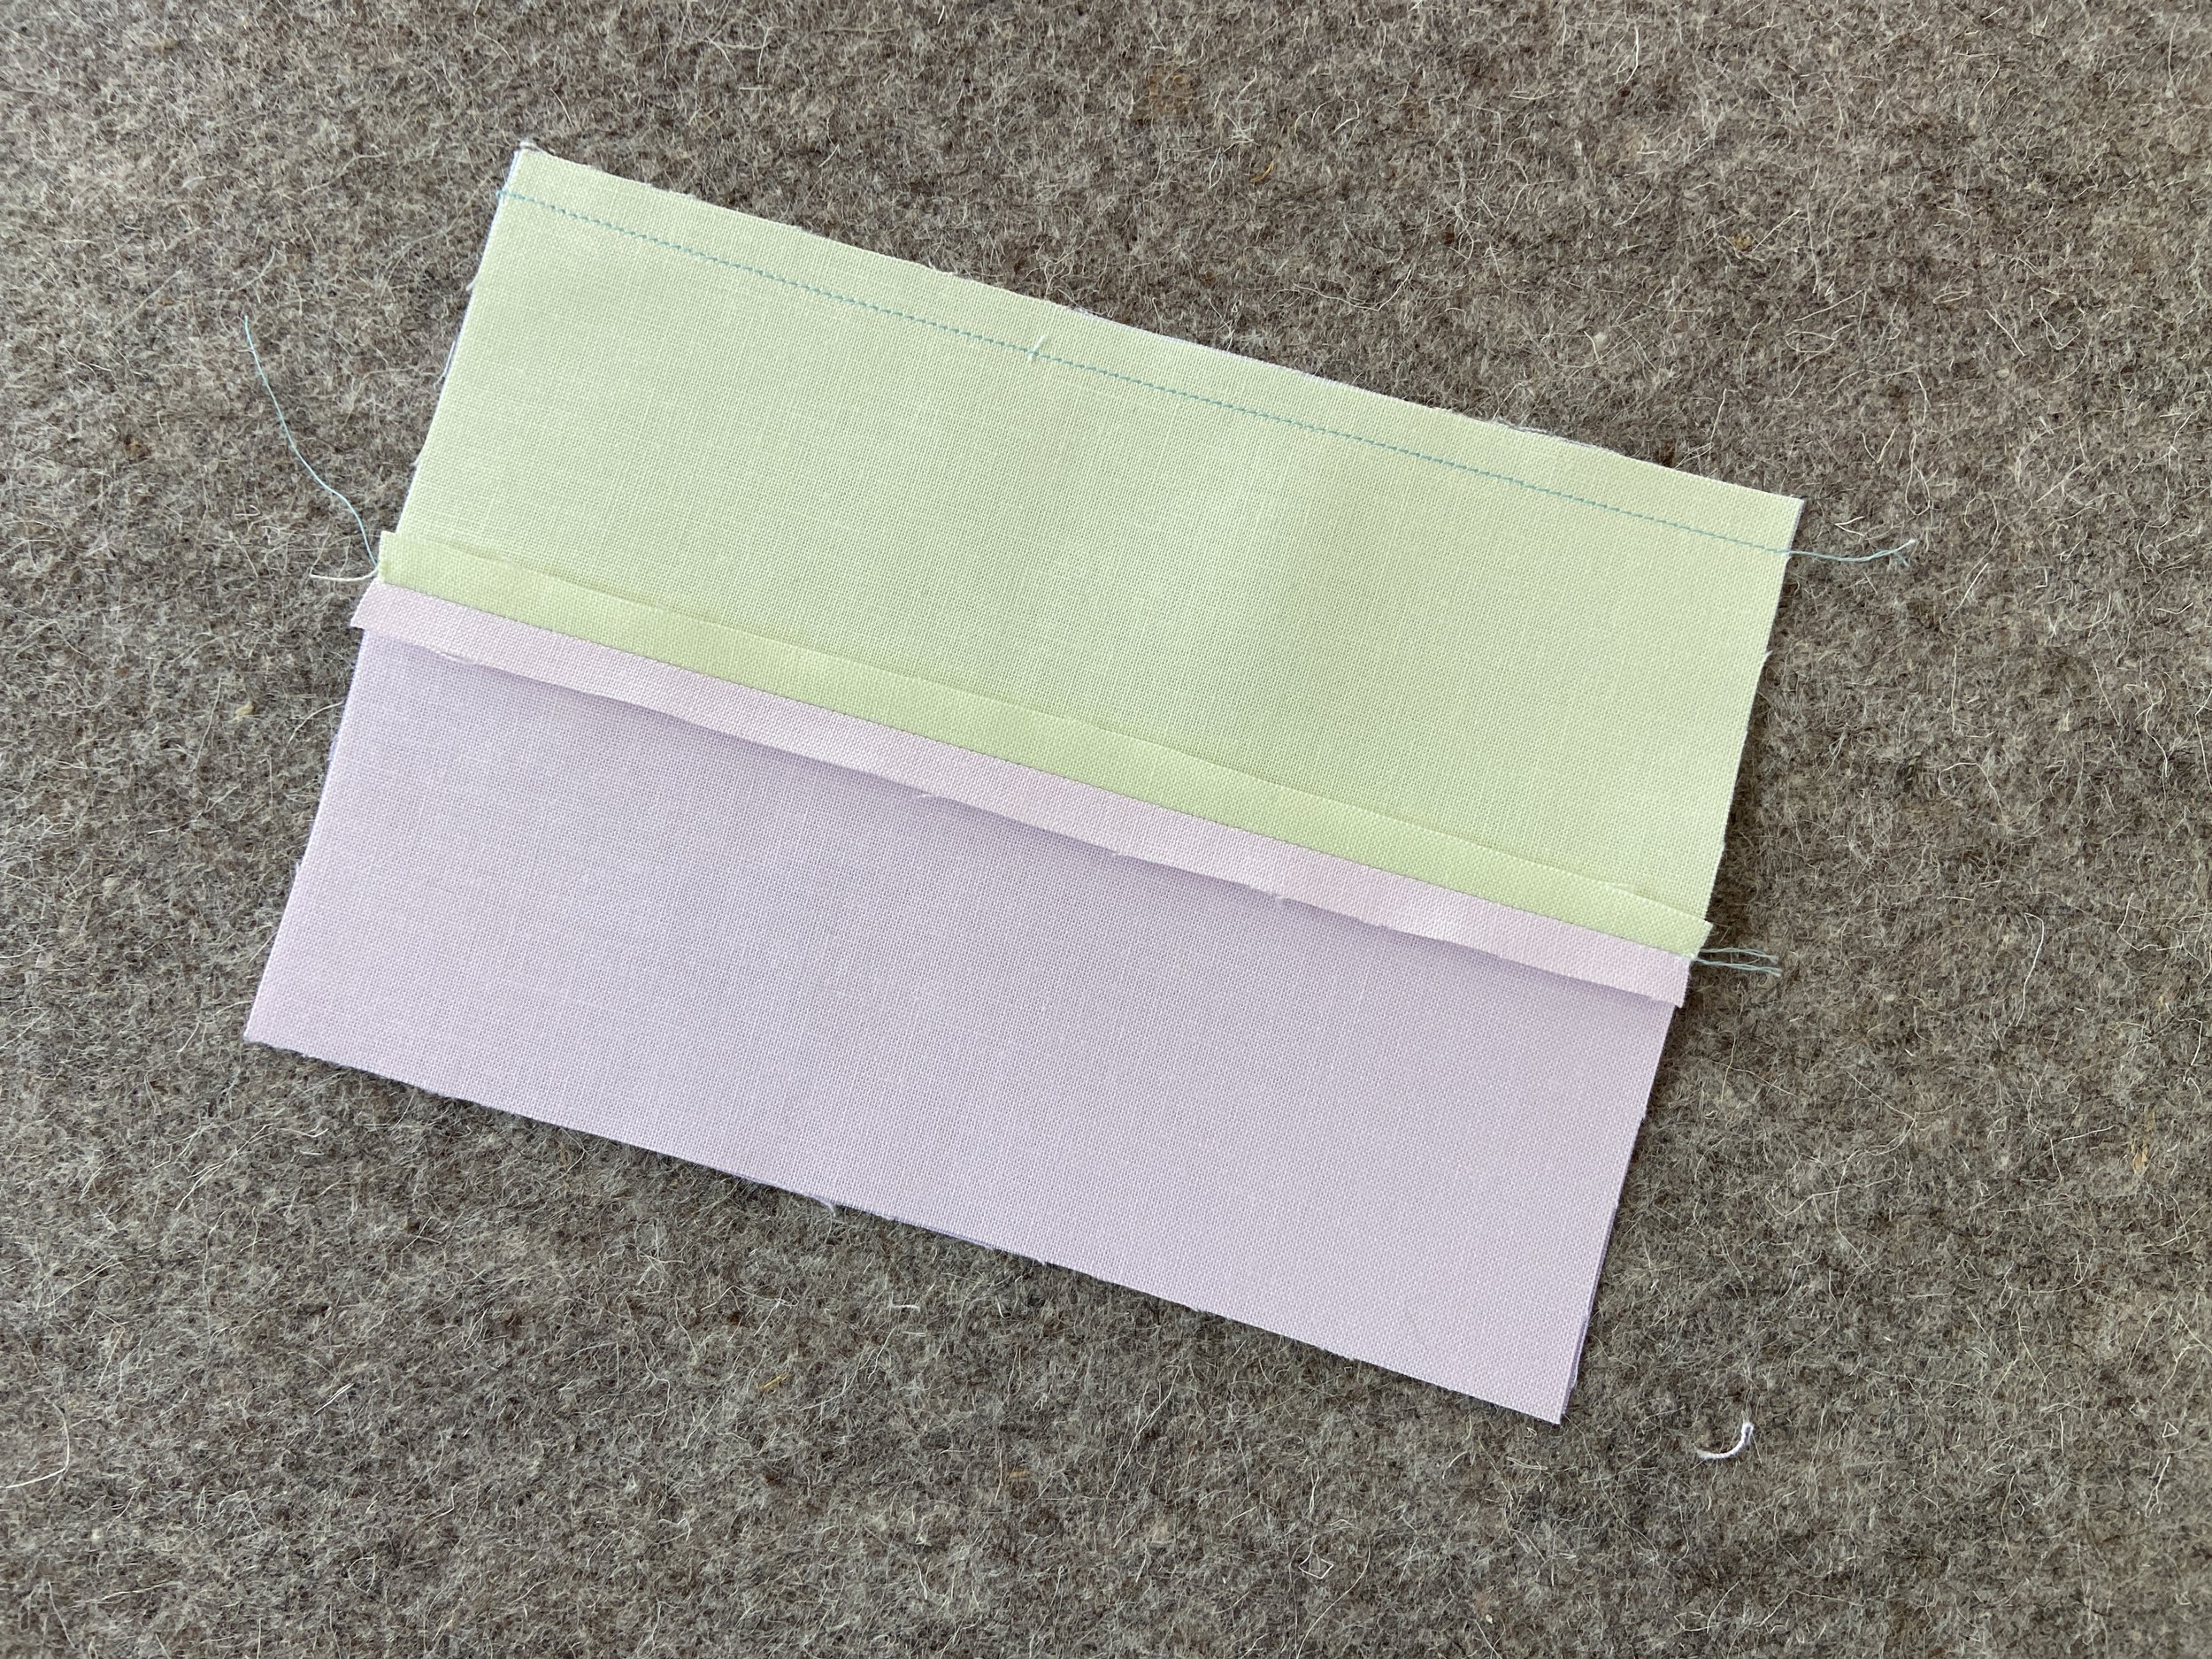
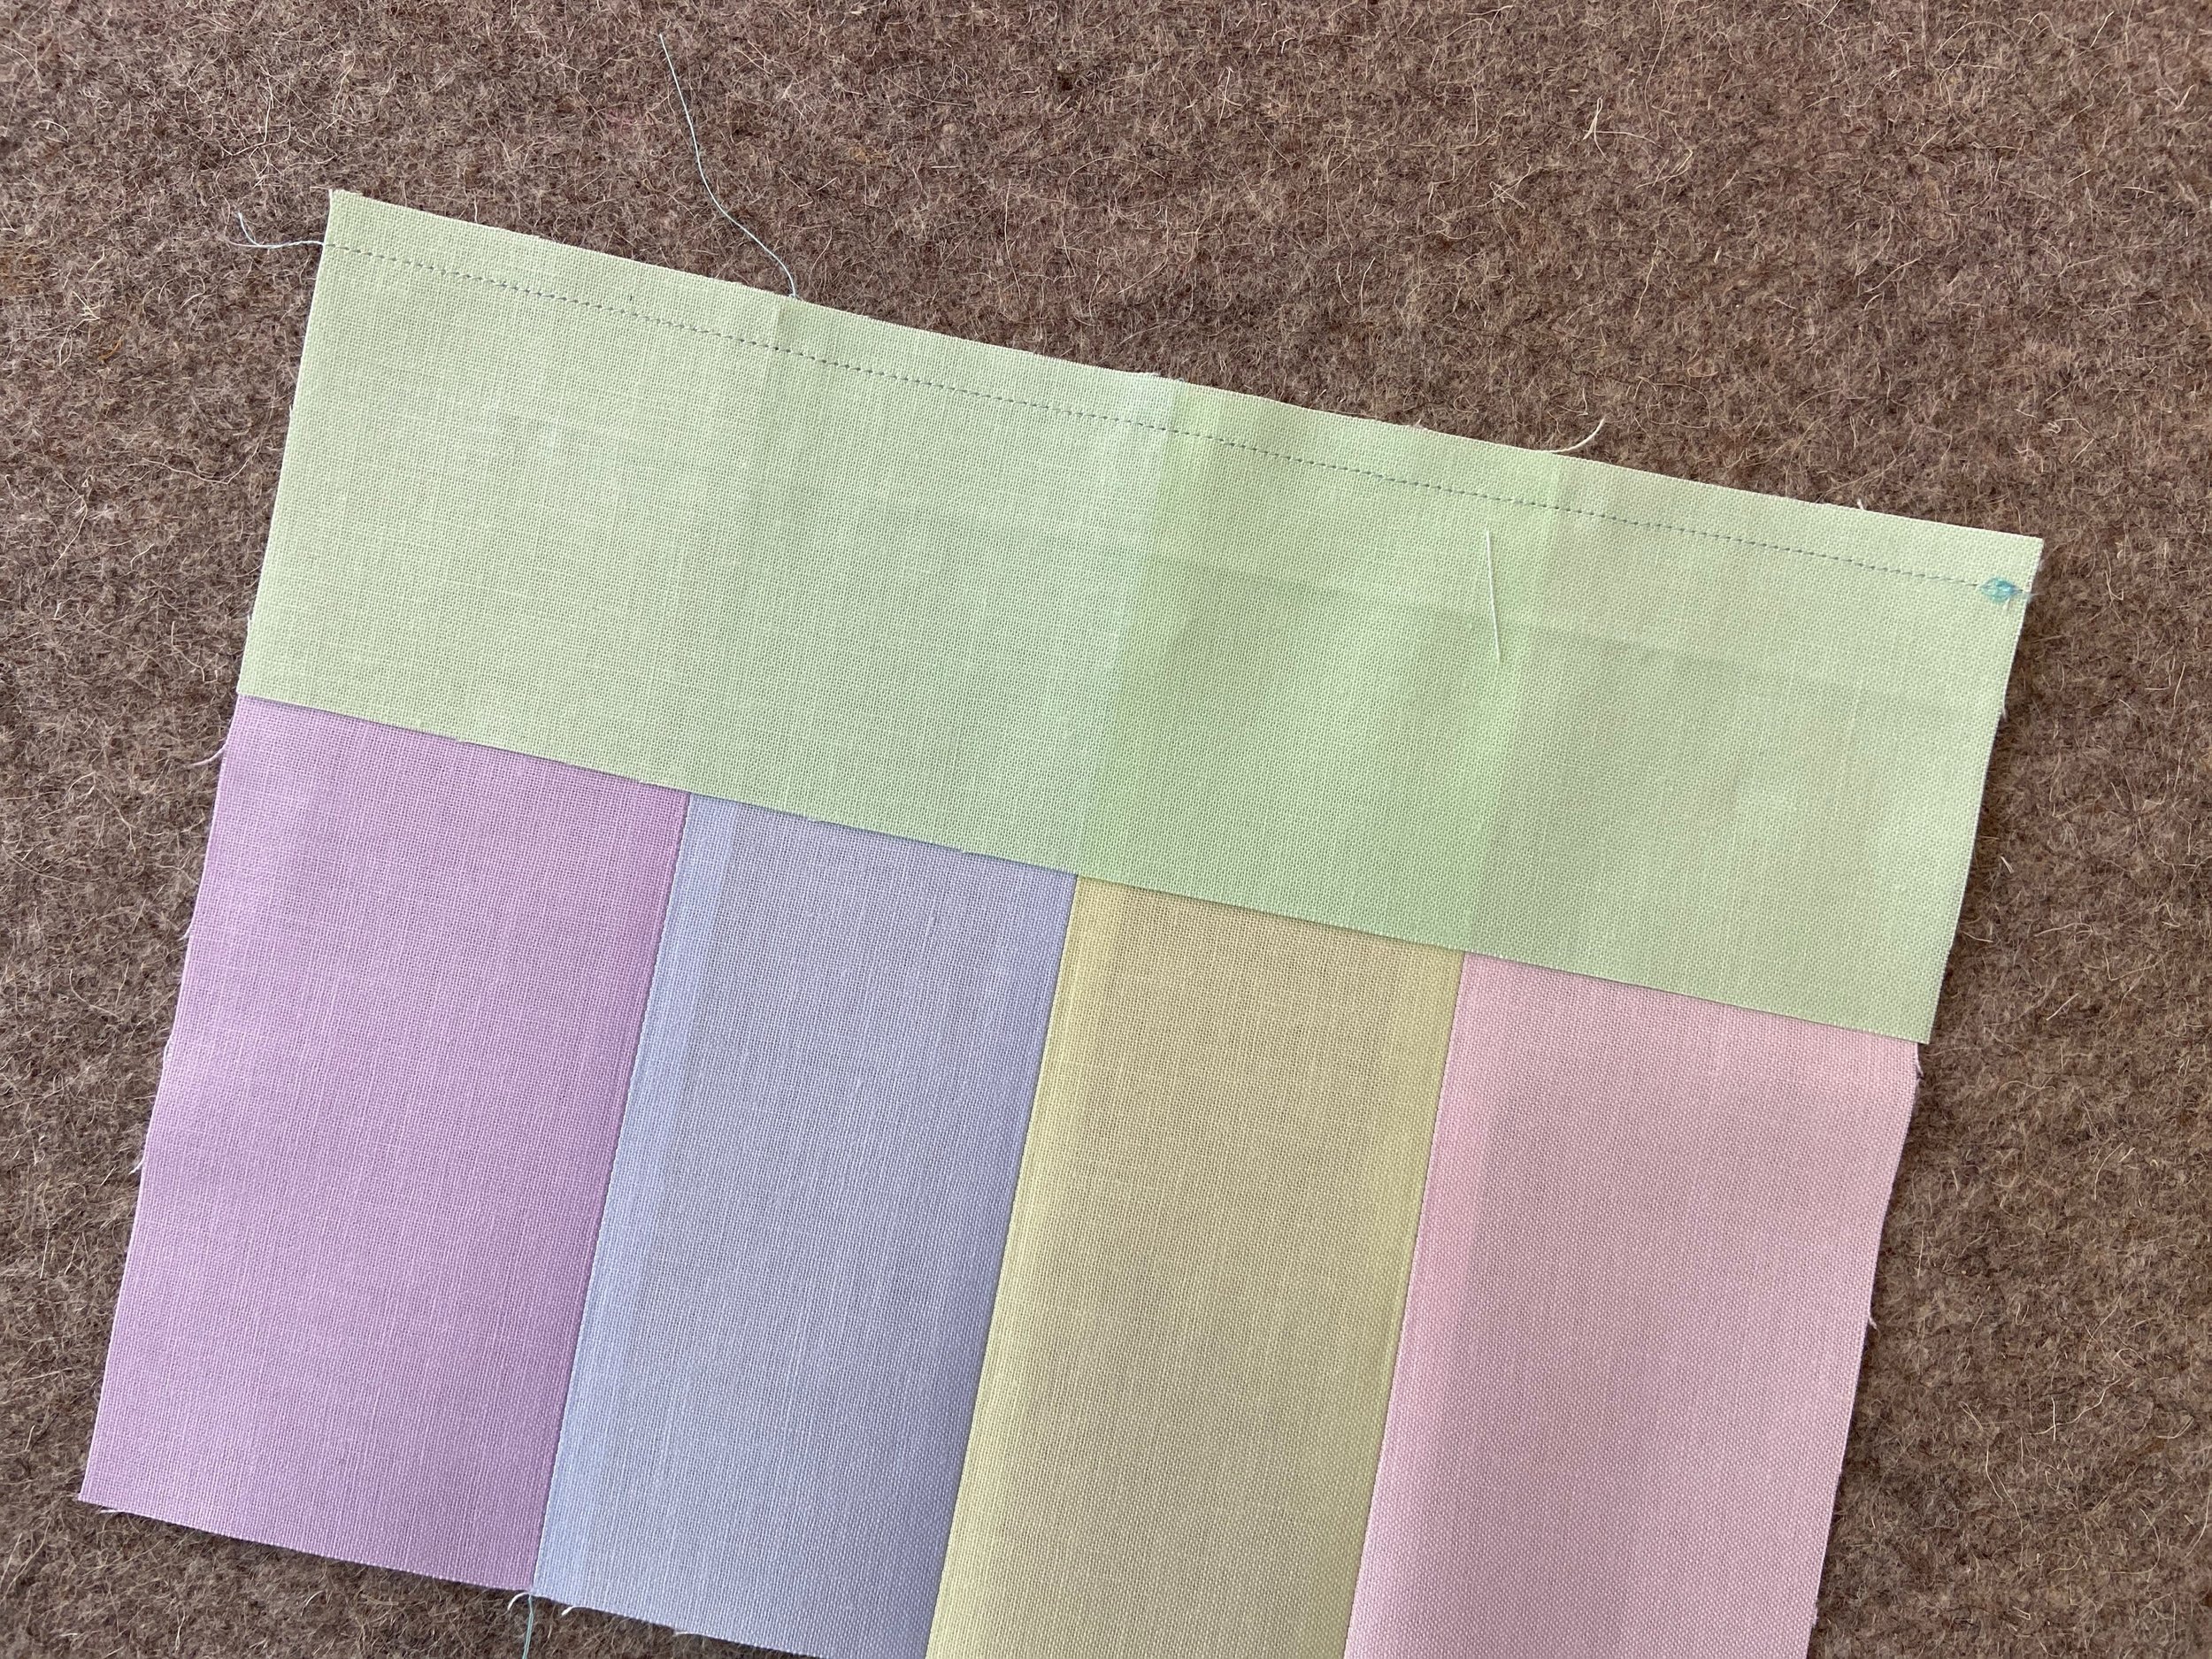
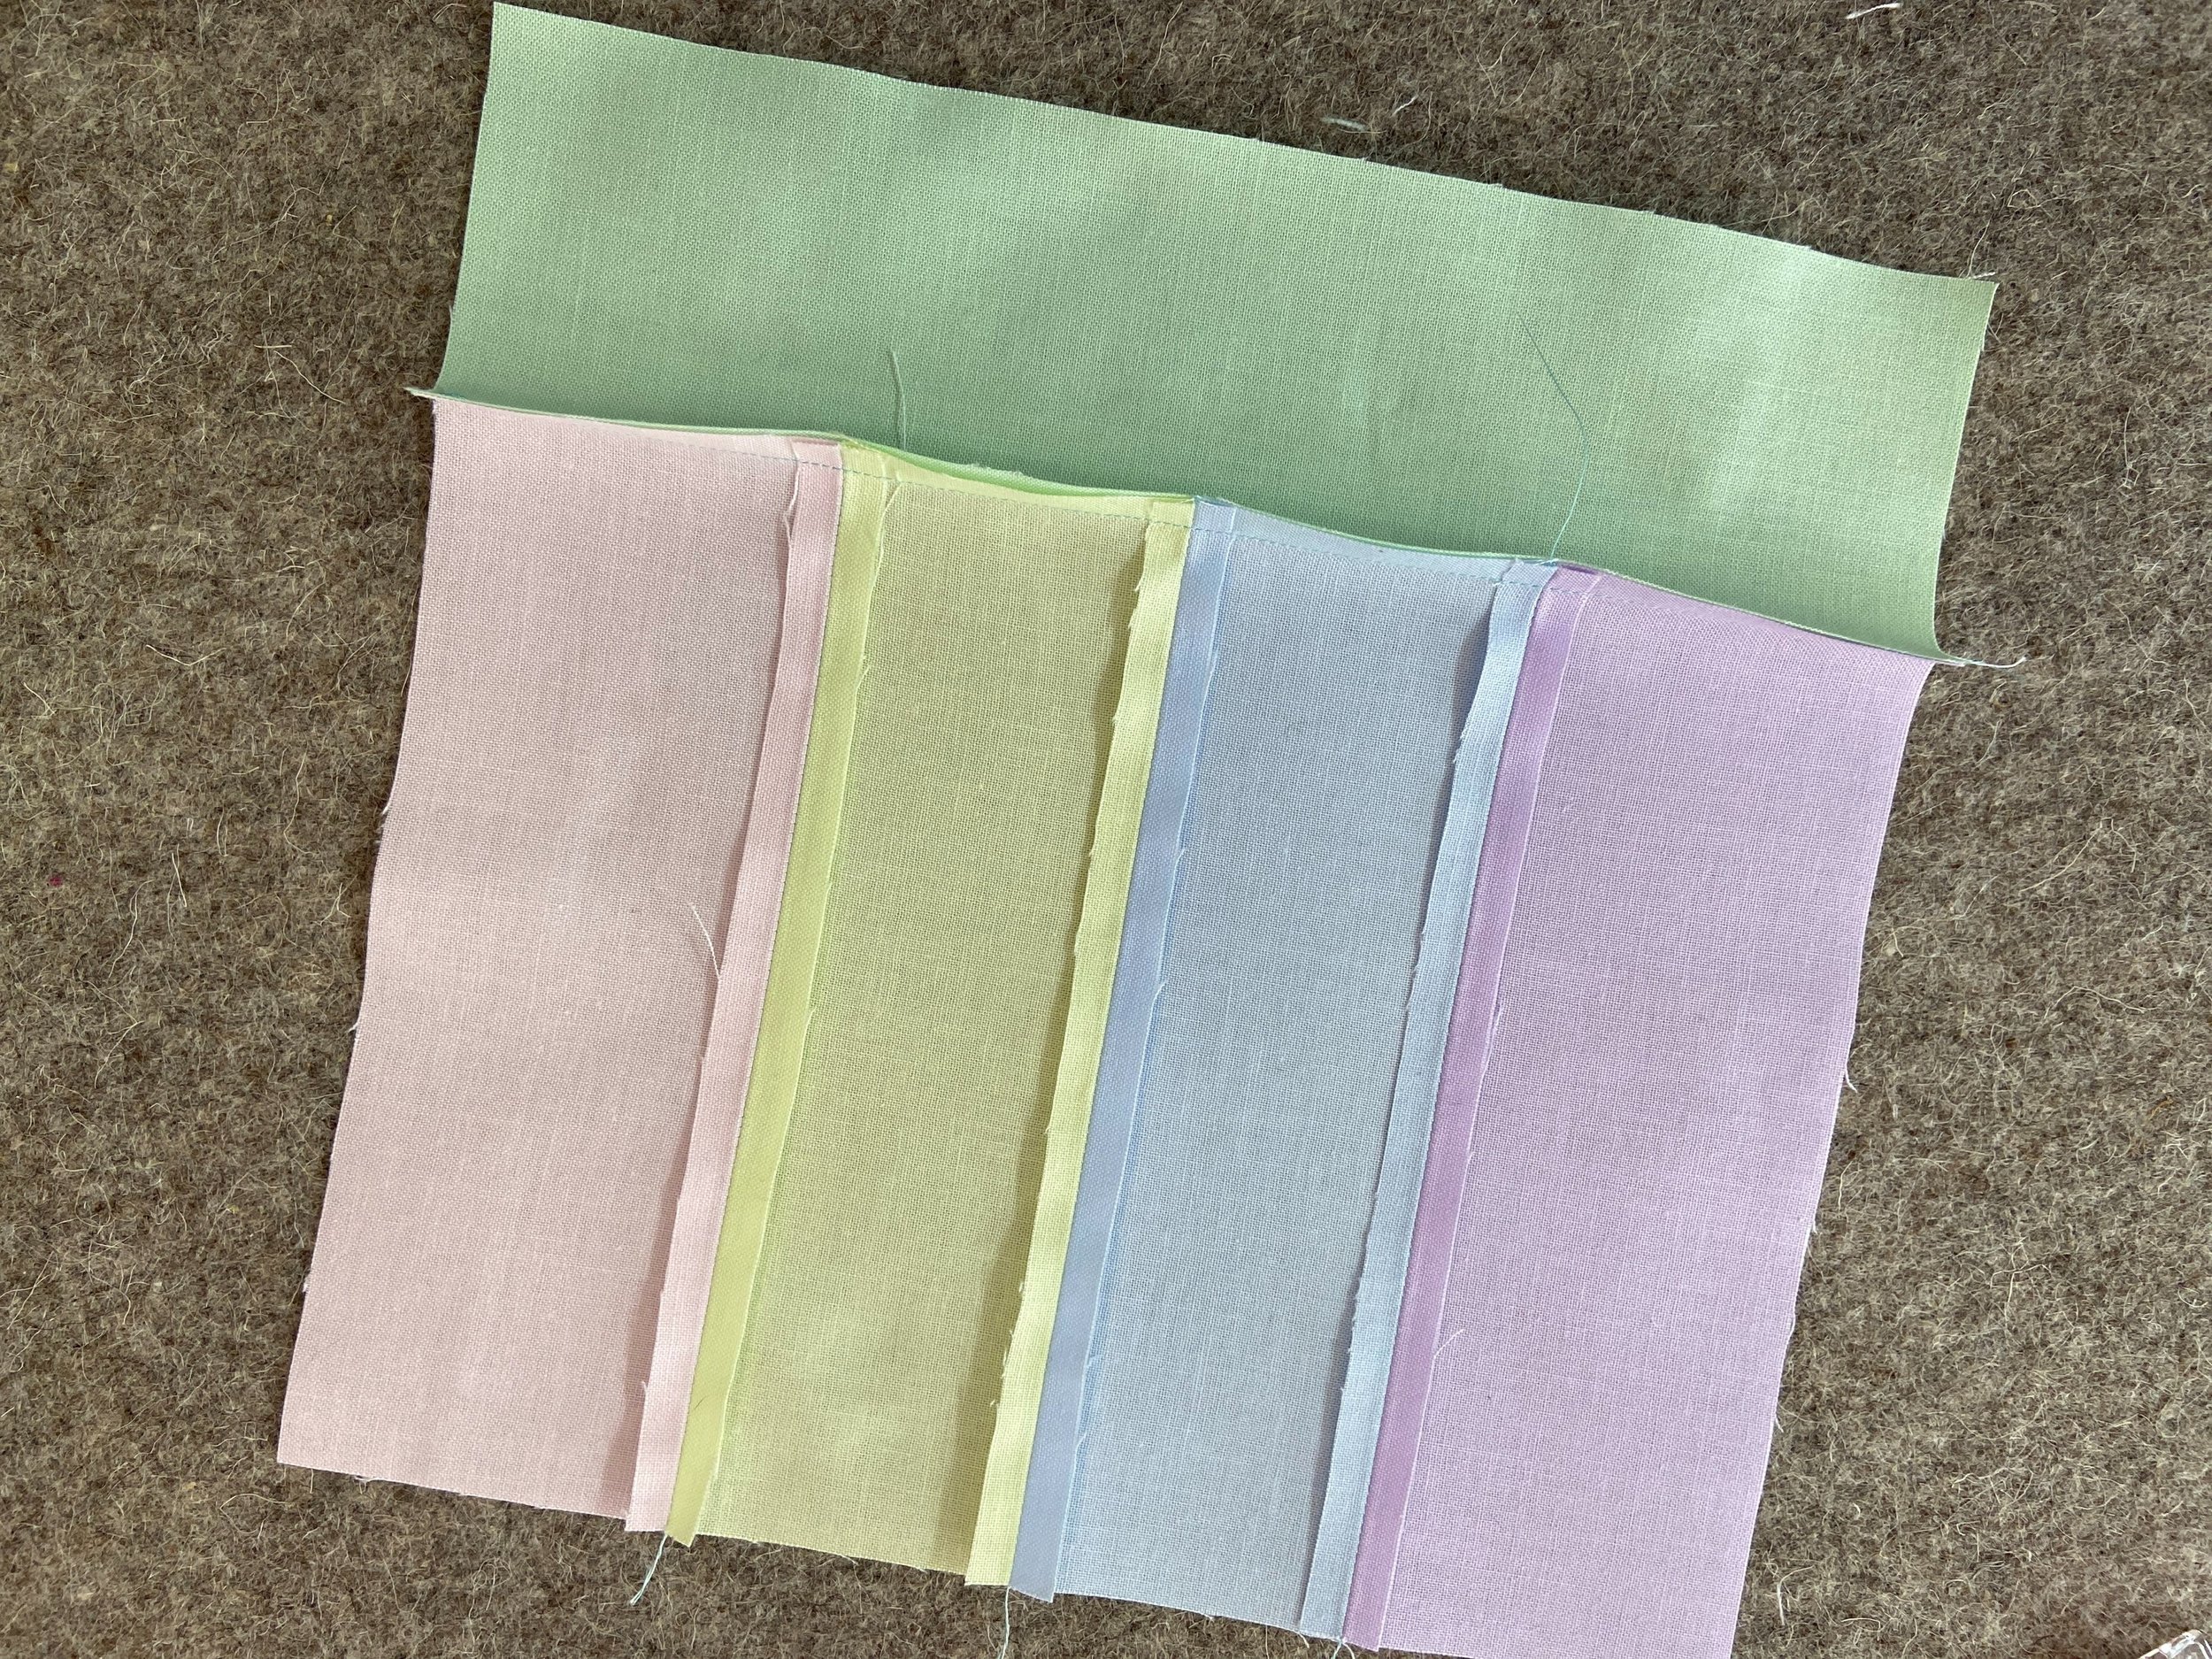
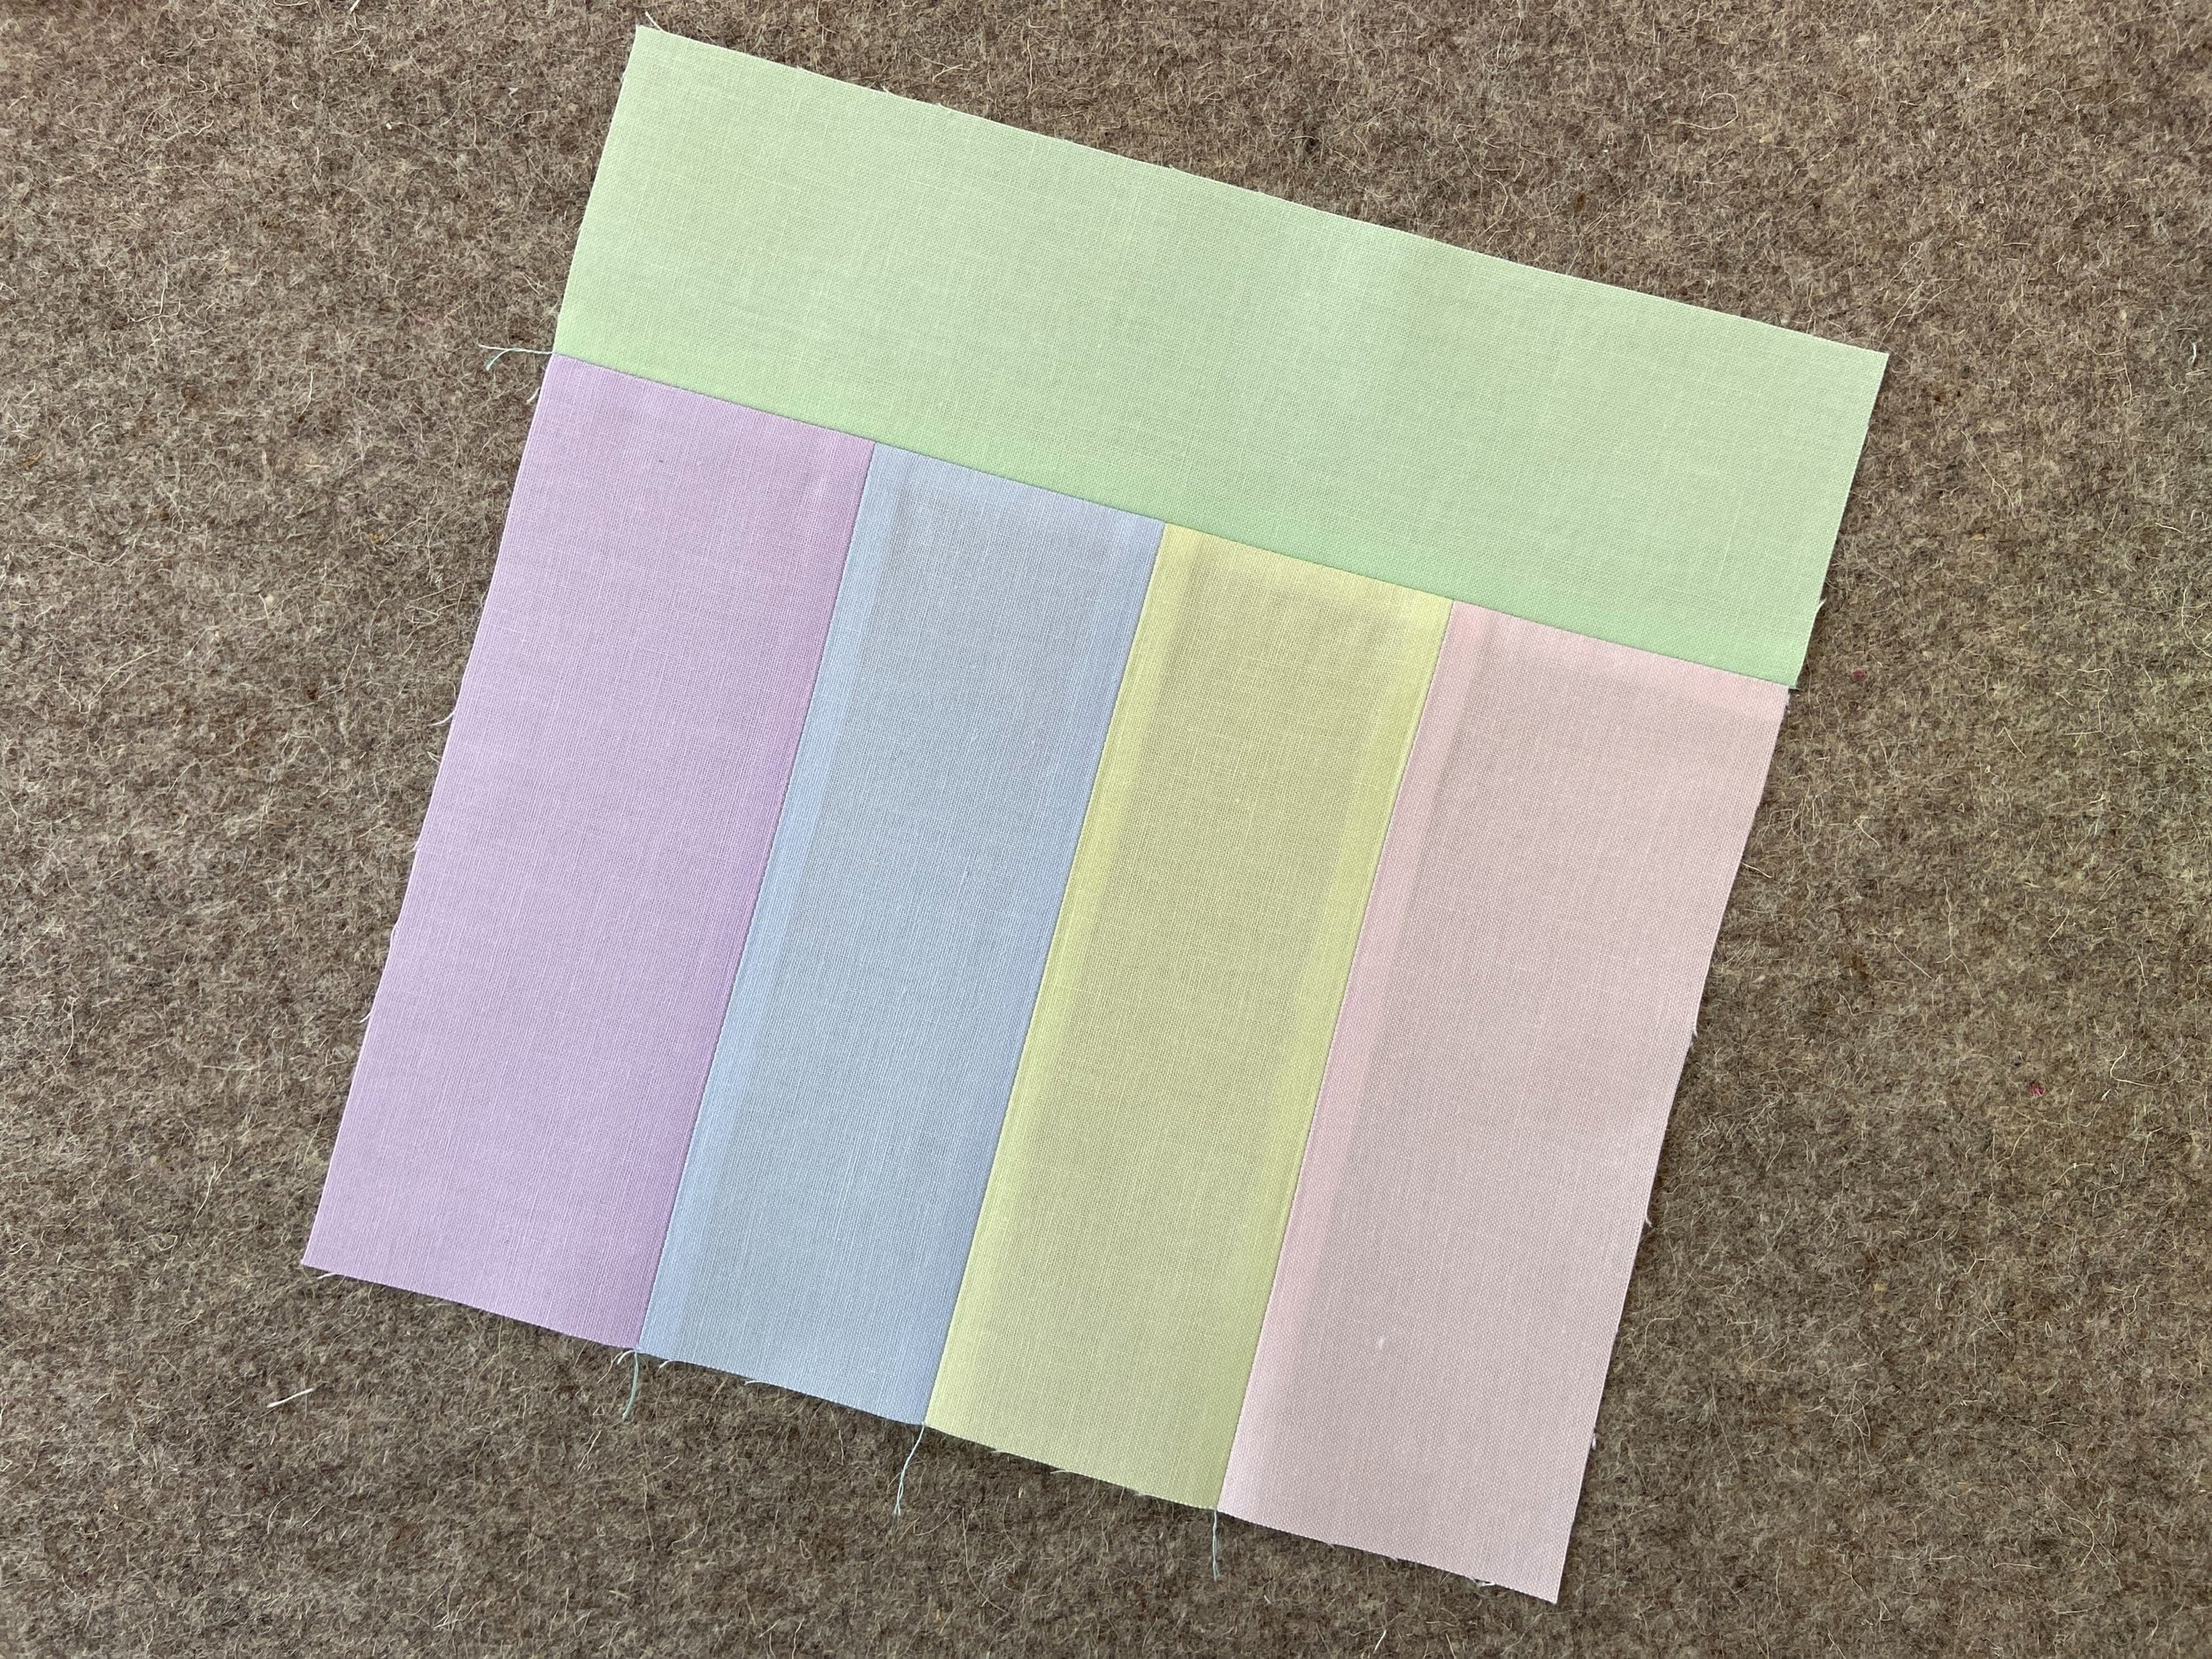
Step 2: After pressing the seams open, sew the two sets together. Make sure your fabrics are right sides together, so all the seams are on the same side. Press that third seam open. When this section of the block is complete it will look like the image below on the back.
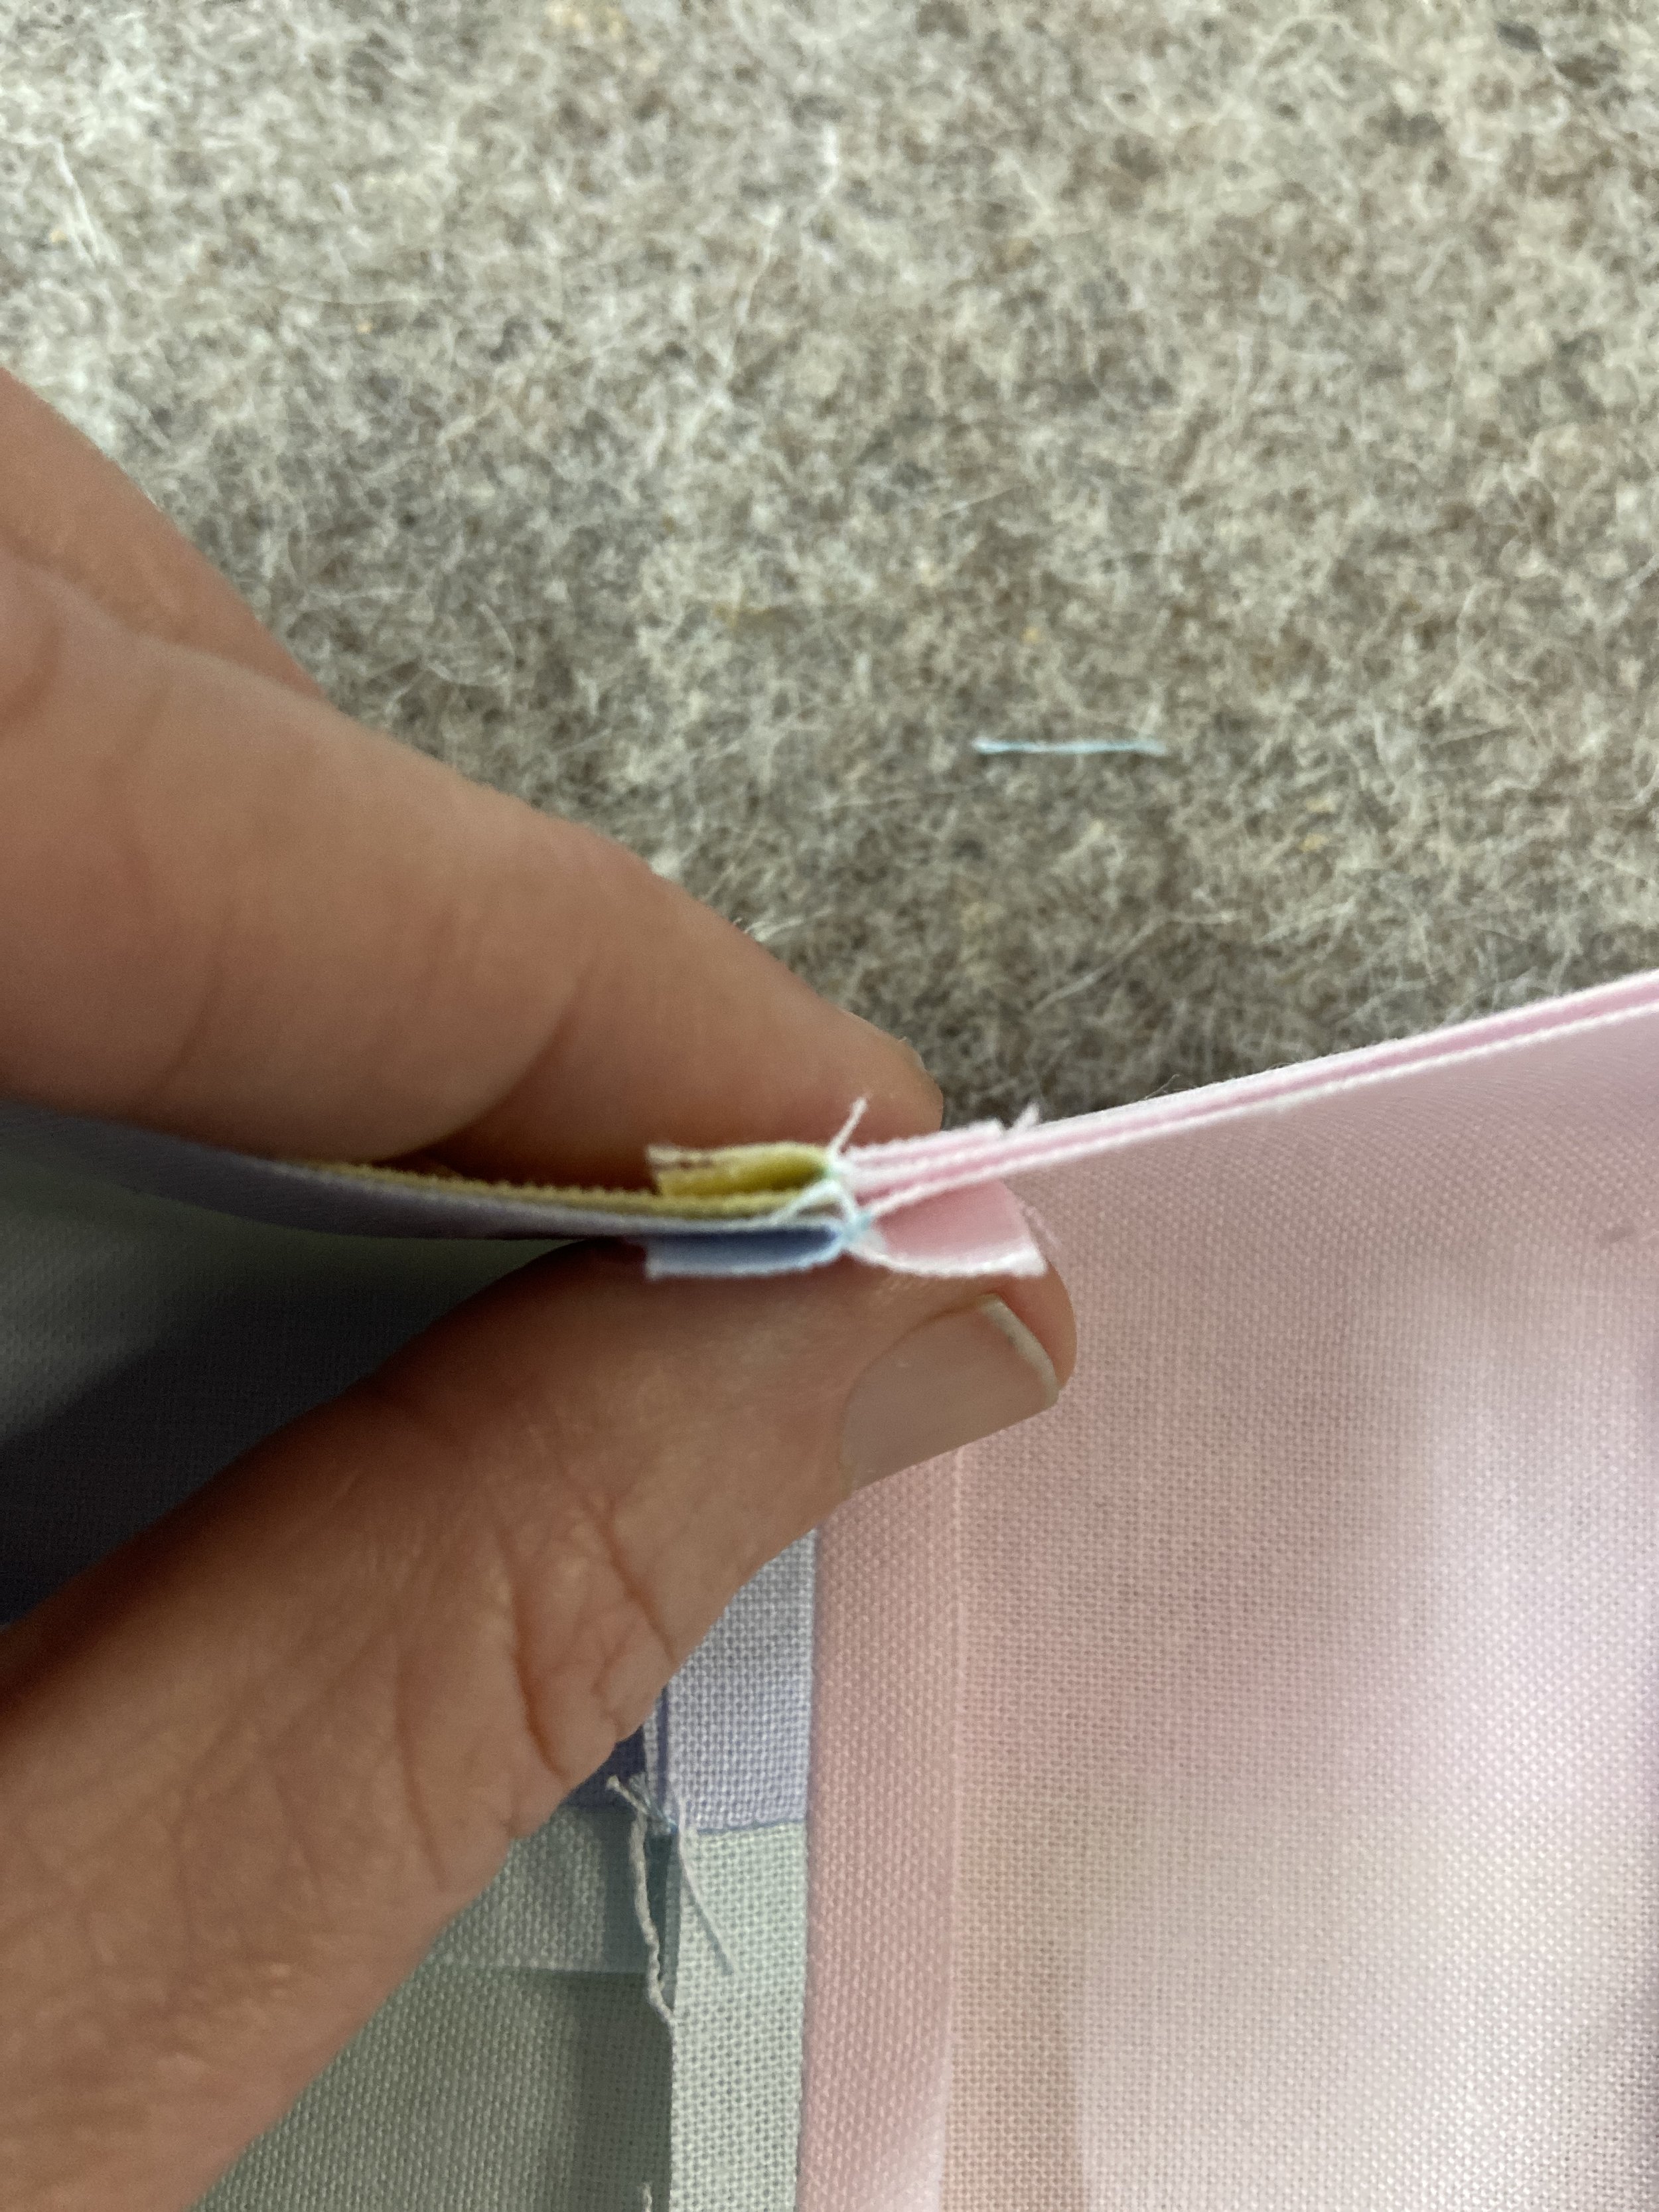
Step 3: Line up the 2.5” x 8.5” strip on one side of the piece you just completed in Step 2. Fabrics should be right sides together (RST). Be sure to line up the ends and one long side of the strip so that it isn’t hanging out farther than the pieced section of the block. Place a clip on each of the seams to hold it in place. I also like to place a clip at the end of the block so that when it is going through my machine it doesn’t slide apart.
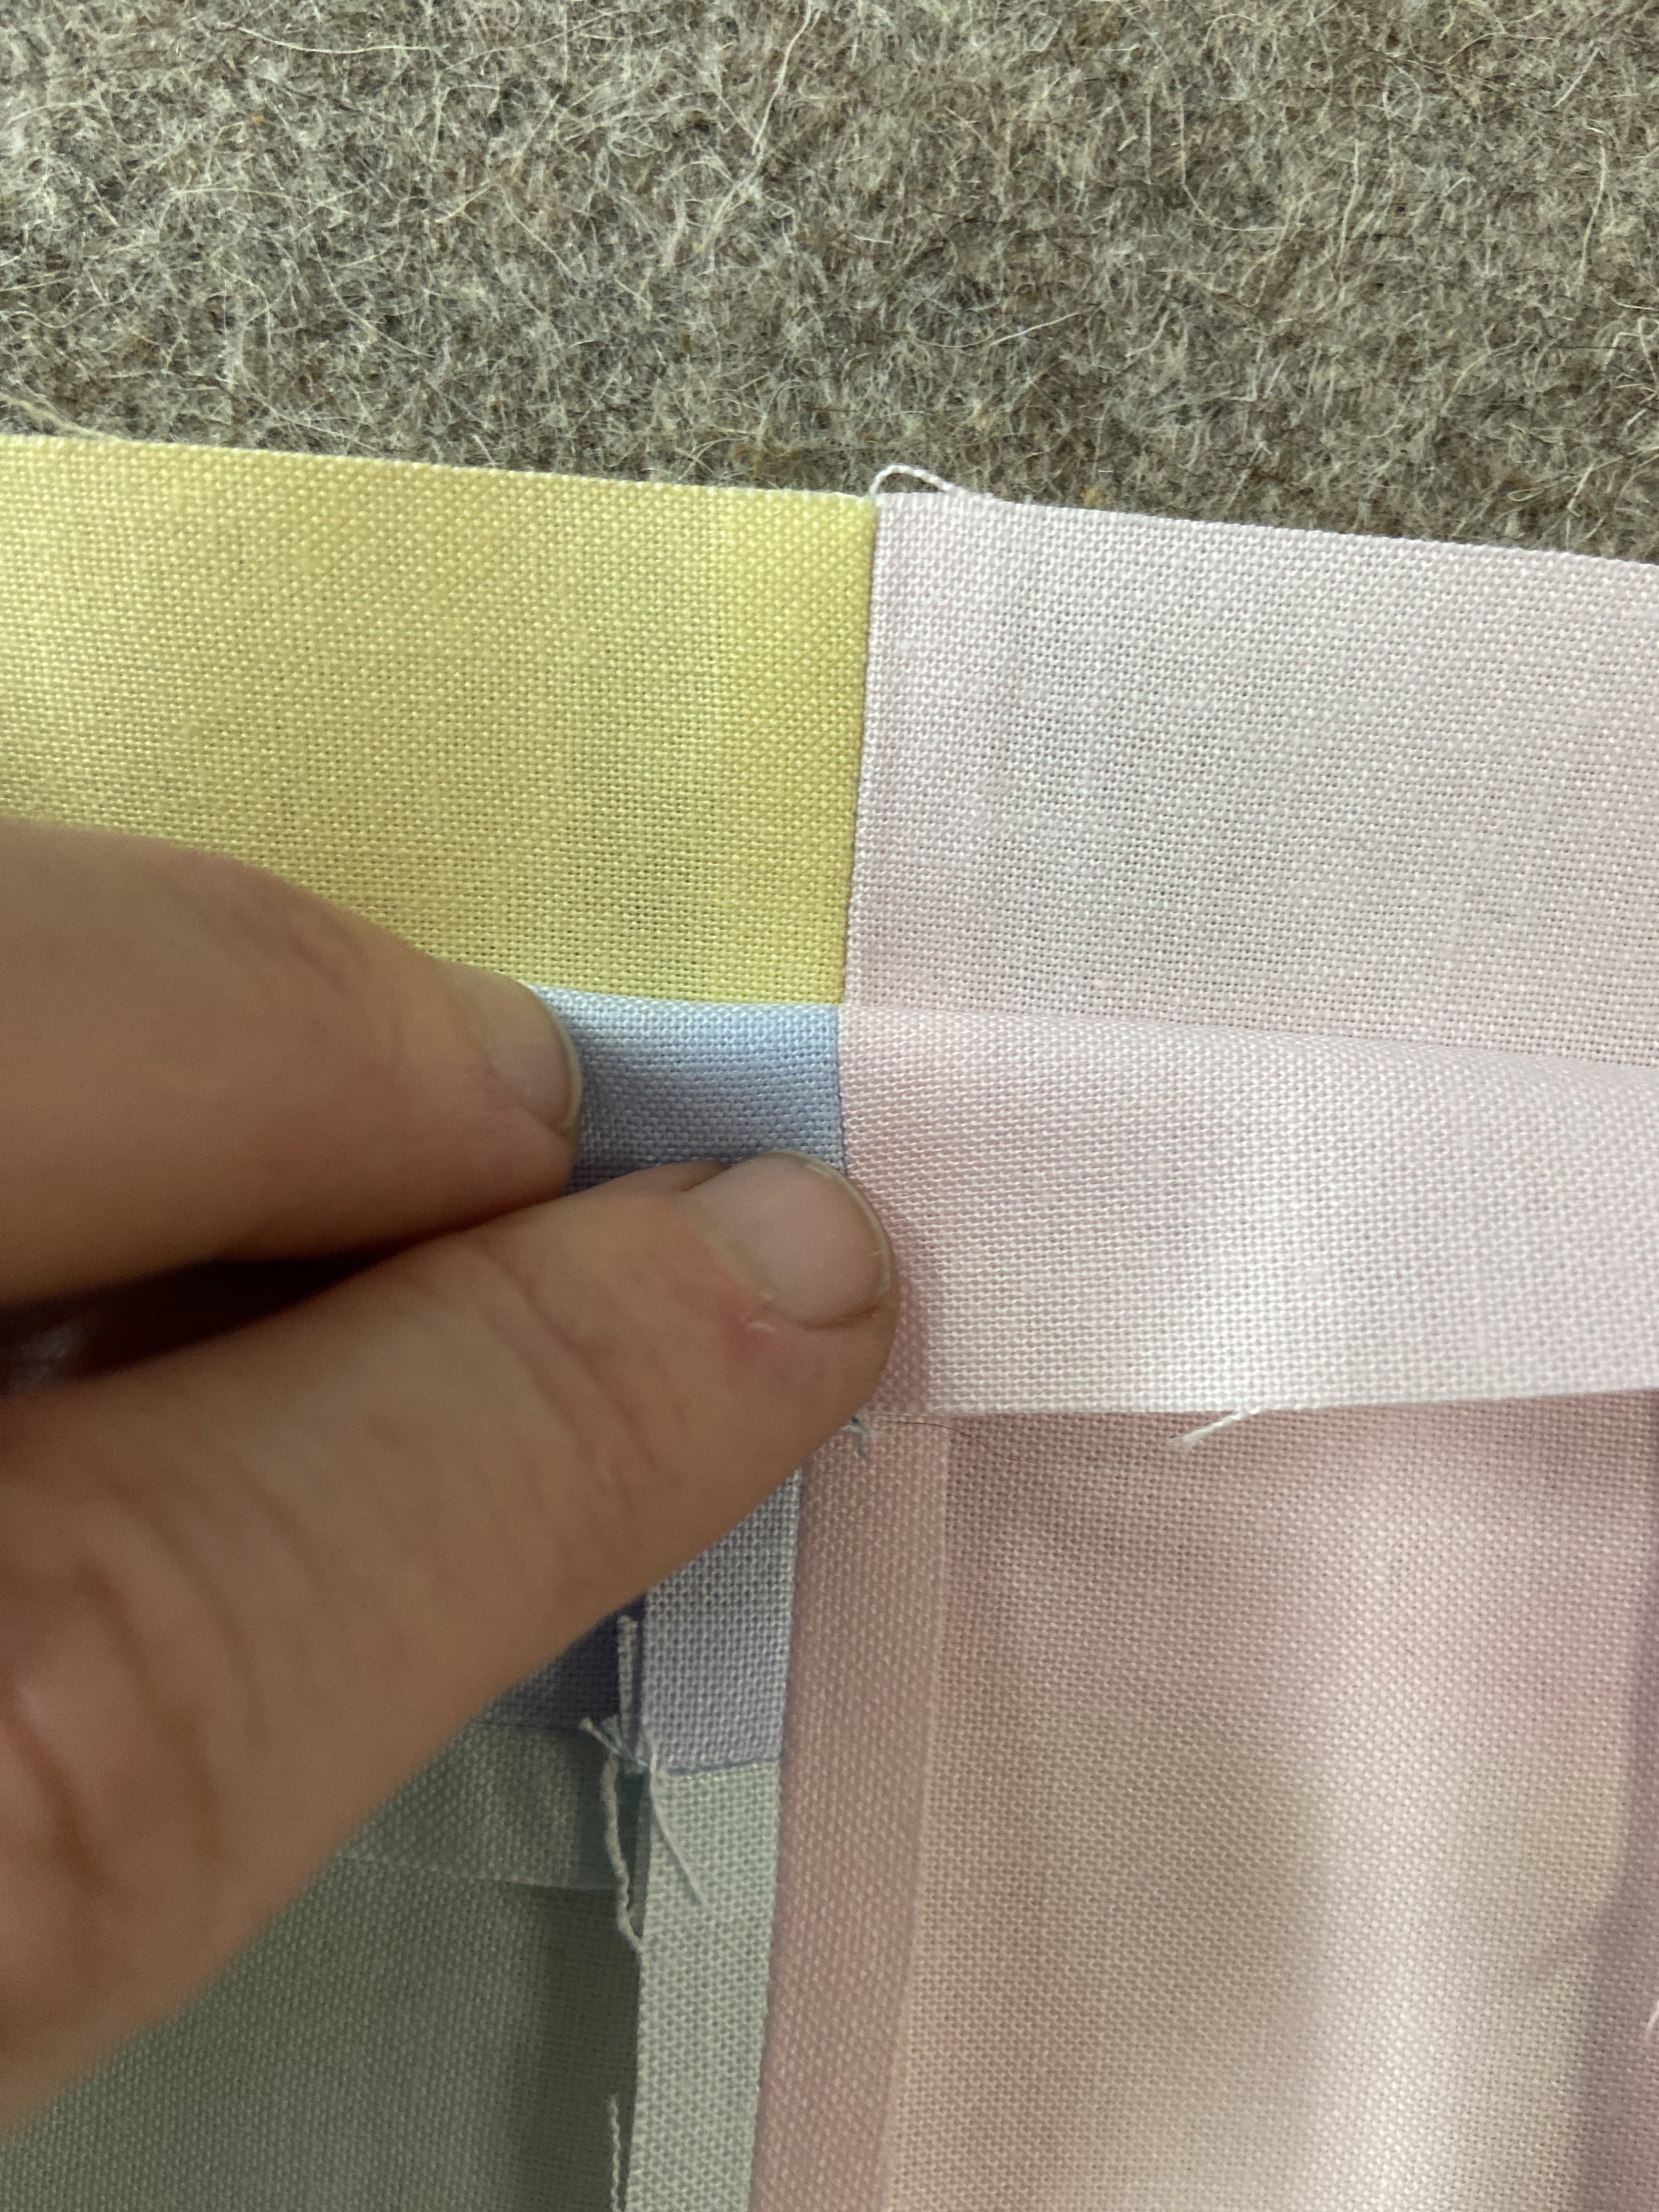
Step 4: Sew a ¼” seam down this edge removing the clips as you get closer to them. Don’t sew over your clips. If you decide to use pins, also don’t sew over those. Place the 2.5” x 6.5” pieces on top so you can see the seams as shown here.
Be sure to check both sides of the seam flaps that they are down as they go through the sewing machine.
Step 5: Press this seam open like you did the others, making sure not to press the earlier seams the wrong way as you move your iron down the seam. It happens.
Step 6: Repeat to make all 35 blocks.


How to Assemble Your First Quilt Top in Rows

Now that all the blocks are sewn together, it is time to lay the quilt top out and begin sewing the rows together. Here is a picture of my top up on the design wall so you can see what it looks like to lay the quilt top out. This is an opportunity to move things around until you like them.
Step 1: The 2.5” x 8.5” strip alternates on the top and bottom of the block as you go. Per the About this Quilt section above, you need 5 blocks across on the quilt and 7 rows down. This will use all 35 blocks.
Step 2: After all the blocks are laid out, place a pin in the left most block of each row. This will help you remember which direction the row is turned as you move them from the design area to the sewing machine.
Step 3: Starting at one end of the first row, flip the end most block, right sides together over the other to line up which seam should be sewn together and place a clip on those edges to bind them together. You can either go straight to the machine and sew that seam now, or you can continue folding over and clipping each seam together so you can sew them all at the machine in one trip. Be sure to clip the flaps of the previous seams down so they don’t fold over as you are sewing.
I like to sew all of a row together at the same time. It looks like this on my sewing machine.
Step 4: Press all your seams open like before and then return the row to the design area to keep it in order. Check your pin to make sure the row is turned the correct direction.
Step 5: Sew all 7 rows together in this manner.
Step 6: Sew the first two rows together by folding the top row down over the second and matching up the seams and clipping them. Matching up seams is important. You want to clip each seam down the rows before beginning to sew the seam.
Check under as you go to make sure that your seam flaps are flat and open. Don’t exaggerate your fabric this much. I only did this to show you in the image.
Step 7: Press the seams as you did above down the entire row.
Step 8: Sew the top 3 rows together. Sew the bottom 4 rows together. Then sew the top of the quilt to the bottom of the quilt. Press seams open as you go.


How to Baste & Quilt Your First Quilt
Step 1: Prepare backing by pressing it well. Lay it right side down, on a large flat surface (such as a table or floor), and secure it around all edges with masking tape, stretching it tight and flat.
Step 2: Spray the backing with Fabric Adhesive Spray following the directions on the can. Center the batting on top, ensuring it is flat.
Step 3: Spray the top of the batting with adhesive. Complete your quilt sandwich by centering the quilt top over the batting with the right side up.
Step 4: Make sure batting and backing are showing around all sides of the quilt top. If you decided to use pins instead of spray, now is the time to add them through all three layers 4” apart all over the quilt sandwich.
Step 5: Mark off lines on your quilt where you want to quilt it. They can be ¼”, ½”, or even 1” apart. I like to start with them wider. I can always go back and add more stitches in between. You can use painters’ tape to tape off your lines so you can follow the tap as you quilt. You can also use a chalk marker and your ruler to mark off the lines.
Step 6: For your first quilt, I recommended adding your walking foot to your machine. This walking foot will help pull the bottom of the sandwich in line with the top of the sandwich.
If you don’t have a walking foot.
If you don’t have a walking foot, then you will walk to check your manual and set your machine, so the feed dogs are locked in the down position. Then, check the other feet that came with your machine. You will want the quilting or “darning” foot. There should be a picture in your manual. Using this foot and the feed dogs in the down position, set your foot at a steady pace (slow your machine down if you can) and begin stitching straight or just slightly wavy lines down the center of the quilt.
Step 7: Begin stitching down the center of the quilt following the tape or chalk to help you keep your stitches straight. When you get to the end, lock your stitches by taking 2 stitches backward. Then, remove the quilt and reset it at the top on your next marked offline. Follow to the end of the quilt again. Continue to repeat this process slowly moving from the center to the right side. After you finish one side, turn the quilt around and move from the “new top” to the right edge. This will help keep the bulk of the quilt to the outside of the machine.
TIP: Having enough table space for you to lay your quilt on will help tremendously as you try to manage a heavy quilt.
Binding Tutorial Coming Soon.
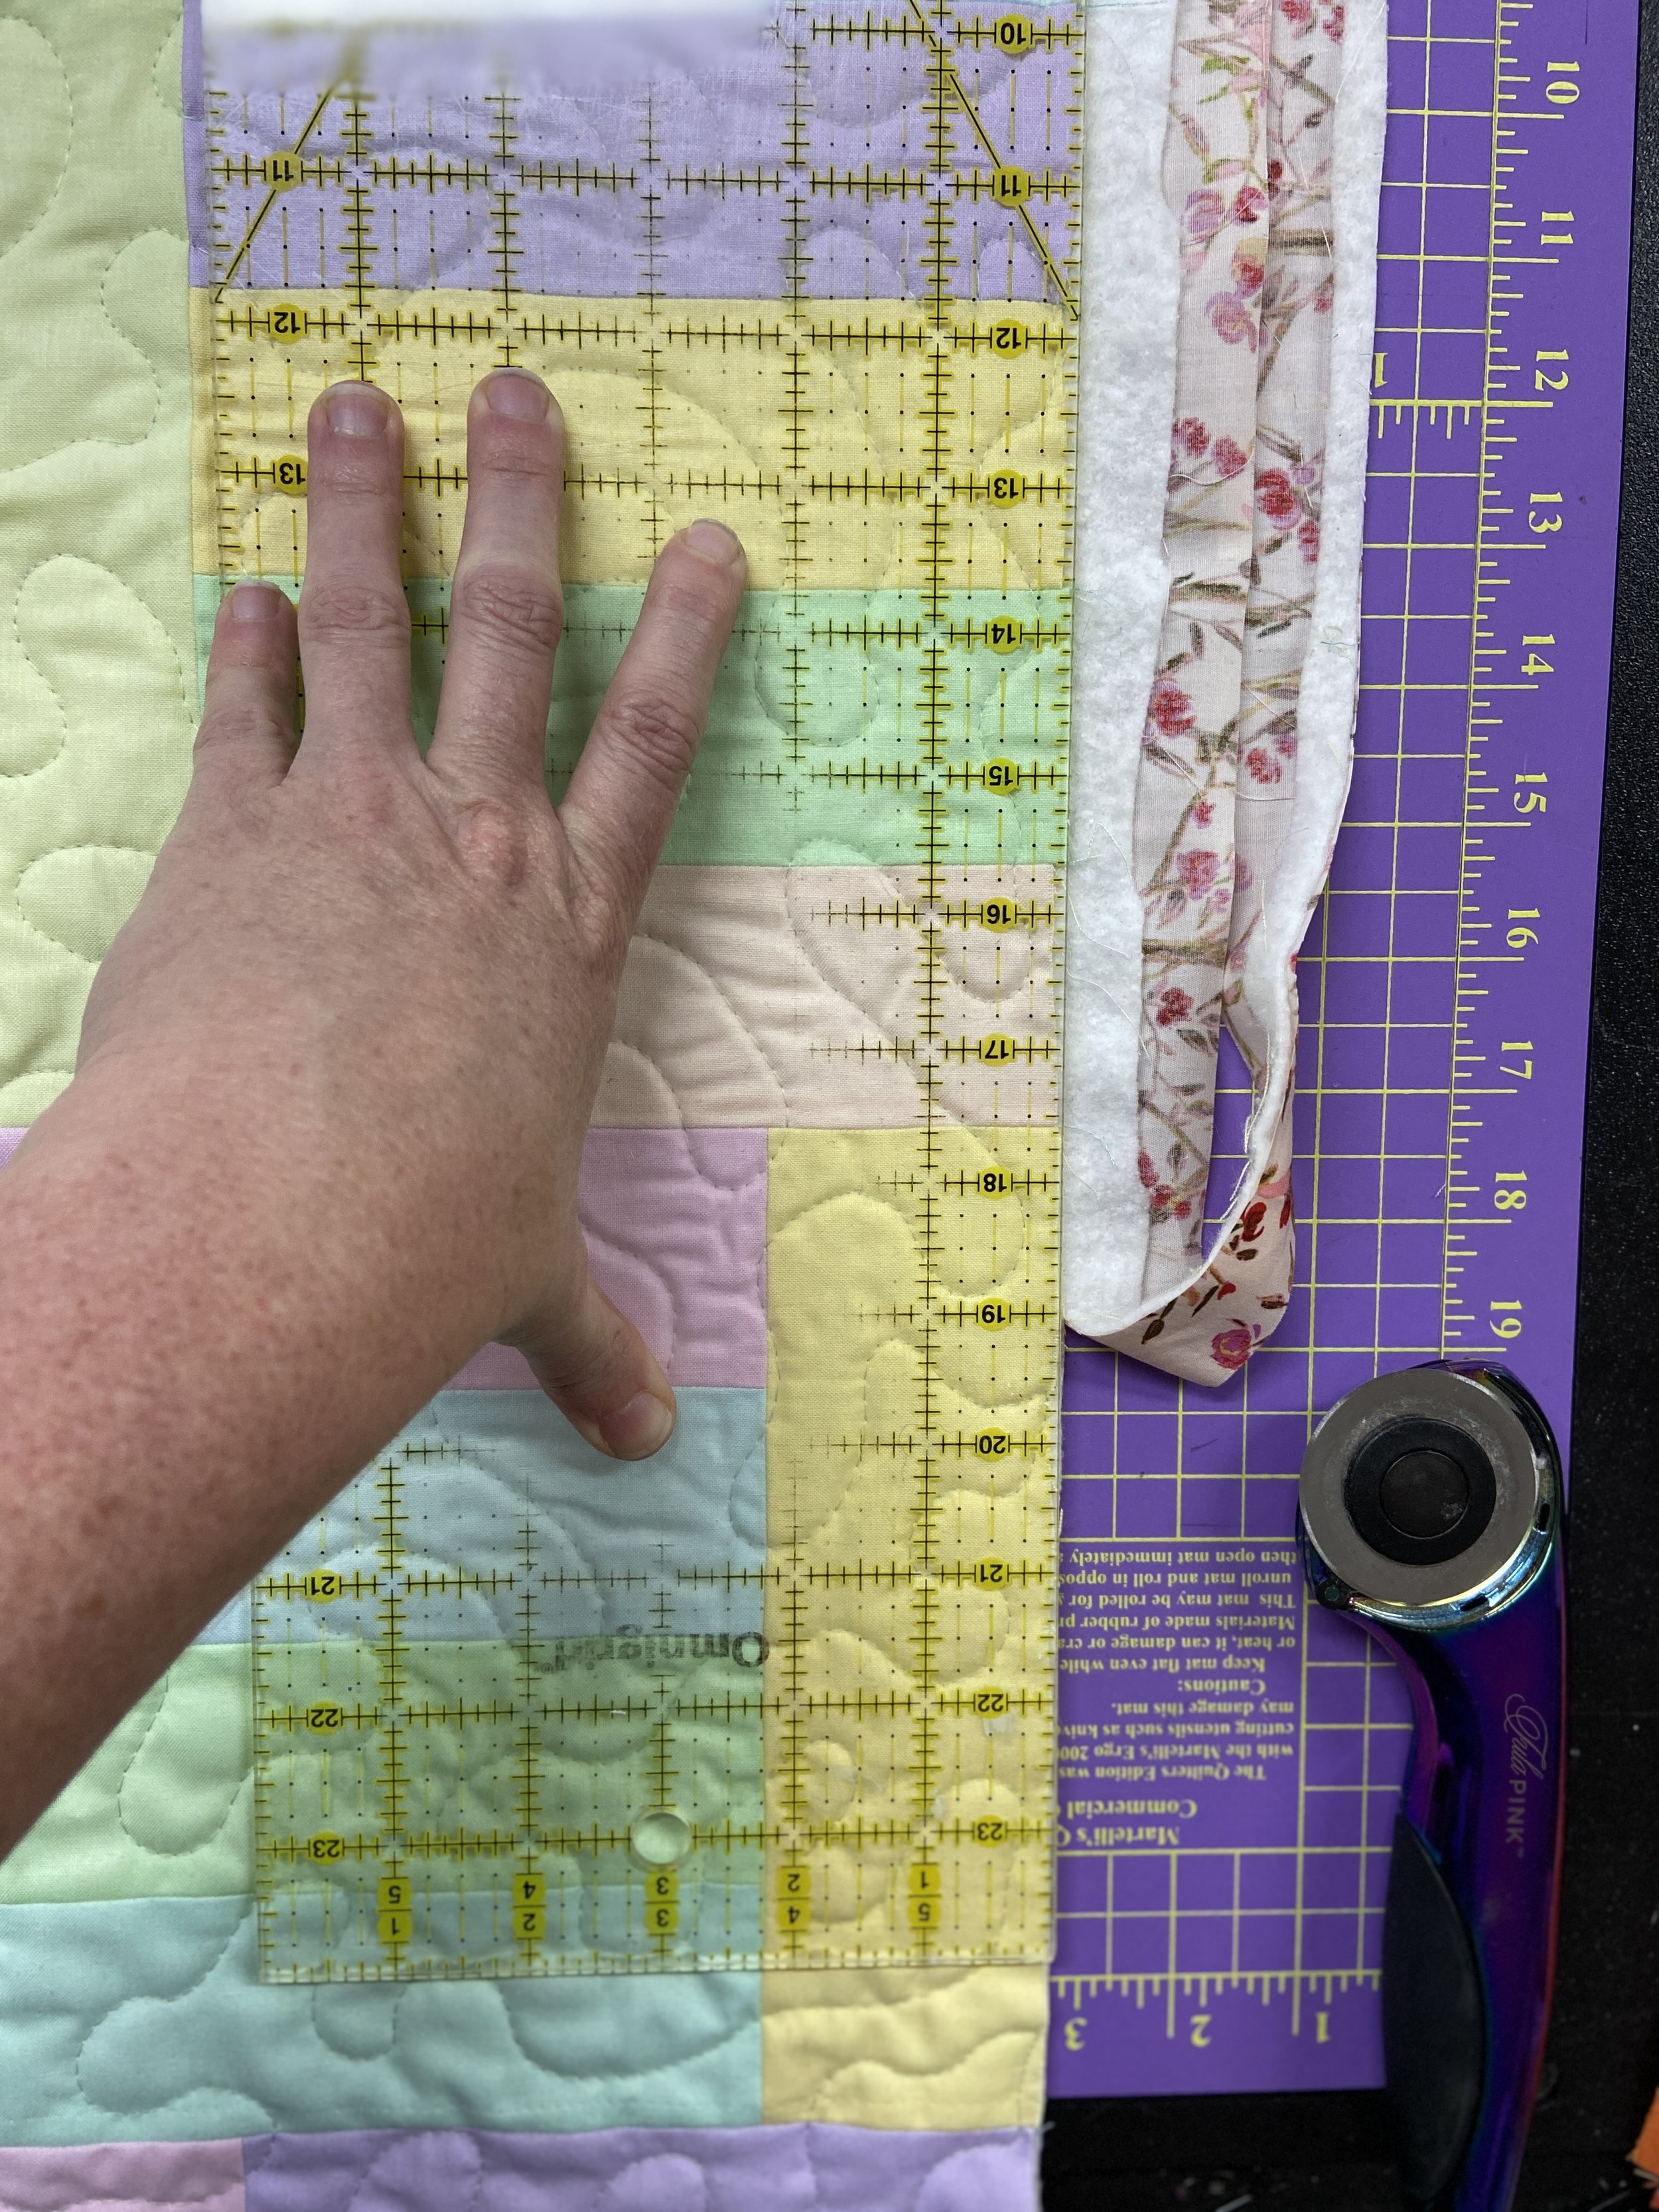
How to Square Up Your Quilt
Step 1: Lay your quilt out on the largest cutting mat that you have. Grab your longest ruler. Think about the width of your blocks. For example, some blocks have smaller blocks inside them that finish at 4” square. Which means, that on the corner of the quilt, two of the four sides of the 4” piece are sewn into the quilt leaving 4.25” of the quilt left. The extra .25” would have been sewn into another block had their been one, but now it is there to support the binding. This is really important to consider as you work your way around the quilt to square it up. (For the Daydreamer quilt, some of the blocks on the edges are 2.25”.)
Step 2: The rest of this tutorial is written with the Daydreamer quilt in mind - which means I need to think in terms of 2.25” around the edge as my guide. Line the edge of your ruler up as long as it will reach so that one seam on the quilt is at the 2.25” mark and the edge of the ruler is on the edge of the quilt. If find that at times, the quilt “bunches” up a smidge under the ruler. I use my fingers to lightly straighten our or pull the edge of the quilt to the edge of the ruler while also keeping the seam on the 2.25” line on the ruler.


In the image above you can see how the quilt needs to be pulled to the edge of the ruler and how it lines up on the 2.25” line.
Step 3: After you make your first cut, pull the quilt down back toward the edge of the cutting mat and line up the ruler again, partly along the cut and partly along what needs to be cut next. Continue this process all the way around your quilt.
